

User Manual: Pro-3000RGB
Stand: 11/2008
Page 4 of 9
Keep surrounding dry and clean. T
his unit should be kept dry, do not use in the rain
or damp and dusty environment. Projector should be put in a water-proof housing
when operated outside.
Operating temperature is 10~35
°C
. Let laser cool off 10minutes after 2 hours of
operation, to ensure maximum lifetime for the diode.
Distance between laser aperture and projection screen should be not less than 1
meter.
Do not turn device on and immediately off again frequently.
Do not look into the laser beam directly, especially not with optical instruments.
Do not touch the device with wet hands.
When the laser diode becomes dim or broken, please contact your dealer timely.
When returning laser to dealer/manufacturer always use original packaging.
Maintenance should be performed every 15-day period. Use a sponge with alcohol,
rather than wet cloth or other chemical liquid, to clean the mirror.
Using the laser
Make sure the correct voltage is used. Connect mains. Connect an emergency switch
to the 9-pin connector on the backside (pins 1, 2). If you do not wish to connect an
emergency switch, connect the 9-pin plug. Depending on the mode selected (see
below), laser light should come out of the opening on the front panel – be careful.
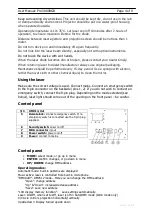
Control panel
Control panel
•
MODE:
select mode, or go up in menu
•
ENTER:
confirm changes, or go down in menu
•
UP/ DOWN:
change DMX address
Operating modes:
Automatic mode: built-in patterns are displayed
Music active: laser is controlled from built-in microphone
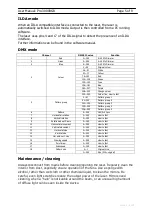
“DMXAddr“: DMX512 mode-. Here you can change the DMX address:
“Open“: change address
“Up“ & “down“: increase/decrease address
“Save“: save new address
“LCD display memory function“:
save settings automatically.
Laser: On/Off, when set to Off, laser is off in Auto/DMX mode (ILDA mode only)
X/Y-Axis: mirrors projection horizontally/vertically
Upside down: Display turned upside down
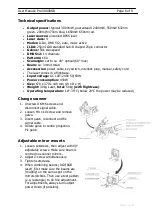
3/4
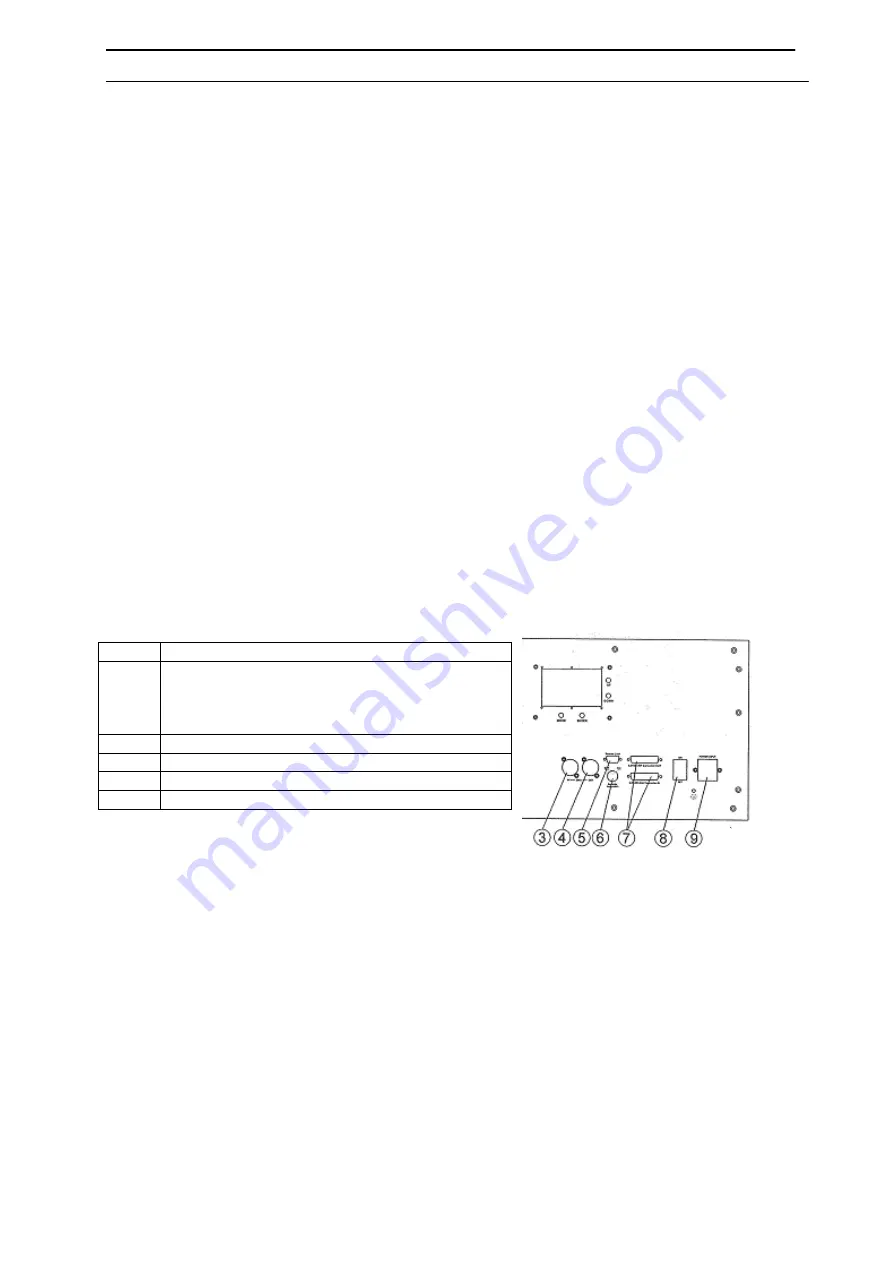
DMX In/Out
5
Remotelock:
connect emergency switch. If no
emergency switch is connected use the 9 pin plug
supplied.
6
Security switch:
Laser on/off
7
ILDA connector
in/out
8
Power switch:
power on/off
9
Power:
connect to mains.


