background image

User Manual: Pro-3000RGB 

Stand: 11/2008 

Page 6 of 9 

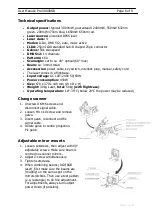
Technical specifications 


Output power:

 typical

:

 3000mW, guaranteed

:

 2400mW, 550mW 632nm 

green, 200mW 473nm blue, 1650mW 650nm red 


Lasersources:

 aircooled DPSS laser 


Laser class: 


Modes:

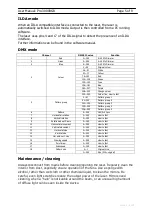
 ILDA, DMX 512, auto, music active 


ILDA:

 25pin ILDA standard Sub-D shaped 25pin connector 


Galvos:

 50k scanspeed 


DMX 512:

 14 channels 


Patterns:

 160  


Scanangle:

 set to ca. 40° optical (60° max) 


Beam:

 ca. 3mm/1mrad 


Accessories:

 power cable, key switch, interlock plug, manual, safety cord 


The laser comes in a flightcase. 


Input voltage:

 AC 100~240V 50/60Hz 


Power consumption:

 450W 


Size:

 670 x 370 x 440 mm (W x D x H) 


Weight:

 30kg Laser, 

total:

 50kg 

(with flightcase)


Operating temperature:

 10°-35°C (below 20°C the power may be reduced) 

Change scanner 

1.


Unscrew UK M6 screws and 
disconnect signal cable. 

2.


Loosen M4 x 10 screw and remove 
galvo.  

3.


Insert galvo, reconnect and fix 
signal cable. 

4.


Rotate galvo to centre projection. 
Fix galvo. 


Adjustable mirror mounts 

1.


Loosen setscrews, then adjust with X/Y 
adjustable screws. Make sure beam is 
centred on scanner mirrors. 

2.


Adjust Z-screw simultaneously. 

3.


Tighten setscrews. 

4.


When combining beams (RGY/RGB 
laser), first make sure the beams are 
(roughly) on the same spot on the 
mirrors/dichros. Then use a test pattern 
(e.g. rectangle) to do fine adjustment. 
For adjustments, always turn output 
power down (if possible). 

Summary of Contents for Pro-3000RGB

Page 1: ...Pro 3000RGB User Manual Please read this manual carefully before use...

Page 2: ...ode 5 Maintenance cleaning 5 Technical specifications 6 Change scanner 6 Adjustable mirror mounts 6 Troubleshooting 7 ILDA signal 7 Technical diagram 8 Please note 8 EU declaration of conformity 9 Che...

Page 3: ...laser series models supplied with a key switch to prevent unauthorized use warning labels and aperture labels affixed to the laser Installation safety Prior to installation and operation of the laser...

Page 4: ...ake sure the correct voltage is used Connect mains Connect an emergency switch to the 9 pin connector on the backside pins 1 2 If you do not wish to connect an emergency switch connect the 9 pin plug...

Page 5: ...tern group 5 6 Pattern 0 255 160 5 32pcs 7 Horizontal rotation 0 255 slow to fast 8 Vertical rotation 0 255 slow to fast 9 Rotation about Z axis 0 255 slow to fast 10 Horizontal movement 0 255 slow to...

Page 6: ...mption 450W Size 670 x 370 x 440 mm W x D x H Weight 30kg Laser total 50kg with flightcase Operating temperature 10 35 C below 20 C the power may be reduced Change scanner 1 Unscrew UK M6 screws and d...

Page 7: ...2A 2009LD 00 Laser dark or dim Configuration wrong mode Check configuration see paragraph control panel Configuration wrong mode Check configuration see paragraph control panel Control board defective...

Page 8: ...bsolutely perfect condition In order to maintain this condition and to ensure a safe operation it is absolutely necessary for the user to follow the safety instructions and warning notes written in th...

Page 9: ...Furthermore the device is verified in correspondence to the laser class regulations DIN EN 60825 1 if properly set up according to the upper mentioned laser safety regulation After installing the dev...

Reviews: