background image

9

 Reference

 If a door for left hand is necessary, please contact the sales representative in your area.

 A set of door & Door hinge can be purchased separately to convert between Right Hand and Left Hand side

INSTALLATION

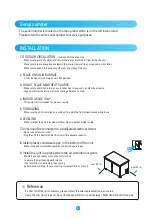
1. GOOD AIR CIRCULATION  

- Inside and Outside the Unit 

  - Make sure to avoid any object which will interrupt or block the air flow inside the unit.
  - Make sure to leave enough space toward the interior rear wall to ensure good air circulation 
  - Make sure to keep 7 inches space at the rear and sides of the unit.
 

2. PLACE ON SOLID SURFACE

  - A fully loaded unit can weigh over 1,000 pounds.

3. DO NOT PLACE NEAR HEAT SOURCE

  - Make sure to avoid hot corner or any location near stove, oven, or other heat source.
  - High ambient temperature will cause cooling efficiency to drop.

4. INDOOR USAGE ONLY

  - This equipment is intended for indoor use only.

5. STABILIZING

  - Make sure the unit is installed on a solid surface with the front wheels locked while in use.

6. LEVELING

  - Make sure that the unit is leveled well from front to back and side to side.

7. Unit should be connected to a dedicated electrical circuit.

  - Do not use extension cords.
  - Plug the unit to a dedicated electrical circuit & adequate capacity.

8. Install plastic condensate pan in the bottom of the unit.

  - Make sure pads are installed upwards and drain hose is in pan.

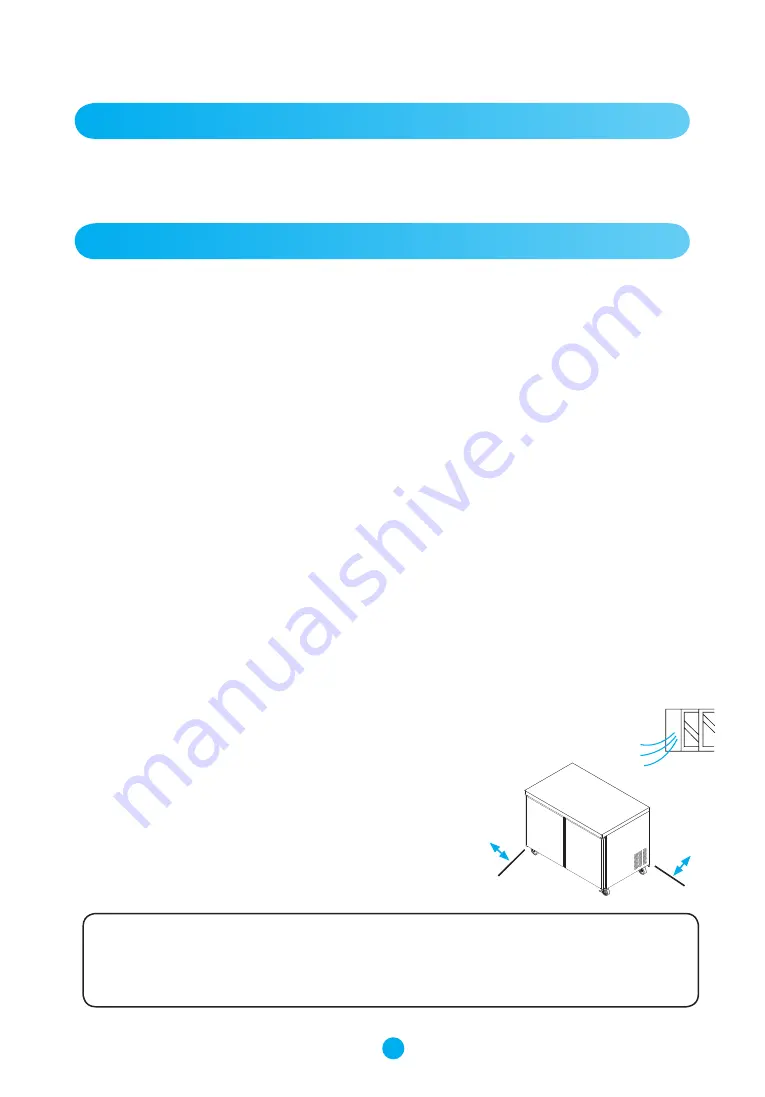
9. Install the unit in a place where the air circulation is good.

  - Maintain enough spaces around the unit since air
        to ensure the best cooling performance
  - If air circulation is obstructed, then cooling
        performance will drop, thus consuming more electricity as a result.

over 50 cm

over 50 cm

Serial number

The serial number is located on the rating label which is on the left interior wall.
Please retain the unit's serial number for service purposes.

Summary of Contents for LMT27

Page 1: ...s Installation Operation Manual Please read this manual completely before attempting to install or operate this equipment R512B 252 IMPORTANT SAFETY INSTRUCTIONS SAVE THESE INSTRUCTIONS Visit us on th...

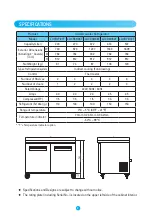
Page 2: ...rior of the package and skid or container Any damage should be noted on the delivery slip and reported to seller immediately 2 If damaged open and inspect the contents with the carrier 3 WITHIN 48 HOU...

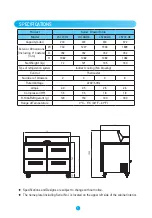
Page 3: ...sions Including 4 Casters mm W 700 923 1227 1533 1839 D 762 762 762 762 762 H 912 912 912 912 912 Net Weight kg 61 74 87 103 120 Type of refrigeration system Indirect cooling Fan blowing Control Therm...

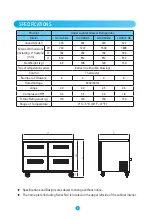
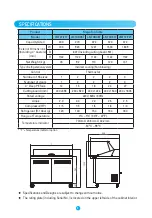
Page 4: ...LUCR60 D4 LUCR72 D6 Capacity Liter 200 372 474 572 Exterior Dimensions Including 4 Casters mm W 700 1227 1533 1839 D 762 762 762 762 H 912 912 912 912 Net Weight kg 66 108 126 150 Type of refrigeratio...

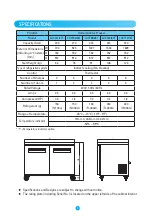
Page 5: ...uding 4 Casters mm W 700 923 1227 1533 1839 D 762 762 762 762 762 H 912 912 912 912 912 Net Weight kg 64 78 91 108 124 Type of refrigeration system Indirect cooling Fan blowing Control Thermostat Numb...

Page 6: ...62 762 762 H 1082 1082 1082 1082 1082 Net Weight kg 67 82 100 112 129 Type of refrigeration system Indirect cooling Fan blowing Control Thermostat Number of Shelves 1 2 2 2 3 Number of doors 1 2 2 2 3...

Page 7: ...72 D6 Capacity Liter 200 372 474 572 Exterior Dimensions Including 4 Casters mm W 700 1227 1533 1839 D 762 762 762 762 H 1082 1082 1082 1082 Net Weight kg 72 121 135 160 Type of refrigeration system I...

Page 8: ...ting board 901 H 1122 1122 1122 1122 1122 Net Weight kg 76 92 110 123 141 Type of refrigeration system Indirect cooling Fan blowing Control Thermostat Number of Shelves 1 2 2 2 3 Number of doors 1 2 2...

Page 9: ...OR USAGE ONLY This equipment is intended for indoor use only 5 STABILIZING Make sure the unit is installed on a solid surface with the front wheels locked while in use 6 LEVELING Make sure that the un...

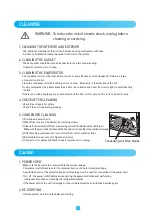
Page 10: ...ct power to unit Take off rear cover at the bottom by removing screws Clean off accumulated dirt from condensing coil and fan blades with a soft brush Make sure to brush in the direction of the fins a...

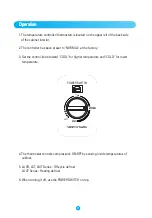
Page 11: ...preset to NORMAL at the factory 3 Set the control knob toward COOL for higher temperature and COLD for lower temperature 4 The thermostat controls compressor s ON OFF by sensing inside temperatures of...

Page 12: ...The door is opened too frequently Loading of too much warm or moist product Not enough ventilation Move the unit in a well Ventilated place with at least 7 Inches of clearance on all sides Condenser i...

Page 13: ...13 Installing Casters 1 Remove the outer packing 2 Install the castors as illustrated 3 Maker sure that the castors with brakes are installed at the front of the unit...

Page 14: ...14 MEMO...

Page 15: ...15 MEMO...

Page 16: ...Manufacturer DAEYEONG E B ANSAN SI GYEONGGI DO REPUBLIC OF KOREA TEL 82 31 491 1091 FAX 82 31 491 0325 www daeyeong co kr...

Reviews:

Related manuals for LMT27