

1.
Remove items from the box. You should have:
-
Bag containing the Light Table (flat)
-
4 x Black support rods
-
Circular acrylic sheet
-
Roll of translucent film
-
Tungsten light head
-
Mains lead for the light head
-
Reflector for the light head
-
500w bulb
-
Backlight stand and riser
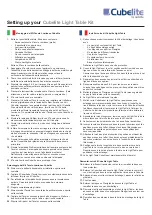
Remove the Light Table from the protective bag.
2.
Lay the Light Table on the floor and position the end of
one of the rods on the corner of the lower steel rim.
Ensure the steel rim locates into the jaws of the tip at
the end of the rod.
3.
Pull the two steel rims away from each other and locate
the jaws of the tip at the other end of the rod into the
upper rim.
4.
Repeat steps 2&3 for the remaining three corners.
When all four rods are in place, check they are all in a
vertical position.
5.
Place the circular acrylic sheet on the top of the Light
Table structure. (Take care not to drop this sheet as it
will break).
6.
The Light table is now complete.
7
. Place your Cubelite on top of the Light Table and set
up the internal silver/white reflector and the external
tungsten light (which came as part of your Cubelite kit)
as per the seperate Cubelite kit instructions. Instead of
attaching the white vinyl background that came with
the Cubelite kit, attach the translucent film that came
with the Light Table kit. This will allow the light from the
Cubelite Light Table to shine through.
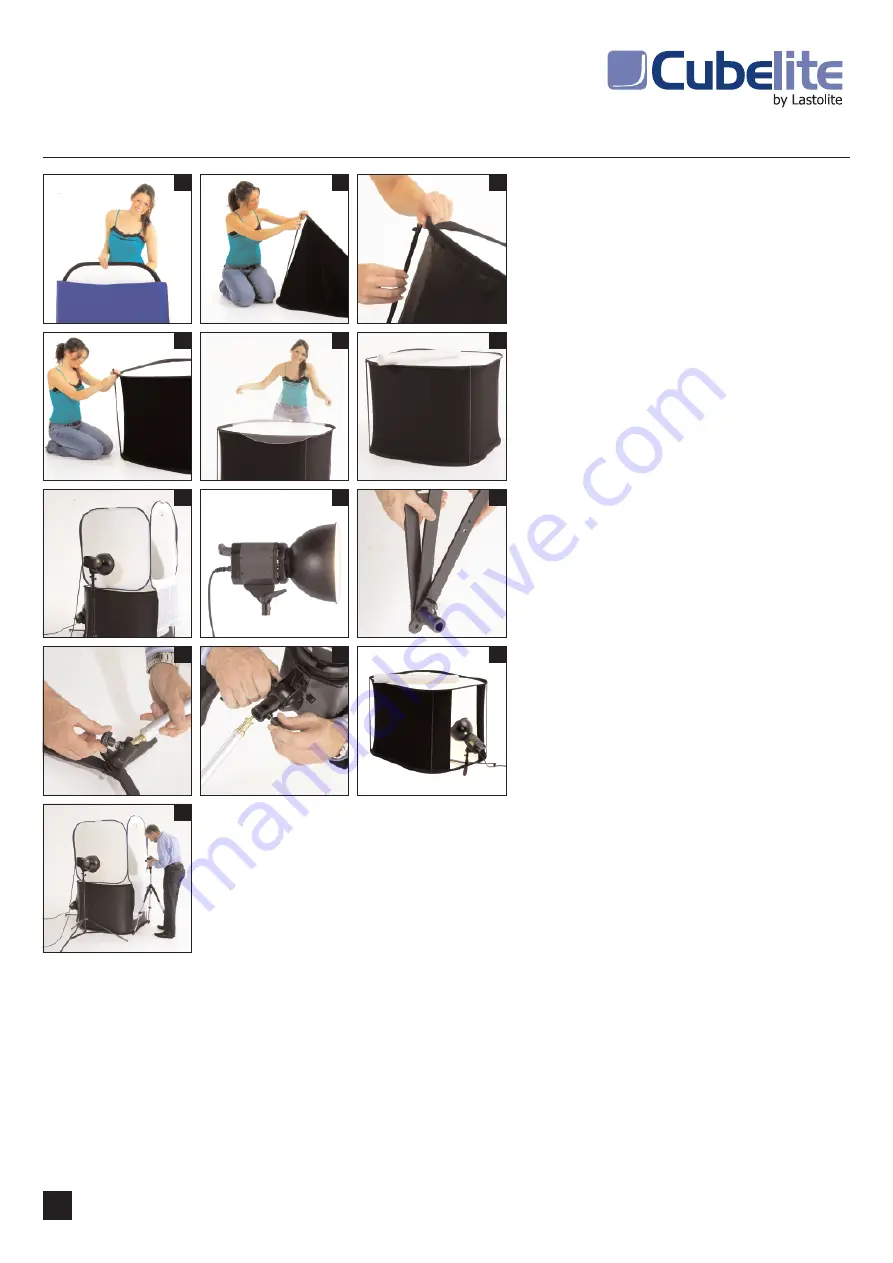
8.
Assemble the Tungsten light head, which came with
the Light Table kit in the same way as the light
head that came as part of the Cubelite kit.
9.
Rotate the three legs of the floor stand so that they
‘fan’ out to an equal distance apart.
10.
Slot the riser into the stand and tighten the thumb
screw. The riser can be extended (if required) by
releasing the thumb screw on the riser, extending the
tube, then re-tightening the thumb screw.
11.
Attach the light head to the top of the stand/riser and
secure using the thumb screw. You must remove the
plastic protector cap from the top of the riser first.
12.
Position the tungsten light head at the base of the rear
opening of the Light Table. The light can be pointed
downwards (using the riser) or upwards (without riser).
Refer to the label near the rear opening of the Light
Table for advice on how to position the light.
13.
Your Cubelite Light Table is ready to use.
Breaking Down your Cubelite Light Table kit.
14.
Remove the translucent film, roll it up and return it to
the protective tube.
15.
Remove the Cubelite from the top of the Light Table
and pack it away as per the instructions that came with
the Cubelite kit.
16.
Allow the lights to cool until it is safe to touch them.
Remove from the stands and store them as required.
17.
Close up the stands to their smallest size.
18.
Remove the circular acrylic sheet from the top of the
Light Table and return it to the protective bag.
19.
Remove the supporting rods from the Light Table and
allow the two steel rims to lie on top of each other.
Return them to the protective bag.
20.
Return all the items to the storage box.
Setting up your
Cubelite Light Table Kit
1
2
3
4
5
6
7
8
9
10
11
12
13
C
02.07


