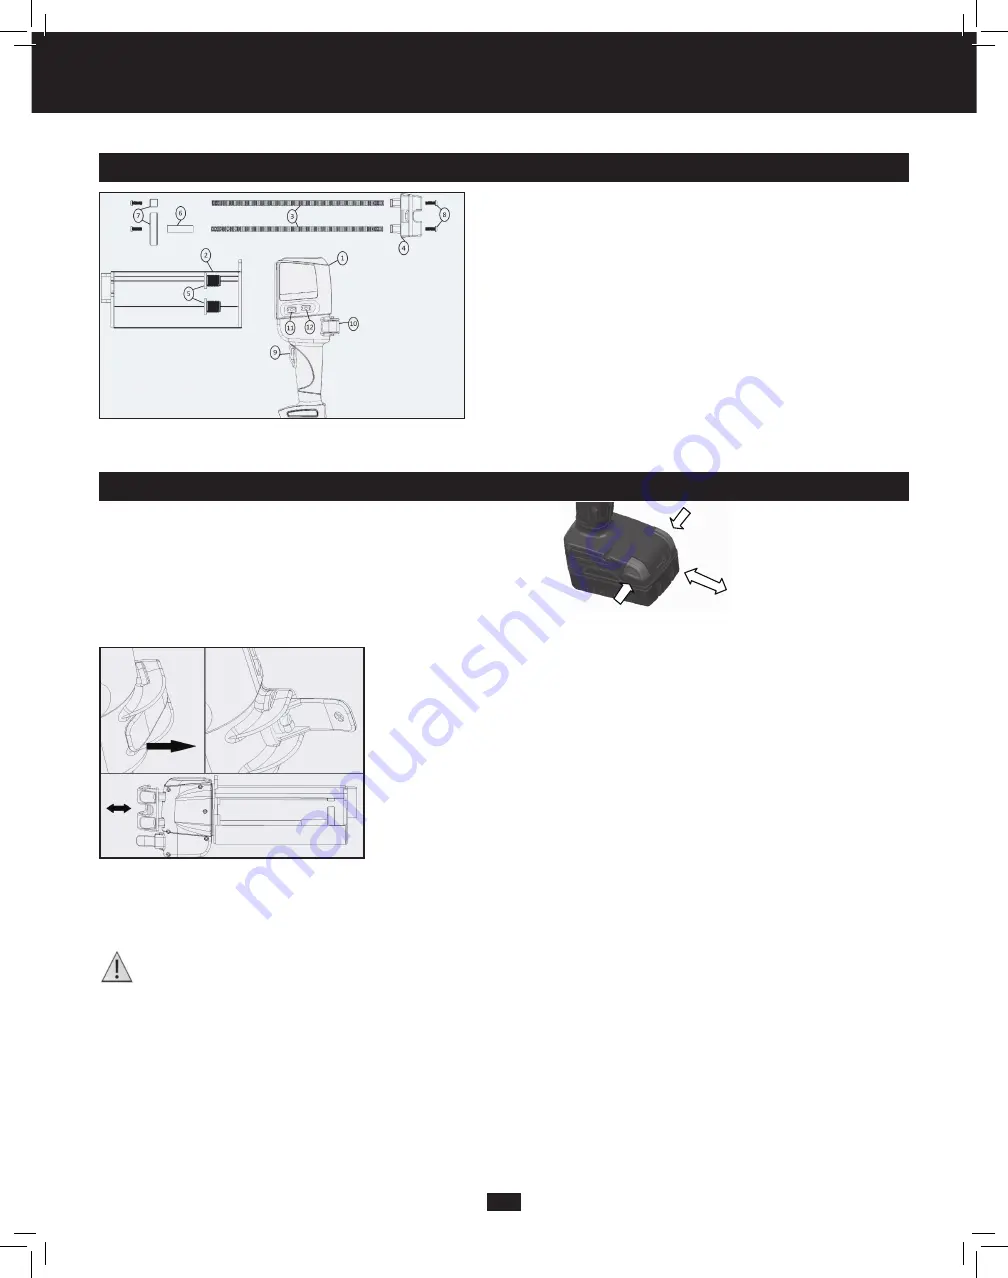
5
FUNCTIONAL DESCRIPTION
1. Power Unit
7. Piston
2. Cartridge Retainer
8. Rack Screws
3. Racks
9. Power Trigger
4. Rack Handle
10. Clutch Lever
5. Barrel Screws
11. Speed Control Knob
6. Rack Stiffener
12. Dose Control Knob
FIGURE 1
OPERATION
1. REMOVE AND INSTALL BATTERY PACK
To remove Battery, squeeze both release buttons and slide the Battery forward.
To insert Battery, slide Battery fully onto the base of the handle.
Note: This power tool is a battery-operated appliance, the battery is charged outside the appliance.
FIGURE 2
2. RACK MOVEMENT
As shown in figure 3 at left, once the clutch lever is opened
the racks are free to move and the tool will not be able to dispense.
The racks can also be manually moved forward with the clutch lever closed.
FIGURE 3
3. INSTALL CARTRIDGE
To install a cartridge, simply flip the clutch lever open and pull the racks completely back. Place cartridge in cartridge retainer. Flip clutch lever closed and firmly push rack handle forward to
until the pistons engage the cartridge. (The handle can be pushed forward with the clutch lever still open, but with it closed the racks will be held forward.)
WARNING – Keep all body parts and foreign objects outside of cartridge holder at all times. Fingers can be injured if caught between piston
and cartridge holder.
Summary of Contents for LATAPOXY 310
Page 27: ...27...


