background image

7

GETTING STARTED

INSTALLING TRANSMITTER BATTERIES

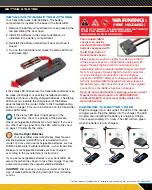
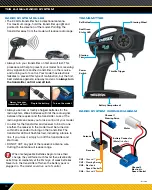
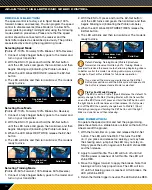
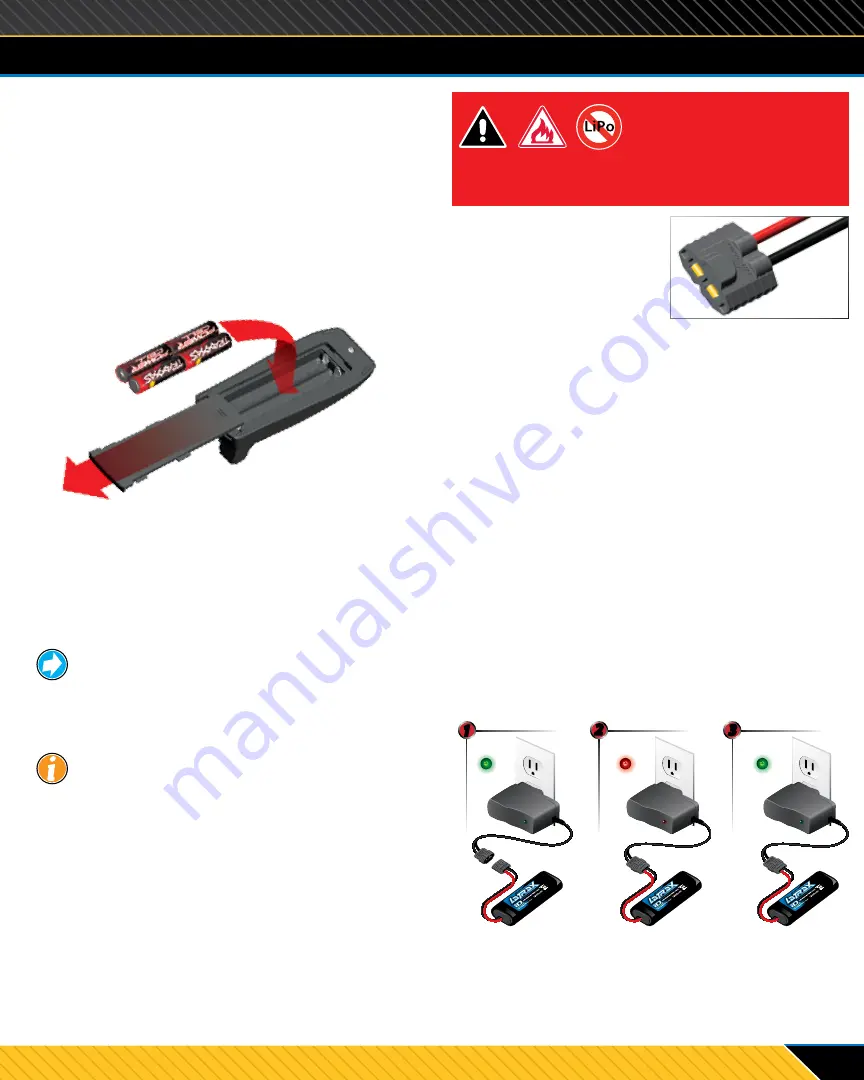
Your transmitter uses 4 AA batteries. The battery 
compartment is located in the base of the transmitter.
1. Remove the battery compartment door by pressing the 

tab and sliding the door open.

2. Install the batteries in the correct orientation, as 

indicated in the battery compartment.

3. Reinstall the battery compartment door and snap it 

closed.

4. Turn on the transmitter and check the status LED for a 

solid green light.

If the status LED flashes red, the transmitter batteries may 
be weak, discharged, or possibly installed incorrectly. 
Replace with new or freshly charged batteries. The status 
LED does not indicate the charge level of the battery 
pack installed in the model. Refer to the Troubleshooting 
section on page 13 for more information on the transmitter 
status LED codes.

If the status LED doesn’t light green on the 
transmitter, check the polarity of the batteries. 

Check rechargeable batteries for a full charge. If you see 
any other flashing signal from the LED, refer to the chart 
on page 13 to identify the code.

CHARGING THE BATTERY PACK

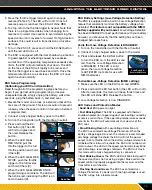
Plug the charger into a wall outlet. The LED on the charger 
will glow green. Plug the battery into the charger. The LED 
will glow red, indicating the battery is charging. Charge 
time is approximately 3 1/2 hours. The LED will turn green 
when the battery is fully charged.

Use the Right Batteries

Your transmitter uses AA batteries. New Traxxas 

alkaline batteries (part #2914) are included with your 
model. You may also use rechargeable batteries, such as 
NiMH (nickel-metal hydride) batteries, in your transmitter. 
Make sure rechargeable batteries are fully charged 
according to the manufacturer’s instructions.

If you use rechargeable batteries in your transmitter, be 
aware that when they begin to lose their charge, they lose 
power more quickly than regular alkaline batteries. 

CAUTION:


Discontinue running your model at the first 

sign of weak batteries (flashing red light) to avoid losing 
control.

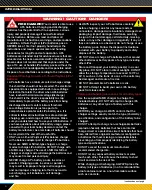
WARNING: 

FIRE HAZARD! 

DO NOT ATTEMPT TO CHARGE LIPO BATTERIES 

WITH THE TRAXXAS NiMH CHARGER  

INCLUDED IN THIS PACKAGE. 

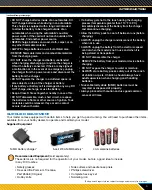
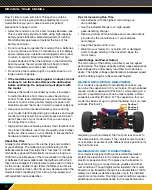
The included NiMH 
charger can only be 
used with Traxxas NiMH 
batteries equipped with 
the iD High-Current 
Connector as shown. 

Please examine your connector to make sure that it 
is the proper connector. All batteries equipped with 
legacy Traxxas High-Current Connectors are not 
compatible with the included NiMH charger.  DO NOT 
try to force legacy Traxxas High-Current Connectors, 
or  any other type of connector, into the charger 
connector. DO NOT attempt to charge any batteries 
with the included NiMH charger if you are unsure of 
the battery type, the connector type, or if the original 
connector on the battery has been changed.

If you do not understand this warning, please contact 
Traxxas Customer Support at 1-888-TRAXXAS  
(1-888-872-9927)* or your local hobby dealer for  
more information.

KA2555-R01

KA2555-R01

KA2555-R01

2

3

1

Disconnected

Connected

KA2555-R01

KA2555-R01

KA2555-R01

KA2555-R01

KA2555-R01

KA2555-R01

*Toll-free support is available to U.S. residents only; outside the U.S., please call +1972-549-3000.

Summary of Contents for RALLY 75054-5

Page 1: ...OWNER S MANUAL MODEL 75054 5...

Page 2: ...of your purchase online at LaTrax com register BEFORE YOU PROCEED Carefully read and follow all instructions in this and any accompanying materials to prevent serious damage to your model Failure to f...

Page 3: ...ewiring fee when returned for service Insulate the Wires Always insulate exposed or damaged wiring with heat shrink tubing to prevent short circuits No Reverse Voltage The speed control is not protect...

Page 4: ...ery packs in series or parallel Charging packs in series or parallel may result in improper charger cell recognition and an improper charging rate that may lead to overcharging cell imbalance cell dam...

Page 5: ...battery connected If there are any signs of a malfunction or in the event of an emergency unplug the charger from the power source and disconnect the battery from the charger DO NOT operate the charg...

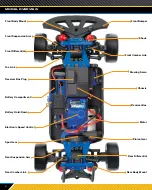
Page 6: ...l Rear Body Mount Chassis Receiver Box Shock Battery Compartment Receiver Box Plug Electronic Speed Control Pinion Gear Front Body Mount Battery Hold Down Motor Front Bumper Spur Gear Rear Suspension...

Page 7: ...14 are included with your model You may also use rechargeable batteries such as NiMH nickel metal hydride batteries in your transmitter Make sure rechargeable batteries are fully charged according to...

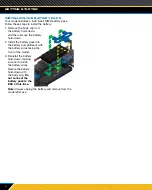
Page 8: ...e battery hold down 2 Install the battery pack into the battery compartment with the battery wires facing the front of the model 3 Reinstall the battery hold down making sure not to pinch the battery...

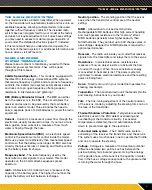
Page 9: ...o send signals to your model This model operates on the 2 4GHz direct sequence spread spectrum mAh Abbreviation for milliamp hour a measure of the capacity of the battery pack The higher the number th...

Page 10: ...ceiver to bind to one another the receiver in the model must be turned on within 20 seconds of turning on the transmitter The transmitter LED will flash fast red indicating a failure to link If you mi...

Page 11: ...g trim control on the transmitter until they are pointing straight ahead 7 Gently operate the throttle trigger to ensure that you have forward and reverse operation and that the motor stops when the t...

Page 12: ...procedure below you should first recalibrate the speed control Refer to ESC Setup Programming on page 15 1 Press and hold the SET button on the transmitter for two seconds The status LED will flash gr...

Page 13: ...receiver are no longer bound Turn the system off and then back on to resume normal operation Find source of the link failure i e out of range low batteries damaged antenna RECEIVER LED CODES LED Color...

Page 14: ...ton 4 The LED will blink and then turn solid red The model is ready to drive ESC OPERATION To operate the speed control and test the programming place the vehicle on a stable block or stand so that al...

Page 15: ...monitors the battery voltage when activated This feature is not compatible with the NiMH battery supplied with your model Low Voltage Detection has been DISABLED for best performance with your battery...

Page 16: ...of the wide variation in the types of batteries that are available and the methods with which they can be charged it s impossible to give exact run times for the model Another major factor that affec...

Page 17: ...entials etc 3 Blow off the model with compressed air optional but recommended Wear safety glasses when using compressed air 4 Remove the wheels from the model 5 Spray all the bearings bushings and fas...

Page 18: ...ding Replace components as needed Driveline Inspect the driveline for signs of wear such as worn drive yokes dirty axle driveshafts and any unusual noise or binding Remove the gear cover inspect the s...

Page 19: ...19 OWNER S MANUAL MODEL 75054 5 LaTrax 6250 Traxxas Way McKinney Texas 75070 Phone 972 549 3000 Toll free 1 888 872 9927 LaTrax com 170116 75054 5 OM N EN R00...

Reviews: