background image

Launch


X-631 Wheel Aligner Maintenance Manual


Probe Rod Calibration 

5-3 


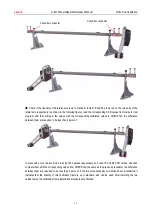
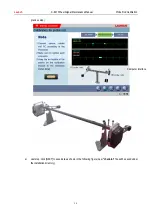
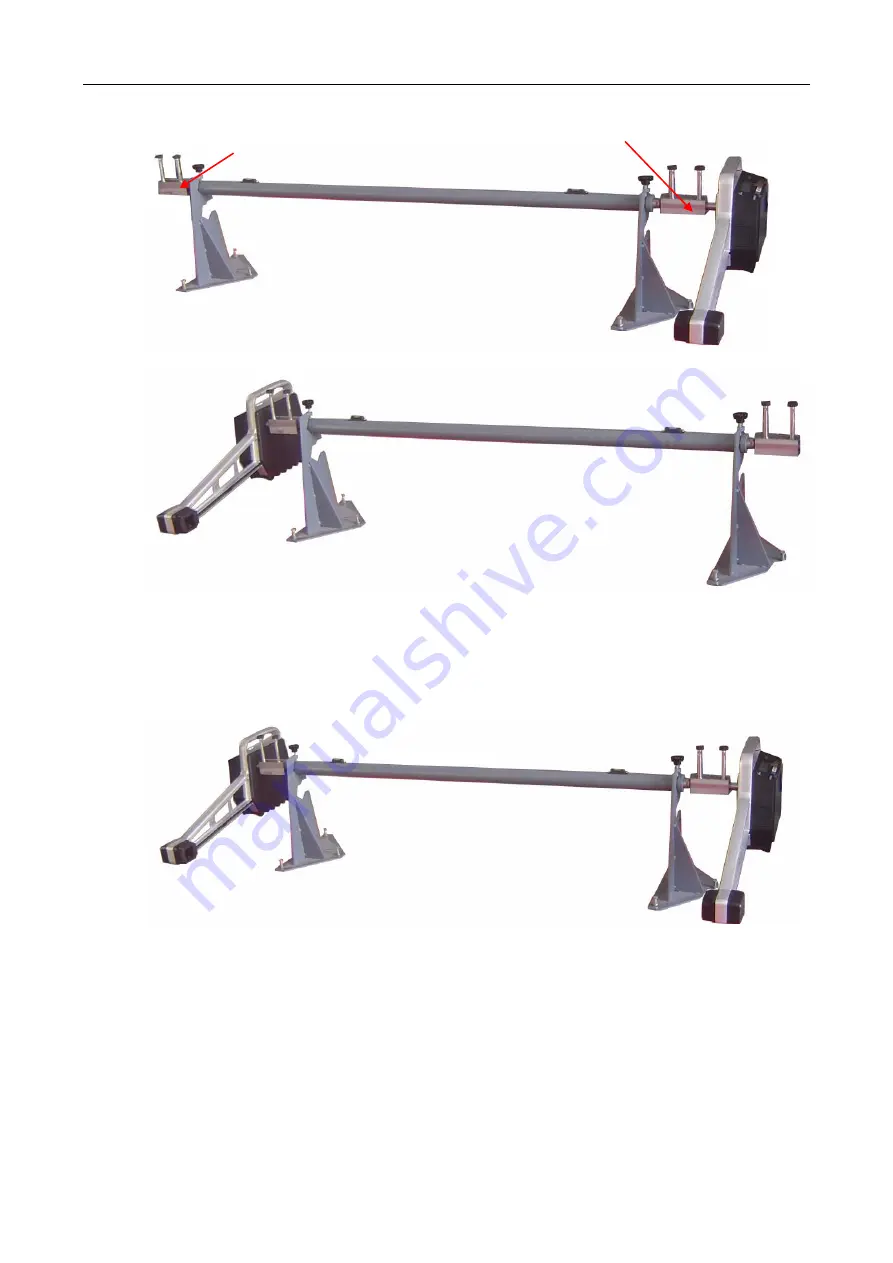
  Check if the linearity of the lateral axle is up to standard: Install 1# and 2# probe rod on the two ends of the 

lateral axle respectively (as shown in the following figure), read the corresponding CCD values from computer test 
program,  and  then  compare  the  values  with  the  corresponding  calibrated  values  in  CHECK  file,  the  difference 
between them are required to be less than 2 percent;           


In succession, turn the two probe rods by 180 degrees respectively, and read 1# and 2# CCD values, and then 
compare them with the corresponding values from CHECK file (the same as the previous procedure), the difference 
between them are required to be less than 2 percent. If the two procedures above-mentioned are all satisfied, it 
indicates  that  the  linearity  of  this  calibration  frame  is  up  to  standard,  and  can  be  used.  After  installing  the  two 
vertical axles, the calibration frame installation procedures are finished. 


Converter connector 


Converter connector 

Summary of Contents for X-631

Page 1: ...Launch X 631 Wheel Aligner Maintenance Manual Table of Content X 631 Wheel Aligner Maintenance Manual...

Page 2: ...Computer System Inspection and Disk Maintenance 2 9 Item11 RF Emitter Receiver Box Inspection 2 10 Item12 Antenna and RF Cable Inspection 2 11 Item13 Printer Inspection 2 11 Maintenance and Testing fo...

Page 3: ...cal support to them The main content of this manual is to introduce the wheel aligner of model X 631 In this manual author describes the wheel aligner by using a lot of practical pictures and explicat...

Page 4: ...leaning 10 Computer system inspection and disk maintenance 11 RF emitter receiver box inspection 12 Antenna and RF cable inspection 13 Printer inspection Maintenance and testing for measurement probe...

Page 5: ...al Inspection for Cabinet Check cabinet portiere and door for damage and well movement and check its surface for serious scratch etc Cabinet door inspection Check the cabinet door for distortion and f...

Page 6: ...nce Manual Testing for Cabinet Assembly 2 2 Item2 Cabinet Wiring Inspection Check if the wiring inside the cabinet is abnormal Check if it is removed by others Check if the connection screw is loose C...

Page 7: ...Power Supply Switch Inspection Front side Connection on back side Note 1 Check if ship shape switch switches flexibly and the power supply indicator is lit 2 Check if the connection on the back side i...

Page 8: ...ssembly 2 4 Item5 Charging Socket Inspection Front side Check if 6pin flange plug plugs and pulls flexibly Back side Check if the cable is broken Charging socket connection picture 6pin flange socket...

Page 9: ...ction Note 1 Check if the power supply switch is loose 2 Test with multi meter if the output voltage of the switch power supply is 9 3 0 1V If the deviation of output voltage is too large please adjus...

Page 10: ...enance Manual Testing for Cabinet Assembly 2 6 Item7 Power Strip Inspection Note 1 Check if the power strip is loose and each switch switches well 2 Test with multi meter if the output voltage of the...

Page 11: ...g for Cabinet Assembly 2 7 Item8 Computer Inspection and Cleaning Note 1 Open the chassis clear away the dust inside the switch power supply and on the main board with wind gun 2 Check if each connect...

Page 12: ...t 5 USB Socket 11 NIC Socket 6 Monitor data socket Note 1 Pull each connector check carefully if the pins are in good condition 2 Clear away the dust inside the sockets and plugs Item9 Mouse and Keybo...

Page 13: ...Inspection and Disk Maintenance Check if the hardware configuration is normal if it is not normal the yellow exclamatory mark will be displayed Check if the files in hard disk are normal Hard disk ma...

Page 14: ...and connecting cable for damage 2 Open the cover and then check the antenna base and connection base for oxidation and rust 3 After plugging the USB plug the power supply indicator is lit 4 Receiver i...

Page 15: ...astened firmly Item13 Printer Inspection 1 Check and clear away the oil dirt and dust inside the printer 2 Check if the nozzle is blocked by self testing of the printer 1 Check if power cable and USB...

Page 16: ...Testing for Measurement Probe Rod Item14 Visual Inspection and Cleaning for Probe Rod 1 Clear away the oil dirt on the film 2 Clear away the oil dirt on each surface and inside the gaps Check and cle...

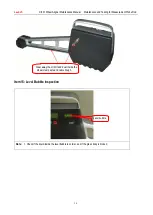
Page 17: ...and Testing for Measurement Probe Rod 3 2 Item15 Level Bubble Inspection Note 1 Check if the liquid inside the level bubble is normal and if the glass body is broken Clear away the oil dirt and dust...

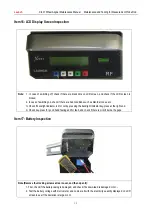
Page 18: ...Check if backlight indicator is lit or not by pressing the backlight indicator key press at the right end 4 Check key press for good hand feeling and for fault and check if there is oil dirt inside th...

Page 19: ...y to form a complete serial circuit and then plug the charging cable of the probe rod Check if the charging current is normal or not If the battery has no electricity the charging current is about 600...

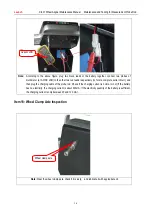
Page 20: ...nd feel 2 Check if the function of each key is normal or not Up and Down key can be tested by cooperating with computer measurement program Item20 Aluminum Frame Inspection Note 1 Check if probe rod a...

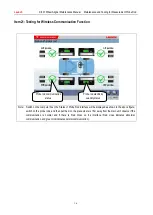
Page 21: ...robe Rod interface will be displayed as shown in the above figure switch on the probe rods and then put them on the place where is 15m away from the main unit observe if the communication is normal an...

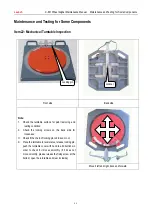
Page 22: ...rusting condition 2 Check the locking screws on the back side for looseness 3 Check if the chain of locking pin is broken or not 4 Place the turntable in level status release locking pin push the tur...

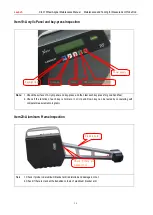
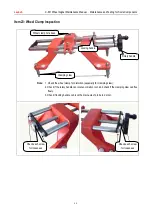
Page 23: ...lamp for distortion especially for clamping claw 2 Check if the rotary handle can rotate normally or not and check if the clamping claw can flex freely 3 Check if locking handle can lock the main axle...

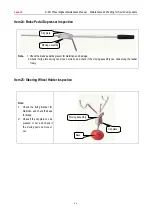
Page 24: ...d damage 2 Check if clip plate spring can move normally and check if the moving assembly can slide along the leader freely Item25 Steering Wheel Holder Inspection Note 1 Check the fixing bracket for d...

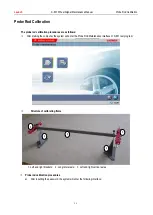
Page 25: ...lows After starting the computer the system will enter the Probe Rod Maintenance interface of X 631 test program Structure of calibrating frame 1 Left and right brackets 2 Long lateral axle 3 Left and...

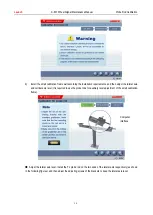
Page 26: ...ateral axle and vertical axle level It is required to use the probe rods for auxiliary level adjustment of the small calibration frame Adjust the lateral axle level Install the FL probe rod on the two...

Page 27: ...etween them are required to be less than 2 percent In succession turn the two probe rods by 180 degrees respectively and read 1 and 2 CCD values and then compare them with the corresponding values fro...

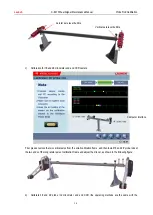
Page 28: ...l axles from the small calibration frame and then install 1 and 2 probe rods at the two ends of the long lateral axle of calibration frame and adjust them level as shown in the following figure d Cali...

Page 29: ...ligner Maintenance Manual Probe Rod Calibration 5 5 previous step e Last step click NEXT to save data as shown in the following figure new check ini file will be saved under the installation directory...

Page 30: ...Launch X 631 Wheel Aligner Maintenance Manual Probe Rod Calibration 5 6 Computer interface...

Reviews: