
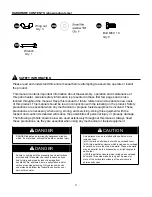

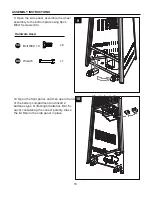


Hardware Used
2
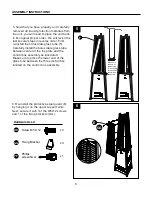
2. Use a secured step ladder or lean the
heater carefully. First, unfasten 3pcs Screw
M5X12(DD) surrounding the steel mesh from
the steel mesh base. Next, unscrew the
3pcs M8 nuts (HH) and remove the mesh
base from the three studs. Place all the parts
you removed in a secure location as you will
need to place them back in later steps
as listed below. Move to step 3.
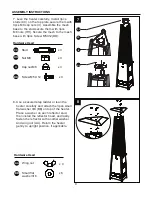
CC
II
DD
HH
CC
x 3
x 3
Nut M8
Stud
II
x 3
Cap nut M8
HH
DD
x 3
Screw M5 X 12
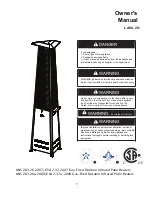
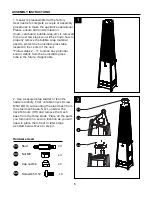
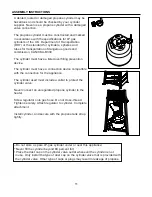
1. Heater is preassembled at the factory.
User needs to complete a couple of assembly
procedures to make the appliance operational.
Please ensure all transit protection
(foam, cardboard, bubble wrap,etc) is removed.
In the next few steps you will be shown how to
properly remove the bubble wrap material
used to protect the boroscilate glass tube
located in the center of the unit.
*Follow steps 2 - 11 to clean any potential
soot or debris from the boroscilate glass
tube in the future, if applicable.
6
ASSEMBLY INSTRUCTIONS
1
Summary of Contents for Lava 2G
Page 22: ......


