in flow may occur after shutting down the hot water
supply to the mixing valve; however, the drop should be
minimal and for a short duration.
3. Open the hot water supply to the mixing valve.
Thermometers T1 and T2 should return to their set
temperatures and T3 to the proper outlet temperature.
4. Shut off the cold water supply to the mixing valve. The
flow of water should shut down rapidly.
5. Open the cold water supply. Thermometers T1 and T2
should return to their set temperatures and T3 to the
proper outlet temperature.
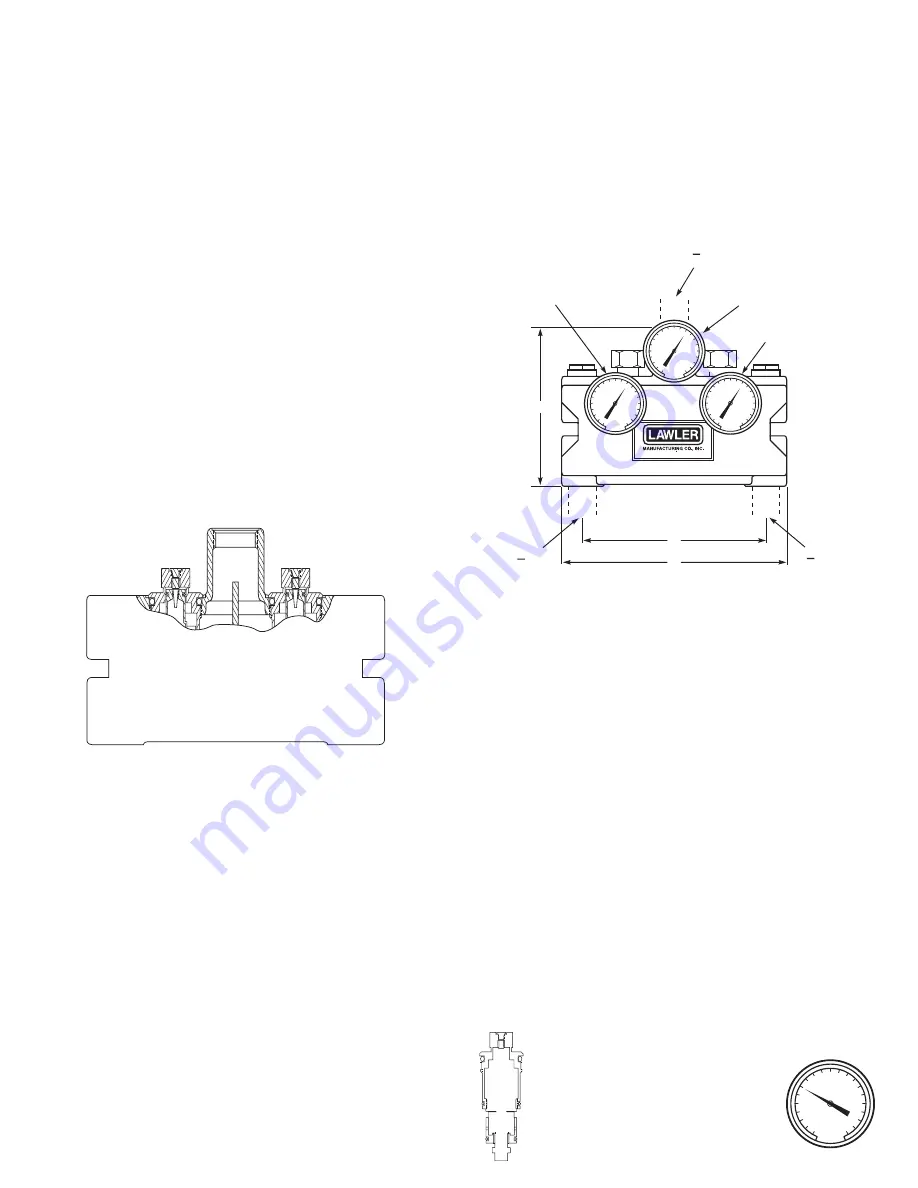
Operating Principle
The Model 911 Mixing Valve is made of two independent
thermostats housed in a single lead free brass casting.
The twin thermostatic cartridges respond independently
to incoming hot and cold water temperatures and provide
backup protection against element failure. If one element
fails, the other should continue to function properly. If
only one element is operating the valve will experience a
decrease in outlet temperature (T3). For this reason the
Model 911 Valve requires testing and maintenance on a
regular basis. In the event of element failure, the cartridge
will provide full cold water flow. The resulting temperature
difference between the two valves will be reflected by T1
and T2.
Thermometers T1, T2, and T3 should be checked at least
every six months.
Installation
After installing the mixing valve, be sure to flush the system
thoroughly. Lawler recommends isolation and check valves
for proper maintenance.
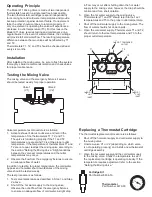
Testing the Mixing Valve
The mixing valve and the emergency fixtures it serves
should be tested weekly for proper operation.
Valve temperature test procedure is as follows:
1. Activate shower fixtures to observe and record the
temperature of the thermometers T1, T2, and T3.
The valve is functioning properly if the T1 and T2
temperatures are equal and T3 is at the proper outlet
temperature. If the temperature of thermometers T1 and
T2 are not equal, readjust the mixing valve according to
the section “Setting the Mixing Valve.” Slight variations
between the valve set temperatures and the outlet
temperatures may occur.
2. Observe the flow from the emergency fixtures to ensure
an adequate flow of water.
In addition to testing for proper temperature, the cold water
by-pass and hot water shut down features of the mixing
valve should be tested weekly.
The test procedure is as follows:
1. Test valve temperature as described in Step 1 and Step
2 above.
2. Shut off the hot water supply to the mixing valve.
Observe the outlet flow from the emergency fixtures
to ensure an adequate flow of cold water. A slight drop
30
40
50
60
70
80
90
110
120
130
30
40
50
60
70
80
90
110
120
130
30
40
50
60
70
80
90
110
120
130
1
″
4
N.P.T.
COLD
INLET
N.P.T.
HOT
INLET
1
″
4
A
B
C
1
1
N.P.T. TEMPERED
OUTLET
1
″
4
1
T2
T3
T1
5330 East 25
th
Street
Indianapolis, Indiana 46218
Valve 2
(V2)
Valve 1
(V1)
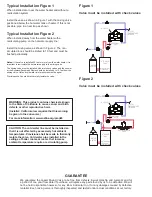
Replacing a Thermostat Cartridge
The thermostat replacement procedure is as follows:
1. Shut off the hot water supply and cold water supply to
the mixing valve.
2. Unscrew valve V1 or V2 (depending on which valve
is not operating properly) and install a new thermostat
cartridge assembly.
3. Open the hot water supply and the cold water supply
to the mixing valve. Check the temperature to see if
the replacement cartridge is operating correctly. If the
temperature requires adjustment refer to the section
“Setting the Mixing Valve.”
20
40
60
80 100 120
140
160
180
200
0
Cartridge Kit
Part Number 8334-50
Thermometer
Part Number 6679-00
Summary of Contents for 911
Page 6: ......


