21
W A R N I N G
before adjusting, inspecting, or cleaning the grass trimmer.
CLEANING
Remove the battery pack.
1. Brush or blow dust and debris out of the air vents using compressed air or a vacuum. Keep the
air vents free of obstructions, sawdust, and wood chips. Do not spray, wash, or immerse the air
vents in water.
2. Wipe off the housing and the plastic components using a moist, soft cloth. Do not use strong
solvents or detergents on the plastic housing or plastic components. Certain household cleaners
may cause damage, and may cause a shock hazard.
BATTERY PACK
• Store the battery pack fully charged.
• Recharge the battery pack whenever there is less power. Do not allow the battery pack to be
come completely discharged.
• Do not recharge a battery pack that is already fully charged. Overcharging shortens battery life.
• Once the charging light turns green, remove the battery from the charger and disconnect the
charger from the outlet.
• Do not store the battery pack on the tool or in the charger.
• Recharge the battery at a temperature of between 0 and }<% If the battery pack is hot, allow
it to cool down before recharging.
• After charging, the battery pack may be stored in the charger, as long as the charger is not
plugged in.
CHARGER MAINTENANCE
• Keep the charger clean and clear of debris. Do not allow foreign material to get into the re
cessed cavity or onto the contacts. Wipe the charger clean with a dry cloth. Do not use sol
vents or water, and do not place the charger in wet conditions.
• Unplug the charger when there is no battery pack in it.
• Fully charge the batteries before placing them in storage. Do not recharge a fully charged bat
tery pack.
• Overcharging will shorten battery life.
• Recharge the battery pack whenever there is less power. Do not allow the batteries to become
completely discharged.
• Store the charger at normal room temperature. Do not store it in excessive heat. Do not use
the charger in direct sunlight. Recharge at room temperature between 0— }<% ?
pack is hot, allow it to cool down before recharging.
MAINTENANCE
Summary of Contents for CLGT1810S01
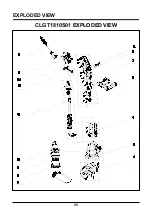
Page 25: ...25 EXPLODED VIEW CLGT1810S01 EXPLODED VIEW ...
Page 27: ...27 NOTES ...
Page 52: ...VUE ÉCLATÉE VUE ÉCLATÉE DU MODÈLE CLGT1810S01 52 ...
Page 54: ...54 REMARQUES ...


