background image

21

TROUBLESHOOTING

PROBLEM

POSSIBLE CAUSE

SOLUTION

The shredder will not 
start.

The collection box is not fitted 

correctly.

Push the collection box firmly to its 

correct position and place the collection 

box safety switch to the ‘LOCK’ position.

The blade housing cover is not 

re-fitted correctly, interlocked 

switch not engaged.

Check to make sure the cover is 

fitted correctly. Refer to Removing the 

Blockages section on page 19-20.

Overload protection tripped.

To switch back on, start by turning the 
operation mode selection switch to the 

middle ‘OFF’ position, and then press the 

reset switch. Switch the shredder on.

No power supply. 

Check the socket, fuse, cable, wire and 
plug and have any repairs carried out by 

a qualified person. 

Garden waste is not 
drawn in.

Cylinder is running in reverse.

Change rotational direction using the 
operation mode selection switch.

Operation mode selection switch 
is defective.

Contact the After Sales Helpline.

Shredding material is too soft.

Use the pusher or add dry twigs/

branches.

Shredder blade remains 
jammed.

Clear the jams. Refer to Removing the 
Blockages section on page 19-20.

Material is not 
shredded properly.

Pressure plate is incorrectly 
adjusted.

Re-adjust the pressure plate. Refer to 
Cutting Blade Gap Adjustment section on 
page 16-17.

Only perform the steps described within these instructions! All further inspection, maintenance and 

repair work must be performed by a qualified specialist.

Gloves and appropriate protective clothing must be worn when performing these instructions. 
Always turn off the machine, disconnect it from the power supply, and let the product cool down 
before making any adjustment.

WARNING

Summary of Contents for SDS2810

Page 1: ...all safety instructions carefully before assembling and operating this machine Ensure the machine has been assembled correctly and safely Keep the instructions safe and pass them on to any subsequent...

Page 2: ......

Page 3: ...3 9 1 2 4 5 6 7 8 10 11 12 13 17 15 14 16 19 20 18...

Page 4: ...4 TABLE OF CONTENTS Section Page Symbols Safety Information In the Box Assembly Operation Maintenance Troubleshooting Technical Data Recycling and Disposal 5 6 13 13 14 15 16 18 19 20 21 22 22...

Page 5: ...ve completely stopped before touching them Do not use as a step Noise level specification Lwa in dB A Protection class II Double insulation Do not dispose of electrical equipment in domestic waste Pro...

Page 6: ...Keep this manual in a safe place so that the information is available at all times SYMBOLS To avoid serious personal injury do not attempt to use this product until you read thoroughly and understand...

Page 7: ...hey do not play with the appliance Never operate the shredder while people especially children or pets are nearby Wear appropriate hearing and eye protection at all times when operating the shredder W...

Page 8: ...and accessories supplied and recommended by the manufacturer Only supply power to the machine through a circuit protected by a residual current device RCD with a tripping current of not more than 30m...

Page 9: ...ce of alcohol or medication Always take a break when you need one and be sensible about how you work Do not leave the shredder working unattended Shut off the shredder before attaching or removing the...

Page 10: ...n the intake opening or ejection channel Ensure that the motor is free of rubbish and other accumulations in order to safeguard the motor from damage or possible fire CAUTION The following states how...

Page 11: ...hough the power source is switched off due to the interlock feature of the guard the shredder blade can still be moved Replace worn or damaged parts for safety Use only genuine replacement parts and a...

Page 12: ...ed by a qualified technician Do not touch the mains power supply cable under any circumstances If the power cable for this equipment is damaged it must be replaced by a qualified person in order to pr...

Page 13: ...or any purposes other than those described Any use of the machine that deviates from its intended use and is not included in these instructions is considered unauthorised use and relieves the manufact...

Page 14: ...such alteration or modification is misuse and could result in a hazardous condition leading to possible serious personal injury WARNING Do not connect to power supply until assembly is complete Failu...

Page 15: ...nserting the collection box make sure the collection box safety switch is in the UNLOCK position Insert the collection box into the chassis The collection box can only be fitted in one direction Fig 5...

Page 16: ...the operation mode selection switch to the middle OFF position Cutting Blade Gap Adjustment See Fig 8 The pressure plate is used in the silent shredder to finely adjust cutting blade gap and to improv...

Page 17: ...ction Box See Fig 9 NOTE The collection box may fill unevenly Do not allow the shredded material to accumulate near the ejection area Switch off the shredder Rotate the collection box safety switch an...

Page 18: ...ly drawn in Adapt to the speed of the shredder and avoid overloading it Overloading will cause it to slow down possibly overheat and shut down To avoid the shredder clogging up mix freshly cut branche...

Page 19: ...en screws on the housing cover Fig 12 Remove the housing cover This may require light shaking movements Always switch the product off disconnect it from the power supply and let the product cool down...

Page 20: ...d correctly Storage Clean the shredder thoroughly before putting it away Store the shredder in a safe dry place well out of reach of children Do not cover the shredder in nylon bags as moisture may de...

Page 21: ...n Garden waste is not drawn in Cylinder is running in reverse Change rotational direction using the operation mode selection switch Operation mode selection switch is defective Contact the After Sales...

Page 22: ...nly in premises having an eliminate current capacity equal to or greater than 100A per phase supplied from a distribution network having a nominal voltage of 220 240V You may need to check with your e...

Page 23: ......

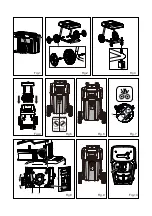
Page 24: ...UNLOCK LOCK Fig 3 Fig 6 Fig 1 Fig 8 Fig 9 Fig 4 Fig 5 Fig 2 Fig 7 UNLOCK LOCK UNLOCK LOCK Fig 10 UNLOCK LOCK...

Page 25: ...Fig 13 Fig 11 Fig 12...

Page 26: ...SDS2810 Suzhou Cleva Electric Appliance Co Ltd No 8 Ting Rong Street Suzhou Industrial Park Suzhou Jiangsu Province China www cleva europe com Made in P R C...

Reviews: