45
Important:
If the HDD amount is less than four, you do not need to install the HDD bracket.
When there is a bracket, please make sure the installation direction of HDDs is the same.
3.4
Rack Installation
Please note this installation mode is for 1.5U/2U series product.
Please follow the steps listed below.
z
Use twelve screws to fix the unit
z
Please make sure the indoor temperature is below 35
℃
(95°f).
z
Please make sure there is 15cm (6 inches) space around the device to guarantee sound
ventilation.
z
Please install from the bottom to the top.
z
If there are more accessories connected in the rack, please take precaution measures in
case the rack power is overload.
3.5
Connecting Power Supply
Please check input voltage and device power button match or not.
We recommend you use UPS to guarantee steady operation, DVR life span, and other peripheral
equipments operation such as cameras.
3.6
Connecting Video Input and Output Devices
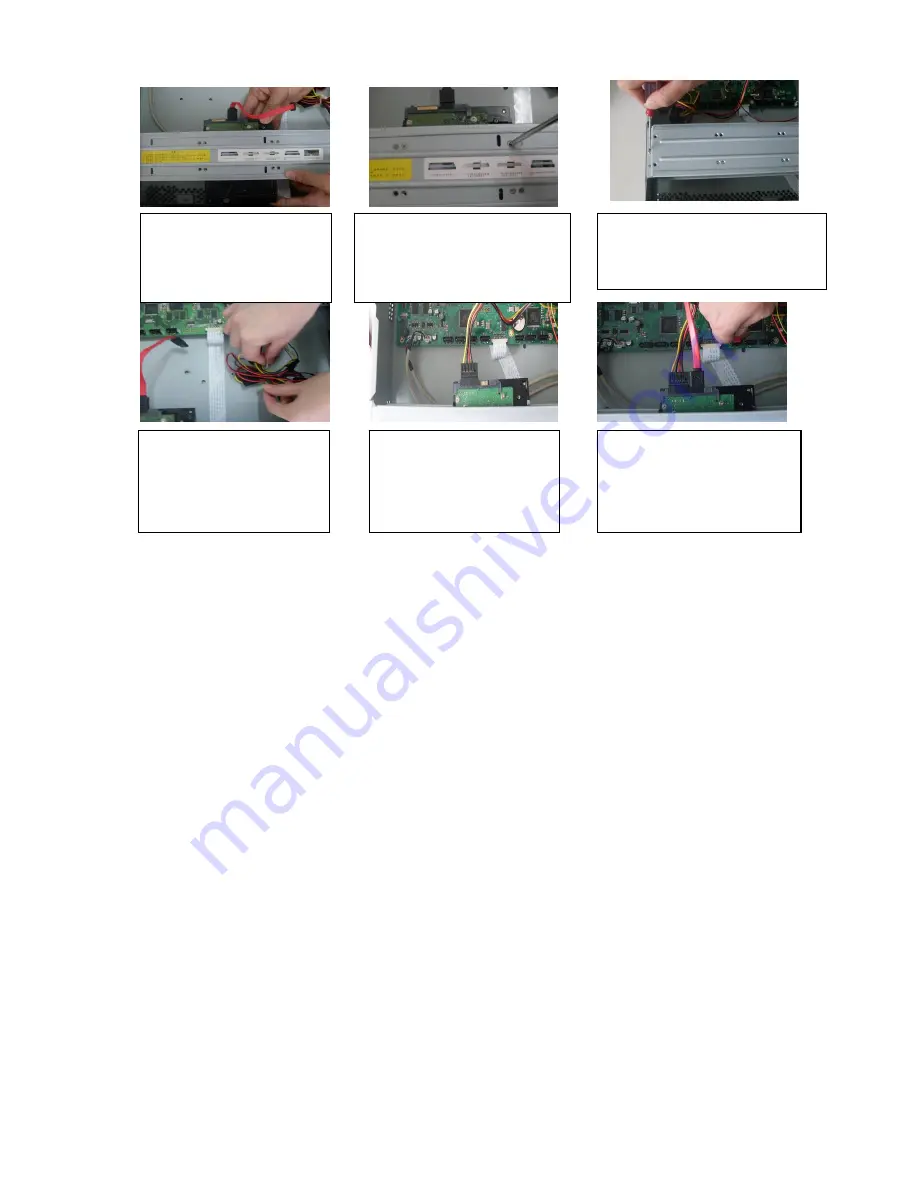
4. Line up the HDD to the
four holes of the HDD
bracket.
5.
Use screws to fix HDD.
6.
Install the upper bracket and then
Use screws to fix HDD in the
bracket.
7. Unfasten the HDD power
cable.
9.
Use the special data cable to
connect the HDD and the SATA
port. Close the chassis and fix
the screws to secure firmly.
8.
Insert the HDD power
cable.
Summary of Contents for DH-D20004
Page 46: ...36 Figure 2 15 ...
Page 63: ...53 1U series 1 5U Series ...
Page 64: ...54 2U Series Figure 3 6 ...
Page 85: ...75 Figure 4 28 Figure 4 29 Figure 4 30 ...
Page 93: ...83 Figure 4 46 ...
Page 133: ...123 Figure 5 66 ...
Page 138: ...128 Figure 6 11 ...
Page 200: ...190 Samsung HA101UJ CE 1T SATA ...


