background image

3

FOR EQUIPMENT THAT CONNECTS TO THE POWER MAINS

22. CAUTION: If the power cord of the device is equipped with an earthing contact, then it must be connected to an outlet with a protective ground. 

Never deactivate the protective ground of a power cord. 

23. If the equipment has been exposed to strong fluctuations in temperature (for example, after transport), do not switch it on immediately. Moisture 

and condensation could damage the equipment. Do not switch on the equipment until it has reached room temperature. 

24. Before connecting the equipment to the power outlet, first verify that the mains voltage and frequency match the values specified on the equip-

ment. If the equipment has a voltage selection switch, connect the equipment to the power outlet only if the equipment values and the mains power 

values match. If the included power cord or power adapter does not fit in your wall outlet, contact your electrician. 

25. Do not step on the power cord. Make certain that the power cable does not become kinked, especially at the mains outlet and/or power adapter 

and the equipment connector. 

26. When connecting the equipment, make certain that the power cord or power adapter is always freely accessible. Always disconnect the equip-

ment from the power supply if the equipment is not in use or if you want to clean the equipment. Always unplug the power cord and power adapter 

from the power outlet at the plug or adapter and not by pulling on the cord. Never touch the power cord and power adapter with wet hands. 

27. Whenever possible, avoid switching the equipment on and off in quick succession because otherwise this can shorten the useful life of the 

equipment.

28. IMPORTANT INFORMATION: Replace fuses only with fuses of the same type and rating. If a fuse blows repeatedly, please contact an authorised 

service centre. 

29. To disconnect the equipment from the power mains completely, unplug the power cord or power adapter from the power outlet. 

30. If your device is equipped with a Volex power connector, the mating Volex equipment connector must be unlocked before it can be removed. 

However, this also means that the equipment can slide and fall down if the power cable is pulled, which can lead to personal injuries and/or other 

damage. For this reason, always be careful when laying cables. 

31. Unplug the power cord and power adapter from the power outlet if there is a risk of a lightning strike or before extended periods of disuse.

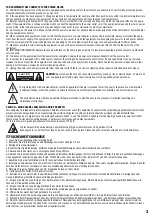
CAUTION

RISK OF ELECTRIC SHOCK

DO NOT OPEN

CAUTION: 

Never remove the cover, because otherwise there may be a risk of electric shock.  There are no 

user serviceable parts inside. Have repairs carried out only by qualified service personnel.

The lightning flash with arrowhead symbol within an equilateral triangle is intended to alert the user to the presence of uninsulated 

“dangerous voltage” within the product’s enclosure that may be of sufficient magnitude to constitute a risk of electrical shock. 

The exclamation mark within an equilateral triangle is intended to alert the user to the presence of important operating and 

maintenance instructions.

CAUTION – HIGH VOLUME LEVELS WITH AUDIO PRODUCTS!

This equipment is intended for professional use. Therefore, commercial use of this equipment is subject to the respectively applicable national accident 

prevention rules and regulations. As a manufacturer, Adam Hall is obligated to notify you formally about the existence of potential health risks. 

Hearing damage due to high volume and prolonged exposure: When in use, this product is capable of producing high sound-pressure levels (SPL) 

that can lead to irreversible hearing damage in performers, employees, and audience members.

For this reason, avoid prolonged exposure to volumes in excess of 90 dB. 

To prevent possible hearing damage, avoid listening at high volume levels over long periods of time.

Even exposure to short bursts of loud noise can result in hearing loss. Please keep the volume constantly at a comfortable level.

DE

SICHERHEITSHINWEISE 

1. Lesen Sie diese Anleitung bitte sorgfältig durch. 

2. Bewahren Sie alle Informationen und Anleitungen an einem sicheren Ort auf. 

3. Befolgen Sie die Anweisungen. 

4. Beachten Sie alle Warnhinweise. Entfernen Sie keine Sicherheitshinweise oder andere Informationen vom Gerät. 

5. Verwenden Sie das Gerät nur in der vorgesehenen Art und Weise. 

6. Verwenden Sie ausschließlich stabile und passende Stative bzw. Befestigungen (bei Festinstallationen). Stellen Sie sicher, dass Wandhalterungen 

ordnungsgemäß installiert und gesichert sind. Stellen Sie sicher, dass das Gerät sicher installiert ist und nicht herunterfallen kann. 

7. Beachten Sie bei der Installation die für Ihr Land geltenden Sicherheitsvorschriften. 

8. Installieren und betreiben Sie das Gerät nicht in der Nähe von Heizkörpern, Wärmespeichern, Öfen oder sonstigen Wärmequellen. Sorgen Sie dafür, 

dass das Gerät immer so installiert ist, dass es ausreichend gekühlt wird und nicht überhitzen kann.

9. Platzieren Sie keine Zündquellen wie z.B. brennende Kerzen auf dem Gerät. 

10. Lüftungsschlitze dürfen nicht blockiert werden. 

11. Betreiben Sie das Gerät nicht in unmittelbarer Nähe von Wasser. Bringen Sie das Gerät nicht mit brennbaren Materialien, Flüssigkeiten oder 

Gasen in Berührung. Direkte Sonneneinstrahlung vermeiden! 

12. Sorgen Sie dafür, dass kein Tropf- oder Spritzwasser in das Gerät eindringen kann. Stellen Sie keine mit Flüssigkeit gefüllten Behältnisse wie 

Vasen oder Trinkgefäße auf das Gerät. 

13. Sorgen Sie dafür, dass keine Gegenstände in das Gerät fallen können. 

14. Betreiben Sie das Gerät nur mit dem vom Hersteller empfohlenen und vorgesehenen Zubehör. 

15. Öffnen Sie das Gerät nicht und verändern Sie es nicht. 

16. Überprüfen Sie nach dem Anschluss des Geräts alle Kabelwege, um Schäden oder Unfälle, z. B. durch Stolperfallen zu vermeiden. 

17. Achten Sie beim Transport darauf, dass das Gerät nicht herunterfallen und dabei möglicherweise Sach- und Personenschäden verursachen kann.

18. Wenn Ihr Gerät nicht mehr ordnungsgemäß funktioniert, Flüssigkeiten oder Gegenstände in das Geräteinnere gelangt sind, oder das Gerät an-

derweitig beschädigt wurde, schalten Sie es sofort aus und trennen es von der Netzsteckdose (sofern es sich um ein aktives Gerät handelt). Dieses 

Gerät darf nur von autorisiertem Fachpersonal repariert werden. 

Summary of Contents for DAVE G3 SERIES

Page 1: ...1 USER S MANUAL BEDIENUNGSANLEITUNG MANUEL D UTILISATION MANUAL DE USUARIO INSTRUKCJA OBSŁUGI MANUALE D USO LD DAVE G SERIES ACTIVE 2 1 DSP BASED PA SYSTEM LDDAVE10G LDDAVE12G LDDAVE15G ...

Page 2: ... s Manual carefully so that you can begin making optimum use of your LD Systems product quickly You can find more information about LD SYSTEMS at our Internet site WWW LD SYSTEMS COM DE Sie haben die richtige Wahl getroffen Dieses Gerät wurde unter hohen Qualitätsanforderungen entwickelt und gefertigt um viele Jahre einen reibungslosen Betrieb zu gewährleisten Dafür steht LD Systems mit seinem Nam...

Page 3: ...nce of important operating and maintenance instructions CAUTION HIGH VOLUME LEVELS WITH AUDIO PRODUCTS This equipment is intended for professional use Therefore commercial use of this equipment is subject to the respectively applicable national accident prevention rules and regulations As a manufacturer Adam Hall is obligated to notify you formally about the existence of potential health risks Hea...

Page 4: ...UNG Entfernen Sie niemals die Abdeckung da sonst das Risiko eines elektrischen Schlages besteht Im Inneren des Geräts befinden sich keine Teile die vom Bediener repariert oder gewartet werden können Lassen Sie Reparaturen ausschließlich von qualifiziertem Servicepersonal durchführen Das gleichschenkelige Dreieck mit Blitzsymbol warnt vor nichtisolierten gefährlichen Spannungen im Geräteinneren die...

Page 5: ...pareil rapidement plusieurs fois de suite vosu risquez de réduire la longévité de ses composants internes 28 CONSEIL IMPORTANT Ne remplacez le fusible que par un fusible de même type et du même calibre Si le fusible fond de façon répétée veuillez consulter un centre de réparations agréé 29 Pour séparer complètement l appareil du secteur débranchez le cordon secteur ou l adaptateur de la prise mura...

Page 6: ...nistro Si el enchufe o el adaptador de corriente no encajan en la toma eléctrica consulte a un electricista 25 Asegúrese de que el cable eléctrico no está pinzado Evite que el cable resulte pellizcado sobre todo en los extremos de conexión al equipo y en la toma eléctrica 26 Al conectar el equipo asegúrese de que el cable eléctrico o el adaptador de corriente estén siempre accesibles Desconecte el...

Page 7: ...ażony w zestyk ochronny należy go podłączyć do gniazda z przewodem uziemiającym Nigdy nie wolno dezaktywować przewodu uziemiającego kabla sieciowego 23 Nie włączać urządzenia bezpośrednio po narażeniu go na silne wahania temperatury np po transporcie Wilgoć i skropliny mogą uszkodzić urządzenie Włączyć urządzenie dopiero wtedy gdy osiągnie temperaturę pokojową 24 Przed podłączeniem urządzenia do g...

Page 8: ...di un dispositivo attivo La riparazione del dispositivo deve essere affidata esclusivamente a personale qualificato autorizzato 19 Per la pulizia del dispositivo utilizzare un panno pulito 20 Rispettare le leggi sullo smaltimento in vigore nel Paese di installazione Al momento di smaltire l imballo separare la plastica dalla carta e dal cartone 21 I sacchetti di plastica devono essere tenuti lonta...

Page 9: ...le tout à un prix très étudié La gamme comprend trois systèmes 2 1 caisson de basse satellites de dimensions différentes Le LDDAVE10G3 possède un caisson de basses à boomer 10 pour une puissance totale système de 350 Watts efficaces le LDDAVE12G3 possède un caisson de basses à boomer 12 pour une puissance totale système de 500 Watts efficaces le LDDAVE15G3 possède un caisson de basses à boomer 15 ...

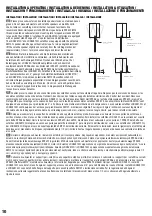
Page 10: ...angle d inclinaison soulevez légèrement l enceinte afin de la dégager du mécanisme de verrouillage environ 5 mm orientez la selon l angle désiré puis laissez retomber l enceinte ES Coloque el subwoofer y los soportes de satélites en una superficie estable y plana No coloque el subwoofer ni los soportes de satélites en carritos móviles sillas mesas o sitios similares donde puedan provocar accidente...

Page 11: ...schalten Sie Ihr LD DAVE G System immer als letztes Gerät ein und als erstes Gerät aus Drehen Sie vor dem Einschalten den Lautstärkeregler herunter FR Afin d éviter tout bruit parasite désagréable lors de la mise sous tension provoqué par un appareil audio externe connecté console etc nous vous conseillons de toujours allumer le système LD DAVE G en dernier et de l éteindre en premier Avant d allu...

Page 12: ...chalter für den Subwoofer 0 180 FR Ce sélecteur inverse la polarité du caisson de basses phase 0 180 si nécessaire ES Invierte la fase del subwoofer 0 180 PL Odwrócenie fazy subwoofera 0 180 IT Inverte la fase del subwoofer 0 180 3 SUB LEVEL EN Volume control of subwoofer Adjust the volume of the subwoofer in relation to satellites Recommended setting centre position 12 00h DE Lautstärkeregler für...

Page 13: ...ckable Volex connector is supplied with this unit IMPORTANT Replace fuse only by fuse of same type and rating If fuse blows repeatedly please contact authorized service center DE Integrierter Sicherungshalter IEC Netzbuchse 220 240V AC Ein Kaltgerätekabel mit verriegelbarem Volex Stecker liegt dem Gerät bei WICHTIGER HINWEIS Ersetzen Sie die Sicherung ausschließlich durch eine Sicherung des gleich...

Page 14: ...hargée Veuillez réduire le niveau du signal audio source connecté ou le volume de l enceinte active Dans le cas contraire vous obtiendrez un son déformé par la distorsion désagréable à écouter et vous risquez d endommager le caisson ES Se ilumina cuando el altavoz se lleva al límite No es crítico si el LED parpadea brevemente Si el LED del limitador se ilumina durante más tiempo o de forma continu...

Page 15: ...il volume del subwoofer rispetto a quello dei satelliti Si consiglia di impostarlo nella posizione centrale ore 12 4 LINE INPUT LEFT RIGHT LINE INPUT LEFT RIGHT LINE INPUT GAUCHE DROITE LINE INPUT LEFT RIGHT LINE INPUT LEFT RIGHT LINE INPUT LEFT RIGHT EN Unbalanced RCA line input DE Unsymmetrischer Line Eingang Cinch FR Entrée asymétrique au niveau ligne sur connecteurs RCA ES Entrada de línea RCA...

Page 16: ... solo con fusibili dello stesso tipo e potenza nominale Se il fusibile dovesse saltare ripetutamente contattare un centro di assistenza autorizzato 10 ON LED ON LED LED ON LED ON DIODA ON ON LED EN Lights up when power is switched on and mains cable is connected correctly DE Leuchtet wenn das Gerät eingeschaltet und das Stromkabel richtig angeschlossen ist FR Cet indicateur s allume lorsque l ence...

Page 17: ... al cabo de unos minutos PL Dioda zapala się w przypadku przeciążenia przegrzewania się urządzenia Wzmacniacz automatycznie przechodzi w tryb wyciszenia W normalnych warunkach urządzenie powróci do trybu działania po kilku minutach IT Si accende in caso di sovraccarico o surriscaldamento del dispositivo L amplificatore passa automaticamente al mute Il dispositivo torna alla modalità di funzionamen...

Page 18: ... 230 Weight kg 9 7 8 5 4 Features Mid Hi System ergonomic milled handles stand support adjustable vertically SM707 ergonomic milled handle stand support adjustable vertically SM707 ergonomic milled handle stand support 5 sloped AMP MODULE INTEGRATED IN SUBWOOFER Amplification Class A B Class A B Class A B Power System RMS W 700 500 350 Power System Peak W 2 800 2 000 1 400 Protection short circuit...

Page 19: ...LD SYSTEMS Evolutive Griffe Gewindeflansch M20 LD SYSTEMS Evolutive Griffe Gewindeflansch M20 LD SYSTEMS Evolutive Griffe Gewindeflansch M20 SATELLITEN Abmessungen Mitteltöner 8 6 5 5 25 Abmessungen Mitteltöner mm 203 2 165 1 133 4 Magnet Mitteltöner Ferrit Ferrit Ferrit Marke Mitteltöner Custom Made Custom Made Custom Made Schwingspule Mitteltöner 1 5 1 75 1 Schwingspule Mitteltöner mm 38 1 44 5 ...

Page 20: ...akon Speakon LDDAVE15G3 LDDAVE12G3 LDDAVE10G3 Type produit Système de sonorisation complet Système de sonorisation complet Système de sonorisation complet Type Actif fonctions DSP intégrées Actif fonctions DSP intégrées Actif fonctions DSP intégrées Niveau maximal de pression sonore en continu en dB SPL 121 119 115 Niveau maximal de pression sonore crête en dB SPL 132 130 126 Bande passante en Hz ...

Page 21: ...ités satellite médium aigu Poignées fraisées de forme ergonomique support pour pied réglable verticalement SM707 Poignées fraisées de forme ergonomique support pour pied réglable verticalement SM707 Poignées fraisées de forme ergonomique embase pour pied inclinaison 5 MODULE AMPLIFICATEUR INTÉGRÉ AU CAISSON DE BASSES Amplification Classe A B Classe A B Classe A B Puissance système eff en W 700 500...

Page 22: ... LD SYSTEMS rosca de unión M20 SISTEMA DE MEDIOS ALTOS Tamaño altavoz de medios 8 6 5 5 25 Tamaño altavoz de medios mm 203 2 165 1 133 4 Imán altavoz de medios ferrita ferrita ferrita Marca altavoz de medios Custom Made Custom Made Custom Made Bobina altavoz de medios 1 5 1 75 1 Bobina altavoz de medios mm 38 1 44 5 25 4 Bocina bocina DC bocina DC radial Tamaño motor agudos 1 1 1 Tamaño motor agud...

Page 23: ...3 LDDAVE12G3 LDDAVE10G3 Rodzaj produktu kompletny system PA kompletny system PA kompletny system PA Typ zasilany w pełni cyfrowe sterowanie DSP zasilany w pełni cyfrowe sterowanie DSP zasilany w pełni cyfrowe sterowanie DSP Maksymalny ciągły poziom ciśnienia akustycznego dB 121 119 115 Maksymalny szczytowy poziom ciśnienia akustycznego 132 130 126 Zakres częstotliwości Hz 35 19 000 40 19 000 45 19...

Page 24: ...sokotonowego 15 mm sklejka 15 mm sklejka Płyta MDF 12 mm Powłoka obudowy systemu średnio wysokotonowego farba strukturalna farba strukturalna farba strukturalna Szerokość mm 275 250 200 Wysokość mm 430 400 300 Głębokość mm 260 250 230 Waga kg 9 7 8 5 4 Cechy systemu średnio wysokotonowego ergonomiczne frezowane uchwyty wspornik statywu regulowany w pionie SM707 ergonomiczny frezowany uchwyt wsporn...

Page 25: ...OOFER Dimensioni del woofer 15 12 10 Dimensioni del woofer mm 381 304 8 254 Magnete del woofer ferrite ferrite ferrite Marca del woofer custom made custom made custom made Bobina del woofer 3 2 5 2 Bobina del woofer mm 76 2 63 5 50 8 Design della cassa bass reflex bass reflex bass reflex Materiale della cassa Legno compensato da 18 mm Legno compensato da 15 mm 15 mm MDF Superficie della cassa vern...

Page 26: ...egnimento Indicatori On Signal Limit Protect On Signal Limit Protect On Signal Limit Protect Alimentazione trasformatore trasformatore trasformatore Tensione elettrica 220 V AC 240 V AC 220 V AC 240 V AC 220 V AC 240 V AC Entrate linea stereo XLR Jack 6 3 mm combo RCA XLR Jack 6 3 mm combo RCA XLR Jack 6 3 mm combo RCA Uscite linea stereo XLR XLR Uscite stereo attive satelliti compatibile Speakon ...

Page 27: ... la documentación adjunta indica que al final de la vida útil del equipo no deberá desecharlo con los demás residuos domésticos con el fin de evitar posibles efectos negativos en el medio ambiente y en la salud humana debidos al vertido incontrolado de desechos La recogida selectiva ayuda a su posterior reciclaje y fomenta la reutilización sostenible de los componentes de este equipo Si es un part...

Page 28: ...28 Adam Hall GmbH Daimlerstrasse 9 61267 Neu Anspach Germany Tel 49 0 6081 9419 0 Fax 49 0 6081 9419 1000 web www adamhall com e mail mail adamhall com WWW LD SYSTEMS COM REV 02 ...

Reviews: