background image

31

D

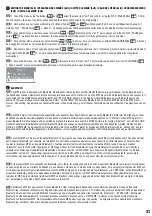
EXITING THE MENU (Exit) / VERLASSEN DES MENÜS (Exit) / QUITTER LE MENU (Exit) / SALIR DEL MENÚ (Exit) / OPUSZCZANIE MENU 

(Exit) / USCITA DAL MENU (Exit)

EN

1. To exit the menu, using the buttons 

 and 

 select the menu item "Exit" and confirm using the PLAY / PAUSE button 

 . 2. After 

about 8 seconds, the menu is automatically exited and the display will change to the main display.

DE

1. Um das Menü zu verlassen, wählen Sie mit Hilfe der Tasten 

 und 

 den Menüpunkt „Exit“ aus und bestätigen den Vorgang mit 

Hilfe der PLAY- / PAUSE-Taste 

 . 2. Nach ca. 8 Sekunden wird das Menü automatisch verlassen und das Display wechselt zur Hauptanzeige.

FR

1. Pour quitter le menu, choisissez avec les touches 

 et 

 l'élément de menu "Exit", puis appuyez sur la touche PLAY / PAUSE pour 

valider 

. 2. Au bout d'environ 8 secondes, le menu est quitté automatiquement, et l'affichage revient sur l'écran principal.

ES

1. Para salir del menú, seleccione con los botones 

 y 

 la opción «Exit» y confirme con el botón REPRODUCIR/PAUSA 

. 2. Al cabo 

de 8 segundos, el menú se cerrará automáticamente y se volverá a la pantalla principal.

PL

1. Aby opuścić menu, należy za pomocą przycisków 

 i 

 wybrać punkt menu „Exit” (zaznaczony jasnym kolorem) i potwierdzić wybór 

przyciskiem PLAY/PAUSE 

. 2. Po ok. 8 sekundach nastąpi automatyczne zamknięcie menu, a na ekranie znowu będzie widoczny główny 

wyświetlacz.

IT

1. Per uscire dal menu, con i tasti 

 e 

 selezionare la voce di menu "Exit" e confermare la procedura con il tasto PLAY/PAUSE 

2. Dopo 8 secondi si esce automaticamente dal menu e sul display appare la visualizzazione principale.

M u s i c

E q

P l a y   M o d e
C h a n g e   D e v i c e

M u s i c

E q

P l a y   M o d e

C h a n g e   D e v i c e

M u s i c

E q
P l a y   M o d e

C h a n g e   D e v i c e

M u s i c

P l a y   M o d e
C h a n g e   D e v i c e

E x i t

00 : 00 : 00

N O R

B T   N O T   L I N K

00 : 00 : 00

N O R

S m a r t p h o n e

BT NOT LINK

Bluetooth

Bluetooth

Smartphone

E

BLUETOOTH

EN

The MP3 player is equipped with Bluetooth, meaning that audio files from another Bluetooth device (e.g. smartphone) can be played back on 

the Roadbuddy speaker (maximum distance between two devices about 10 meters). To pair the MP3 player with a Bluetooth device and connect to it, 

press briefly on the MODE button until "Bluetooth" and "BT NOT LINK" appears in the display. Activate Bluetooth on your Bluetooth device and 

search on the user interface for available devices. Select "LD SYSTEMS" and pair your Bluetooth device with the MP3 player. In the MP3 player 

display, "Connecting" appears and your Bluetooth device is then displayed (e.g. smartphone), therefore paired and connected. The playback can now 

start.

DE

Der MP3-Spieler ist mit Bluetooth ausgestattet, was bedeutet, dass Audio-Dateien eines anderen Bluetooth-Geräts (z.B. Smartphone) auf dem 

Roadbuddy Lautsprecher wiedergegeben werden können (maximale Entfernung zwischen beiden Geräten ca. 10 Meter). Um den MP3-Spieler mit 

einem Bluetooth-Gerät zu koppeln und zu verbinden, drücken Sie jeweils kurz so oft die MODE-Taste, bis im Display „Bluetooth“ und „BT NOT LINK“ 

erscheint. Aktivieren Sie Bluetooth auf Ihrem Bluetooth-Gerät und suchen auf der Benutzeroberfläche nach verfügbaren Geräten. Wählen Sie den 

Eintrag „LD SYSTEMS“ und koppeln damit Ihr Bluetooth-Gerät mit dem MP3-Spieler. Im Display des MP3-Spielers erscheint „Connecting“ und Ihr 

Bluetooth-Gerät wird daraufhin angezeigt (z.B. Smartphone), ist somit gekoppelt und verbunden. Die Titelwiedergabe kann nun gestartet werden.

FR

Le lecteur MP3 est muni d'un récepteur Bluetooth, ce qui signifie que l'enceinte Roadbuddy peut diffuser les données audio stockées sur tout 

autre appareil Bluetooth (par exemple, un smartphone). La distance maximale séparant les deux appareils soit être inférieure à 10 mètres. Pour 

coupler le récepteur MP3 à un appareil Bluetooth, il faut appuyer plusieurs fois brièvement sur la touche MODE, jusqu'à ce que la mention 

"Bluetooth" puis "BT NOT LINK" apparaisse à l'affichage. Activez le mode Bluetooth sur votre appareil Bluetooth puis cherchez, sur l'interface 

utilisateur, les autres appareils Bluetooth disponibles. Choisissez l'entrée "LD SYSTEMS", puis couplez votre appareil Bluetooth avec le module 

lecteur MP3. La mention "Connecting" apparaît alors à l'écran du lecteur MP3, puis apparaît le nom de votre appareil Bluetooth (par exemple, 

smartphone). Les deux appareils sont alors couplés, et la liaison établie entre eux. Vous pouvez alors lancer la lecture du titre.

ES

El reproductor MP3 está equipado con Bluetooth, por lo tanto, los archivos de audio de otros dispositivos Bluetooth (por ejemplo, smartphones) 

se pueden reproducir en el altavoz Roadbuddy (a una distancia máxima de 10 metros entre los dispositivos). Para emparejar el reproductor MP3 con 

otro dispositivo Bluetooth, pulse repetidamente el botón MODE hasta que en la pantalla aparezca «Bluetooth» y «BT NOT LINK». Active Bluetooth en el 

dispositivo Bluetooth y busque los dispositivos disponibles. Seleccione la opción «LD SYSTEMS» para emparejar el dispositivo Bluetooth con el 

reproductor MP3. En la pantalla del reproductor MP3 se mostrará «Connecting» y luego aparecerá el dispositivo Bluetooth (por ejemplo, «Smartpho-

ne») emparejado y conectado. Ahora puede reproducirse la canción.

PL

Odtwarzacz MP3 jest wyposażony w łącze Bluetooth, dzięki czemu głośnik Roadbuddy może odtwarzać pliki audio z innego urządzenia 

Bluetooth (np. smartfona). Maksymalna odległość między oboma urządzeniami wynosi ok. 10 metrów. Aby połączyć odtwarzacz MP3 z urządzeniem 

Bluetooth, należy naciskać przycisk MODE do momentu, gdy na wyświetlaczu będzie widoczna funkcja „Bluetooth” i „BT NOT LINK”. Aktywować 

Bluetooth na urządzeniu Bluetooth i wyszukać dostępne urządzenia. Wybrać opcję „LD SYSTEMS” i połączyć w ten sposób swoje urządzenie 

Bluetooth z odtwarzaczem MP3. Na wyświetlaczu odtwarzacza MP3 pojawi się napis „Connecting”, a następnie zostanie wyświetlone urządzenie 

Bluetooth (np. smartfon). Oznacza to aktywne połączenie. Można rozpocząć odtwarzanie ścieżek.

Summary of Contents for LDRBUD10

Page 1: ...BUDDY 10 BATTERY POWERED BLUETOOTH LOUDSPEAKER WITH MIXER AND WIRELESS MICROPHONE LDRBUD10 LDRBUD10HS USER S MANUAL BEDIENUNGSANLEITUNG MANUEL D UTILISATION MANUAL DE USUARIO INSTRUKCJA OBS UGI MANUAL...

Page 2: ...tto secondo elevati standard qualitativi che garantiscono un funzionamento regolare per molti anni Per questo motivo LD Systems con il suo nome e la pluriennale esperienza rappresenta un azienda produ...

Page 3: ...intended to alert the user to the presence of important operating and maintenance instructions CAUTION HIGH VOLUME LEVELS WITH AUDIO PRODUCTS This equipment is intended for professional use Therefore...

Page 4: ...rgf ltig 31 Entfernen Sie Netzkabel und Netzadapter aus der Steckdose bei Gefahr eines Blitzschlags oder wenn Sie das Ger t l nger nicht verwenden CAUTION RISK OF ELECTRIC SHOCK DO NOT OPEN ACHTUNG En...

Page 5: ...e d s que vous n utilisez pas l appareil pendant un certain temps ou si vous d sirez nettoyer l appareil Pour ce faire tirez toujours sur la fiche elle m me ou sur le bloc secteur lui m me ne tirez ja...

Page 6: ...encienda inmediatamente La conden saci n o la humedad podr an da ar el equipo Deje que el equipo alcance la temperatura ambiente antes de encenderlo 24 Antes de conectar el cable el ctrico a la toma d...

Page 7: ...mo e wykona tylko autoryzowany personel specjalistyczny 19 Do czyszczenia urz dzenia stosowa such ciereczk 20 Przestrzega obowi zuj cych w danym kraju przepis w dotycz cych usuwania odpad w Podczas u...

Page 8: ...icare tutti i cavi per evitare danni o incidenti ad esempio per inciampo 17 Durante il trasporto assicurarsi che il dispositivo non possa cadere e causare possibili danni a cose e o persone 18 Se il d...

Page 9: ...icateur travaillant en Classe D et une alimentation d coupage de haute efficacit Le Roadbuddy permet de travailler avec des micros HF il poss de un r cepteur UHF int gr il est livr avec un metteur mai...

Page 10: ...kowicie bezprzewodow transmisj wyposa ony jest w odbiornik radiowy FM jest on dost pny w opcji z nadajnikiem r cznym lub kieszonkowym z zestawem nag ownym Istnieje tak e mo liwo rozszerzenia go o doda...

Page 11: ...EN Unbalanced line input with 3 5 mm jack for connecting an external audio source e g tablet smartphone An incoming stereo signal is mono summed internally To activate the mini jack input switch 4 AUX...

Page 12: ...rique entr e ligne connecteur Combo mixte XLR jack 6 35 mm Cette entr e est compatible avec un signal micro asym trique issu d un microphone poss dant un connecteur jack mono Attention la position du...

Page 13: ...reases it DE Lautst rkeregler f r den Kanal 3 CH 3 Nach links gedreht verringert sich nach rechts gedreht erh ht sich die Lautst rke FR Potentiom tre de r glage de niveau du canal 3 CH 3 Tournez le po...

Page 14: ...Einsetzen des integrierten Limiters wird signalisiert indem die Farbe der LED auf Rot wechselt der Lautsprecher wird im Grenzbereich betrieben Ein kurzes Aufleuchten der LED ist nicht problematisch Le...

Page 15: ...nsione di esercizio del dispositivo coincidano 19 FUSE HOLDER SICHERUNGSHALTER PORTE FUSIBLE PORTAFUSIBLES PODSTAWA BEZPIECZNIKA PORTAFUSIBILI EN Always replace the fuse with a fuse of the same type a...

Page 16: ...o akumulatora Je li wiec si wszystkie trzy zielone diody LED oznacza to e akumulator jest ca kowicie na adowany Gdy akumulator jest roz adowany wieci si czerwona dioda LED IT La colonna di LED a 4 seg...

Page 17: ...Quelle des MP3 Spielers erfolgt mit Hilfe des MODE Tasters FR Port pour carte SD d une capacit maximale de 32 Go Lors de l introduction de la carte veuillez respecter la bonne direction rang e de cont...

Page 18: ...latz f r USB Speichersticks bis 32 GB Kapazit t Die Wahl der Signal Quelle des MP3 Spielers erfolgt mit Hilfe des MODE Tasters FR Port pour cl USB d une capacit maximale de 32 Go Le choix de la source...

Page 19: ...radiowego 01 16 IT Visualizzazione del canale radio selezionato 01 16 34 IR EN Infrared interface to synchronise the radio channel on the receiver and transmitter DE Infrarot Schnittstelle zum Synchro...

Page 20: ...kr ci pokryw obudowy Aby zsynchronizowa kana radiowy odbiornika i nadajnika kieszonkowego nale y ustawi wybrany kana w odbiorniku patrz punkt 32 i nacisn przycisk ASC R wnocze nie ustawi interfejs pod...

Page 21: ...que la cancelaci n de ruido ser m nima Este ajuste es adecuado para la mayor a de los casos y solo deber cambiarlo en casos especiales PL UWAGA przed zmian poziomu MUTE nale y najpierw ustawi g o no g...

Page 22: ...ginal de f brica sirve para la mayor a de aplicaciones y solo debe cambiarlo en casos excepcionales PL Za pomoc tego regulatora mo na ustawi czu o mikrofonu Obr t w lewo zmniejsza a obr t w prawo zwi...

Page 23: ...est faible Dans ce cas veuillez remplacer les piles aussi vite que possible par des neuves ES El LED se ilumina de color verde micr fono encendido El LED se ilumina de color rojo bater a descargada S...

Page 24: ...nto se ilumine el LED de se al AF del receptor Si el sonido empieza a distorsionarse disminuya la sensibilidad bajando el conmutador de 3 posiciones MIC 0dB 10dB al valor inmediatamente menor PL Regul...

Page 25: ...en direction du port infrarouge du r cepteur contact visuel direct en appuyant galement sur sa touche ASC Le port infrarouge de l metteur de poche se trouve l arri re du bo tier point 54 ES Para sincr...

Page 26: ...erlo quindi di lato Se l impianto trasmittente resta inutilizzato a lungo estrarre le pile dallo scomparto per evitare eventuali danni 56 ATTACHING THE BELT PACK TRANSMITTER BEFESTIGEN DES TASCHENSEND...

Page 27: ...pista seleccionada se reproducir continuamente F Folder Repetir carpeta Se repiten todas las pistas que se encuentran en una carpeta del medio de almacenamiento PL N Normal Wszystkie cie ki znajduj c...

Page 28: ...nutes and seconds DE Anzeige der bereits abgespielten Zeit des aktuell wiedergegebenen Titels in Minuten und Sekunden FR Affichage de la dur e coul e en lecture pour le morceau en cours en minutes et...

Page 29: ...quindi la voce di menu Eq in chiaro e confermare con il tasto PLAY PAUSE Ora possibile attivare uno dei sette preset dell equalizzatore premendo i tasti e e confermando la selezione con il tasto PLAY...

Page 30: ...MODE Taste wechselt der MP3 Spieler seine Signal Quelle SD Karten Steck platz Steckplatz f r USB Speichersticks Bluetooth Die aktivierte Signal Quelle wird im Display angezeigt FR Choix de la source d...

Page 31: ...jeweils kurz so oft die MODE Taste bis im Display Bluetooth und BT NOT LINK erscheint Aktivieren Sie Bluetooth auf Ihrem Bluetooth Ger t und suchen auf der Benutzeroberfl che nach verf gbaren Ger ten...

Page 32: ...FR Pour d connecter l appareil Bluetooth par exemple pour en coupler un autre v rifiez que le lecteur MP3 se trouve bien en mode Bluetooth puis maintenez enfonc e la touche MODE pendant environ 1 seco...

Page 33: ...uno de los siete preajustes del ecualizador mantenga pulsado el bot n MODE durante 1 segundo aproximadamente Pulse ahora los botones y para seleccionar la opci n Eq quedar resaltada y confirme con el...

Page 34: ...e PLAY PAUSE L affichage indique alors Name LD SYSTEMS C est sous ce nom qu appara t le lecteur MP3 du Roadbuddy sur votre appareil Bluetooth smartphone tablette ES Con el reproductor MP3 en modo Blue...

Page 35: ...tarten Erneutes Dr cken stellt den MP3 Spieler in den Pause Modus die Wiedergabe wird angehalten FR Appuyez sur la touche PLAY PAUSE pour lancer la lecture d un morceau Appuyer de nouveau sur la touch...

Page 36: ...9 sul display appare brevemente 0029 P ENTER EN Press the ENTER button to enter the menu to select the equalizer the playback mode and the signal source DE Durch Dr cken der Taste ENTER gelangen Sie...

Page 37: ...changes its signal source SD card slot slot for USB memory sticks Bluetooth The activated signal source is shown on the display DE Wahl der Signal Quelle des MP3 Spielers 1 Dr cken Sie die ENTER Tast...

Page 38: ...peut tre allum teint que par l interm diaire de la t l commande infrarouge et non sur l appareil lui m me ES 1 Al pulsar brevemente el bot n MODE el reproductor MP3 cambia su fuente de se al tarjeta...

Page 39: ...ER gelangen Sie in das Bluetooth Men Bedienung und Einstellung erfolgen wie im Kapitel BEDIENUNG IN DER BLUETOOTH BETRIEBSART ausf hrlich beschrieben FR Appuyer sur la touche ENTER appelle le menu Blu...

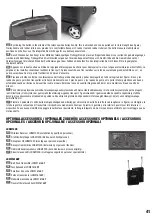
Page 40: ...T Lo scomparto accessori pu alloggiare due trasmettitori a mano le antenne dei ricevitori il telecomando il cavo di rete e altri accessori Premendo il punto marcato PUSH il coperchio si apre v figura...

Page 41: ...e el suelo Emplee el vaso de soporte integrado de 36 mm para montarlo sobre un soporte de altavoz PL Po naci ni ciu przycisku po rodku teleskopowego uchwytu w zka uchwyt zostanie odblokowany i mo e zo...

Page 42: ...aerobica LDHSAE1 LDHSM1 EN Water resistant Headset LDHSM1 DE Wasserabweisendes Headset LDHSM1 FR Serre t te r sistant l eauLDHSM1 ES Micr fono de diadema resistente al agua LDHSM1 PL Wodoodporny zesta...

Page 43: ...ver current short circuit Controls Master Volume low high AUX MP3 switch Echo Channel 1 Level Channel 2 Level Channel 3 Level 2 x MIC LINE switch Master Volume low high AUX MP3 switch Echo Channel 1 L...

Page 44: ...F output power max 10mW High Low 10mW Handheld Microphone weight 285g Handheld Microphone material Aluminum Black Belt Pack transmitter weight 80g without batteries Belt Pack transmitter material ABS...

Page 45: ...Schalter Master Lautst rke Low High AUX MP3 Schalter Echo Channel 1 Level Channel 2 Level Channel 3 Level 2 x MIC LINE Schalter Anzeigen Lade Batteriestatus Power Lade Batteriestatus Power Line Eing...

Page 46: ...Sender 80g ohne Batterien Material Beltpack Sender ABS Allgemeine Spezifikationen Betriebsspannung Schaltnetzteil 100 V 120 V 60 Hz 220 V 240 V AC 50 Hz ber IEC Kaltger tebuchse Schaltnetzteil 100 V...

Page 47: ...ts circuits Contr les Potentiom tres Master Volume Low High s lecteur AUX MP3 potentiom tres Echo Channel 1 Level Channel 2 Level Channel 3 Level 2 x s lecteurs MIC LINE Potentiom tres Master Volume L...

Page 48: ...eur main 285 g Mat riau corps metteur main Aluminium finition noire Masse metteur portable bodypack 80 g sans piles Mat riau bo tier metteur bodypack ABS Caract ristiques g n rales Tension secteur 220...

Page 49: ...Master Volume low high selector AUX MP3 Echo Channel 1 Level Channel 2 Level Channel 3 Level 2 selectores MIC LINE Master Volume low high selector AUX MP3 Echo Channel 1 Level Channel 2 Level Channel...

Page 50: ...del micr fono de mano 285 g Material del micr fono de mano Aluminio negro Peso de la petaca transmisora 80 g sin pilas Material de la petaca trans misora ABS Especificaciones generales Tensi n el ctri...

Page 51: ...5 18 000 Hz THD 0 002 0 002 Poziom ci nienia akustyczne go 1 W 1 m 96 dB 96 dB Maksymalny poziom ci nienia akustycznego 115 dB 115 dB Zabezpieczenia zabezpieczenie przeci eniowe zabezpieczenie nadpr d...

Page 52: ...u RF RF LED czerwony AF LED zielony Wtyczki TNC antena odbiornika TNC antena odbiornika Moc wyj ciowa RF maks 10 mW High Low 10 mW Waga mikrofonu r cznego 285 g Waga mikrofonu r cznego aluminium czar...

Page 53: ...uito Controlli Volume generale low high interruttore AUX MP3 Echo Channel 1 Level Channel 2 Level Channel 3 Level 2 interruttori MIC LINE Volume generale low high interruttore AUX MP3 Echo Channel 1 L...

Page 54: ...titore a mano 285 g Materiale del trasmettitore a mano Alluminio nero Peso del trasmettitore portatile 80 g senza batterie Materiale del trasmettitore portatile ABS Specifiche generali Tensione di ese...

Page 55: ...t werden FR GARANTIE FABRICANT LIMITATION DE RESPONSABILIT Nos conditions actuelles de garantie et de limitation de responsabilit sont disponibles l adresse suivante http www adamhall com media shop d...

Page 56: ...ewentualne sprawdzenie uzgodnionych umownie warunk w utylizacji urz dze Niniejszy produkt nie mo e by utylizowany razem z innymi odpadami przemys owymi IT MANUFACTURER S WARRANTY LIMITATION OF LIABILI...

Page 57: ...57...

Page 58: ...58...

Page 59: ...59...

Page 60: ...60 Adam Hall GmbH Daimlerstrasse 9 61267 Neu Anspach Germany Tel 49 0 6081 9419 0 Fax 49 0 6081 9419 1000 web www adamhall com e mail mail adamhall com WWW LD SYSTEMS COM REV 02...

Reviews: