39
5
m
m
.
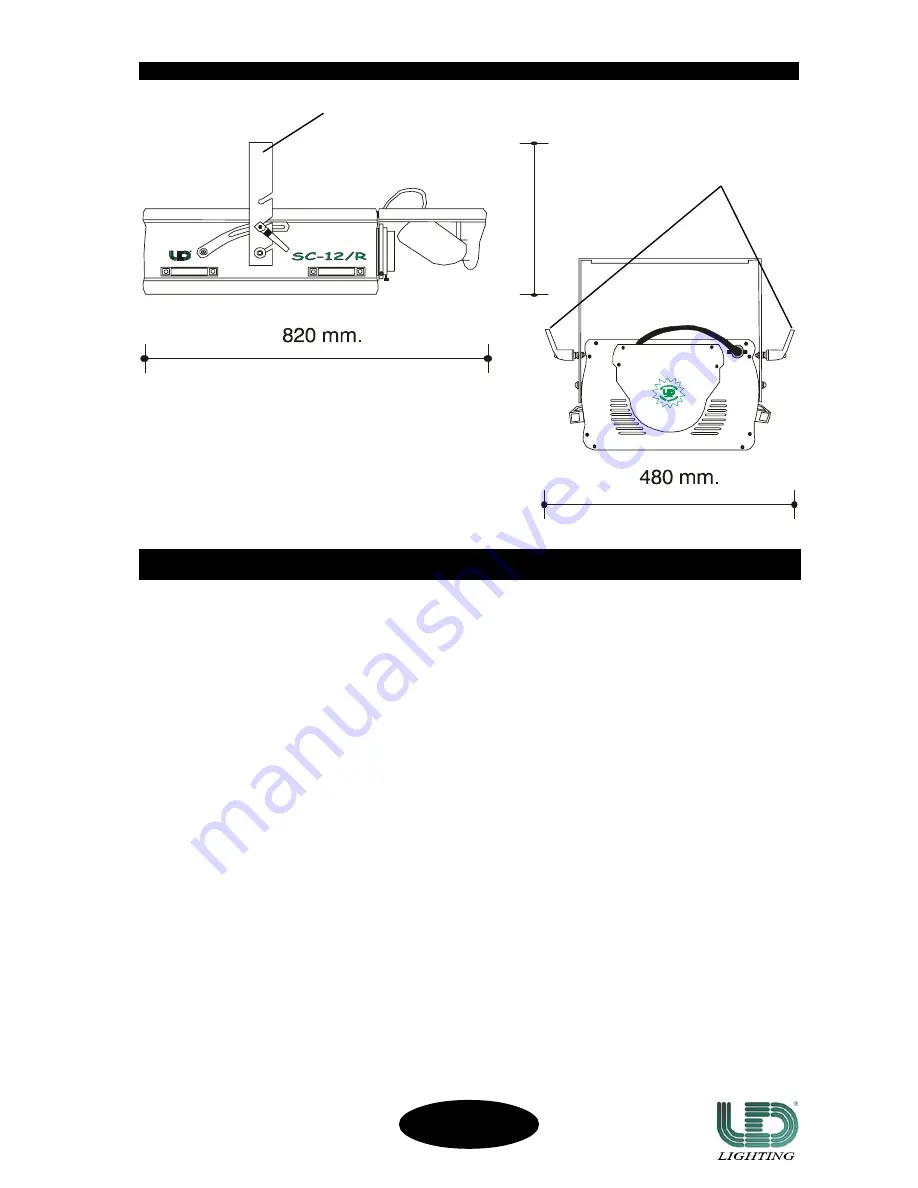
fig. 1
5
TECHNICAL FEA
TECHNICAL FEA
TECHNICAL FEA
TECHNICAL FEA
TECHNICAL FEATURES
TURES
TURES
TURES
TURES
BRACKET
MANUAL ORIENTATION
KNOBS
ASSEMBLING
ASSEMBLING
ASSEMBLING
ASSEMBLING
ASSEMBLING
!
Before installing the SC-12/R, make sure that the carrying structure is safe and able to support the weight of
the unit.
The SC-12/R is equipped with a bracket with three holes (diam. 10 mm.) to fix clamps and/or screw bolts (fig. 1).
To orientate the unit, follow these instructions:
1) Unscrew the knobs placed at the both sides of the unit (fig. 1);
2) Orientate the unit in the preferred position;
3) Screw the above said knobs.
!
Once finished make sure that the unit is correctly fixed and stable.
!
Always make sure that you are using a safety chain.
!
Do not install the unit outdoor directly exposed to rain or moisture.
!
To avoid installing the projector close to heat sources.
!
The unit must be at a minimum distance of 30 cm. from the walls or from any inflammable material and 1 mt.
from lighted objects.
!
The unit must be placed where it could be easily aerated. To avoid obstructing the in/out air gratings.
SC-12/R
CODE 991247


