The Z-11Pro has a total of 8,000 3-D frequency memories. There are 2,000 memories for
each
of
four separate antennas. When you transmit on or near a previously tuned frequency, you can use
“Memory Tune” to reset the tuner in only a fraction of a second. The process of storing tuning
settings in memory is completely automatic; your Z-11Pro “learns” as you use it, adapting itself
to all of the bands and frequencies you use.
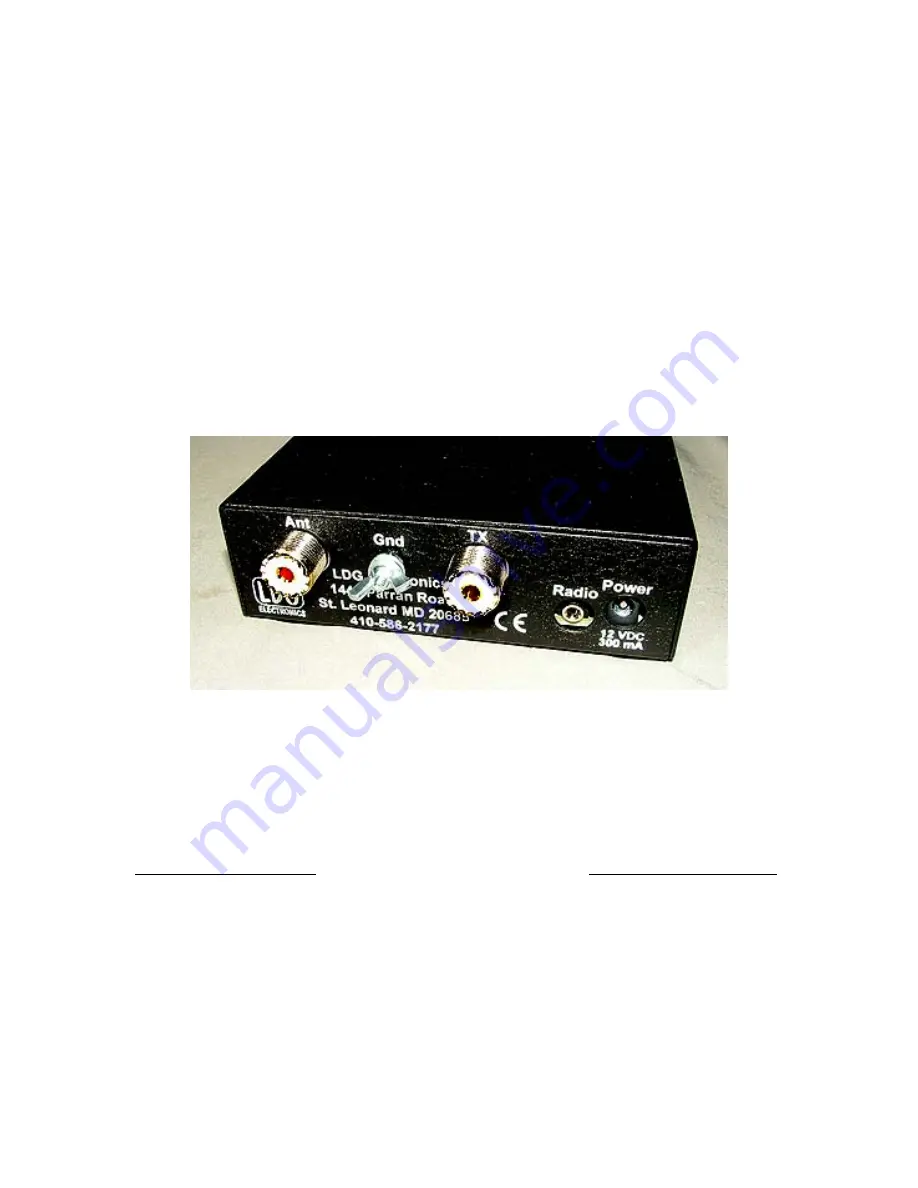
On the back panel, there are five connectors:
•
RF input (marked “
TX
”, standard SO-239 connector)
•
Antenna connector (marked "
Ant
", standard SO-239 connector)
•
DC power in (2.5 by 5.5 mm power jack marked "
Power
", center positive)
•
Stereo 1/8” jack marked "
Radio
" for connecting a control cable to a compatible
transceiver
•
Ground connector (wing nut)
Installation
Your Z-11Pro tuner is intended for indoor use only; it is not water resistant. If you use it outdoors
(Field Day, for example) you must protect it from rain. The Z-11Pro is designed for use with
coax-fed antennas. If you wish to use it with longwires or antennas fed with a balanced
transmission line (e.g., ladder line), an external balun is required; either the LDG RBA-4:1 or
RBA-1:1 is ideal, depending on the antenna and transmission line used.
Always turn your radio off before plugging or unplugging anything. Your radio may be damaged
if you connect or disconnect a cable with the unit powered up. Note that some radios do not
power down the tuner even when the radio is turned off. To be safe, unplug the tuner's power
connector before plugging or unplugging anything else.
Connect the HF antenna jack on your transmitter or transceiver to the
TX
jack on the back of your
Z-11Pro tuner using the coax jumper with standard PL-259 plugs. Attach your antenna lead-in
coax to the
Ant
jack on the back of your Z-11Pro tuner.
6


