1
Introduction
This manual contains information for the correct
maintenance of your 2R-III™ rear-loader garbage truck.
Maintenance personnel should read and understand
this information before doing repairs and maintenance
on the vehicle. For information on how to safely and
efficiently operate the 2R-III™, please refer to the
Operator’s Manual
that is provided with your unit.
Introducing the 2R-III™
The main purpose of the
2R-III™
is to safely and
efficiently
load, compact, transport and unload refuse.
The following describes how the unit performs those
tasks in the most basic terms. For a more detailed
description of the unit and its components, read the
complete 2R-III™
Maintenance Manual
. Before going
further, you will need to become familiar with specific
terms that are used when referring to the 2R-III™
garbage truck
.
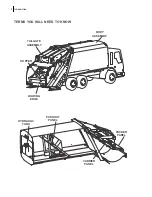
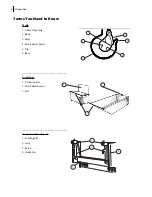
Terms You Will Need to Know
Body’s main components are the
hopper
, the
packer
panel
, the
tailgate
, the
pushout panel
, and the
carrier
panel
. During collection, refuse is contained inside the
body
.
Some trucks may be equipped with a
cart tipper
or a
push bar
. If the latter is installed, a
reeving cylinder
or
a
winch
is provided.
The
hopper
is the area of the body where refuse is
dumped. The
packer panel
is the piece of equipment
that pushes refuse into the body. The
pushout
(or
ejection
)
panel
is the piece of equipment that is used
to eject garbage at landfill sites. The
tailgate
is the rear
pivotal door that prevents refuse from exiting the body
during collection. At landfill, the
tailgate
is raised to
allow discharge of refuse.
Operating controls for the packer, carrier panel,
container handling system, and tipper
(optional) are
located on the right-hand side of the tailgate.
Operating controls for the pushout panel and tailgate
are located on the left-hand side of the body, not far
from the cab.
Summary of Contents for 2R-III
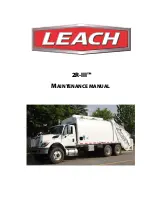
Page 1: ...2R III MAINTENANCE MANUAL...
Page 2: ......
Page 3: ...2R III MAINTENANCE MANUAL...
Page 5: ......
Page 6: ......
Page 20: ...10 Introduction...
Page 42: ...32 Safety...
Page 58: ...48 Preventive Maintenance Figure 5 1 Hydraulic tank w return filter 1 2 3 4 5 6 7 8...
Page 66: ...56 Preventive Maintenance...
Page 102: ...92 Troubleshooting...


