Service & Repair 107
7.
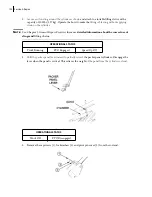
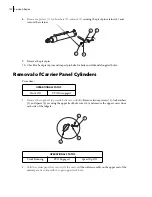
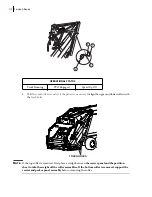
Disconnect both the case end (1) and rod end (2)
pressure tubes from the carrier cylinder.
Immediately plug the pressure tubes and cap the cylinder ports
to keep fluid in and dirt out.
8.
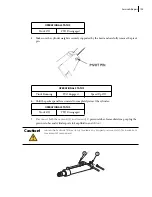
Remove capscrew (1), nut (2) and lockwashers (3)
securing the cylinder pivot pin retainer (4)
and remove
retainer.
9.
Carefully remove the pivot pin and lift out the cylinder
assembly.
10.
Check for bent pivot pins and inspect pin hubs for broken welds and elongated holes.
N
OTE
:
If the cylinder is not to be installed immediately, keep ports sealed to prevent dirt from
entering.
Disassembly of Operating Cylinders
Procedure for disassembling operating cylinders:
1.
Remove all grease fittings, clean parts, drain fluid
and follow all other applicable guidelines for
disassembly provided in Chapter 3
General Repair Practices
before proceeding to disassemble the
cylinder.
2.
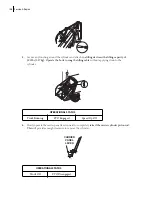
Secure the case end of the cylinder to the floor or workbench.
3.
Secure the rod end of the cylinder to an overhead
hoist or other suitable lifting mechanism with a
minimum
lifting capacity of 500
lbs
(227
kg).
2
1
1
4
3
2
Summary of Contents for 2R-III
Page 1: ...2R III MAINTENANCE MANUAL...
Page 2: ......
Page 3: ...2R III MAINTENANCE MANUAL...
Page 5: ......
Page 6: ......
Page 20: ...10 Introduction...
Page 42: ...32 Safety...
Page 58: ...48 Preventive Maintenance Figure 5 1 Hydraulic tank w return filter 1 2 3 4 5 6 7 8...
Page 66: ...56 Preventive Maintenance...
Page 102: ...92 Troubleshooting...


