118 Service & Repair
N
OTE
:
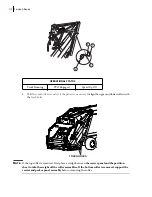
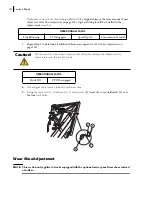
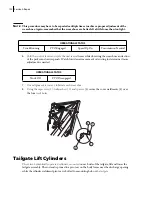
Before proceeding with the replacement of a wear shoe, you will need to slightly lift the
carrier
and packer panel assembly with a lifting crane to take the weight off the wear shoes and gain
access to the shoes. Ensure that the carrier and packer panel assembly is properly fixed to the
crane before proceeding with the shoe replacement. For replacement purposes, proceed from
the bottom to the top in horizontal fashion. If need be, replace all bottom wear shoes, then all
top wear shoes.
4.
Replace any wear shoe that is excessively worn or cracked
. To do so:
4 a.
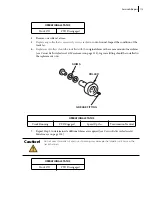
Remove all 4 screws that secure the plastic plates to the wear shoe assembly (see Figure
8-2).
4 b.
Take the plates off from the wear shoe assembly (see Figure 8-2).
4 c.
Remove the wear shoe pin (see Figure 8-2).
At the center of the pin, you will find a cylindrical hole with a thread in it. Partially insert a
screw in the hole then pull it out using a puller tool or some other tool of the same type.
4 d.
Slightly lift the packer and carrier panel assembly using a lifting crane. See note above.
4 e.
Remove the wear shoe that needs to be replaced.
N
OTE
:
In cases where only the top and bottom chromium plates (see Figure 8-2) are worn out but the
rest of the wear shoe assembly shows no signs of wear, there is no need to replace the complete
wear shoe; only the plates that are damaged by wear and tear should be replaced.
OPERATIONAL STATUS
Truck Off
PTO Disengaged
TRAC
K
HOLES
Summary of Contents for 2R-III
Page 1: ...2R III MAINTENANCE MANUAL...
Page 2: ......
Page 3: ...2R III MAINTENANCE MANUAL...
Page 5: ......
Page 6: ......
Page 20: ...10 Introduction...
Page 42: ...32 Safety...
Page 58: ...48 Preventive Maintenance Figure 5 1 Hydraulic tank w return filter 1 2 3 4 5 6 7 8...
Page 66: ...56 Preventive Maintenance...
Page 102: ...92 Troubleshooting...

