background image


2(8) 

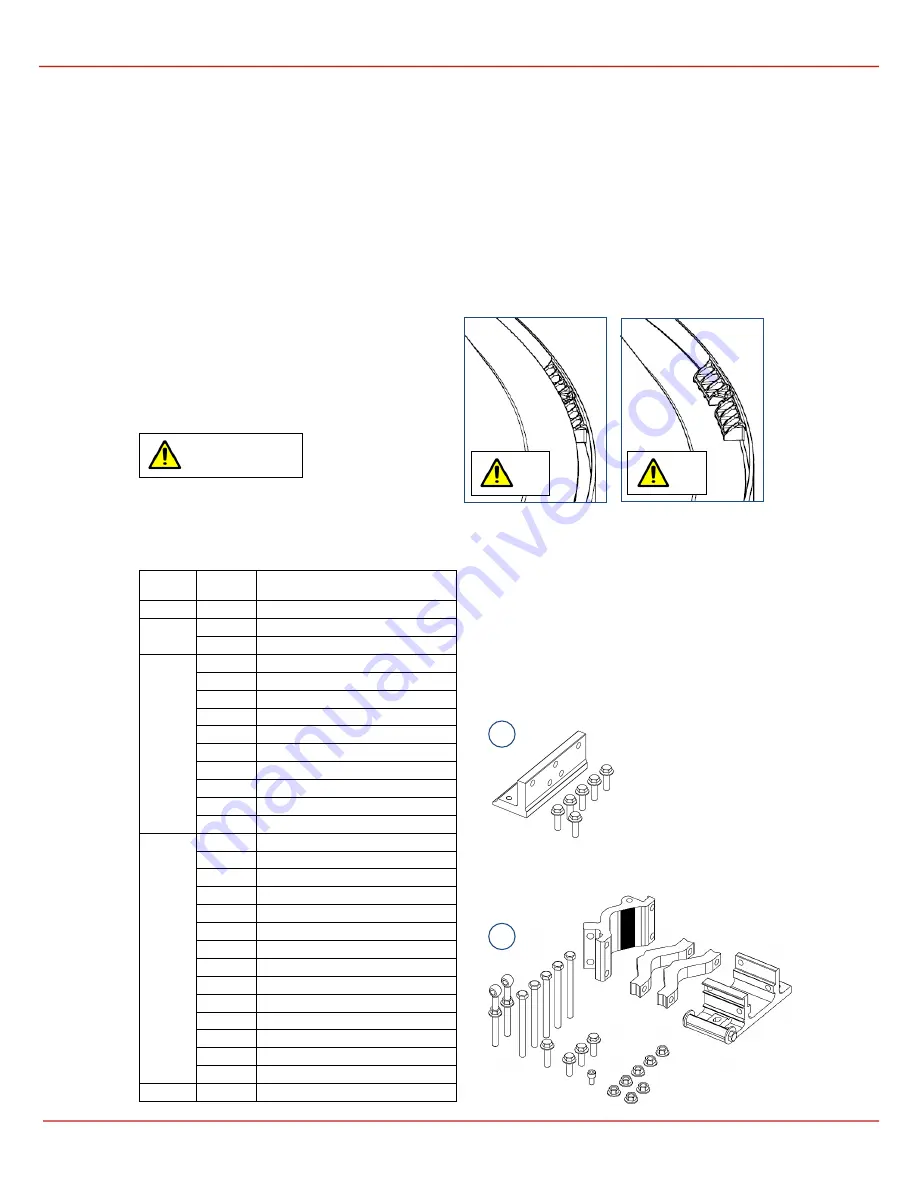
Not  
OK! 


OK! 


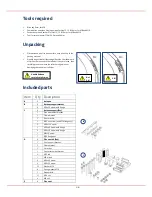
Tools required 


Allen key 6mm; for M8. 


Combination wrenches (ring/open jaw) for Hex 13, 15 & 16mm; for M8 and M10. 


Socket wrench and sockets for Hex 13, 15 & 16mm; for M8 and M10. 


Tool for torque levels; 17Nm, 24Nm and 49Nm.  

Unpacking 


Place antenna on a flat clean surface, such as on top of the 
packing material. 


Visually inspect that all fastenings (8pcs) on the radome are 
still properly mounted to the reflector. If any are loose,  then 
carefully press them over the reflector edge, without 
damaging the radome or reflector. 


Included parts 


Item  Qty  Description 

Antenna 

Antenna support bracket 


M10x35 screw with flange 

Antenna support (Box)


Pipe attachment bracket 


Clamp bracket 


Pivot bracket 


M10 link screw (and M10 flange nut) 


M10x120 screw 


M10x40 screw with flange 


M10x30 screw with flange 


M8x16 screw 


M10 flange nut 

Side strut kit (Box) 


Strut support bracket 


Clamp bracket 


L-bracket 


Strut attachment bracket 


M10 rod 


M8 U-bolt 


M10x30 screw 


M10x25 screw 


13 

Washer M10 


Spring washer M10 


Washer M8 


11 

M10 nut 


M8 nut 

E


1


Side strut


Handle Antenna 
carefully at all times. 


8x 

8x 

Summary of Contents for 1.2m Antenna

Page 1: ...any liability for the results of improper or unsafe installation inspection maintenance or removal practices Torsgatan 5B Telephone 46 31 386 11 00 SE 411 04 G TEBORG customer lat leax com SWEDEN www...

Page 2: ...reflector edge without damaging the radome or reflector Included parts Item Qty Description A 1 Antenna B 1 Antenna support bracket 6 M10x35 screw with flange C 1 Antenna support Box 1 Pipe attachment...

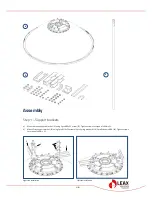
Page 3: ...acket 1 using 5pcs M10x35 screw 2 Tighten screws to torque of 49Nm 5 b Mount Strut support bracket 3 using 3pcs M10x25 screws 3pcs Spring washer M10 3pcs Washers M10 4 Tighten screws to torque of 49Nm...

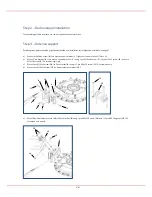
Page 4: ...hten screw to torque of 17Nm 5 b Mount Pivot bracket 6 to Antenna support bracket 1 using 1pcs M10x40 screw 7 1pcs M10x35 screw 8 and 1pcs M10x30 screw 9 Fit screws finger tight c Mount 2pcs M10 link...

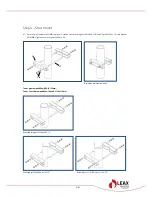
Page 5: ...d 17 and 4 2pcs M10 nut 4 1pcs Washer M10 18 Tighten nuts to torque of 49Nm 5 Alternative bracket orientation Tower pipe compatibility 50 115mm Tower L section compatibility L40x40 L110x110mm Assembly...

Page 6: ...mm using 2pcs Clamp bracket 1 and 4pcs M10 flange nut 2 b Position the antenna so it will point along the radio link path and then tighten nuts to torque of 49Nm 5 c Mount L bracket 3 to Strut support...

Page 7: ...ent bracket 10 using 1pcs M8 U bolt 14 and 2 2pcs M8 nut 2 1pcs Washer M8 15 g Respect the maximum orientation angle indicated below This angle may be limited by the radio equipment h After completing...

Page 8: ...15 c On completion tighten screws to torque of 49Nm 5 Azimuth adjustment a Ensure 5pcs M10 nut 2 3 and 2pcs M10 screw 4 are slightly loose b Move 4pcs M10 nuts 2 along Azimuth screws to adjust direct...

Reviews: