Reversing the door opening
Changing the internal light
Useful hints
Spare parts supplied:
2 x Upper door top hinge covers
1 x Upper door centre hinge bush/door
stopper assembly
2 x Hinge pin bushes
1 x Hinge pin hole blanking plug
Procedure:
•
Switch off the fridge freezer at the mains
and pull out the plug.
•
Remove all the shelves and loose items
from the cabinet.
•
Gently prise off the plastic hinge covers on
both sides of the upper door top trim and
top front panel using a small flat-headed
screwdriver.
•
Lie your fridge freezer on its back,
protecting it and the floor with some of its
polystyrene packing or other soft object.
•
Unscrew and remove the lower hinge.
•
Carefully remove the lower door by sliding it
from the centre hinge. Stand the door
upright in a safe place.
•
Open the upper door and unscrew and
remove the centre hinge. Remove the door
and stand it in a safe place.
•
Unscrew and remove the upper hinge.
•
Using a pair of pliers, unscrew the hinge pin
from the top hinge bracket and replace it
on the opposite side. Replace the top hinge
on the opposite side of the cabinet.
•
Reposition the left hand side feet to the
opposite side of the cabinet.
•
Taking care not to mark the doors,
reposition the hinge pin bushes and plugs
on the top of the doors to the opposite
side.
Unscrew and remove the upper door centre
hinge pin bush / door stopper. This part
cannot be used on the other side of the door,
a replacement is supplied.
•
Fit the replacement upper door centre
hinge pin bush / door stopper.
•
Reposition the three small plastic plugs
which covered the centre hinge holes onto
the other side to fill the holes left empty.
•
Locate and refit the upper door onto the top
hinge.
•
Fit the centre hinge pin into the upper door
hinge bush. One screw of the hinge bracket
can be fixed with the door closed, to fix the
other, open the door.
•
Locate and fit the lower door onto the
centre hinge.
•
Locate and fit the lower door bottom hinge.
•
Stand the cabinet upright and adjust the
front feet if necessary to have it standing
level.
•
Check that the doors open and close easily
and that there are no gaps between the
door seal and the cabinet which could
allow air into the cabinet.
•
Check that all the hinge screws are
tightened, without being over tightened.
•
Replace all fittings and loose items back
into the cabinet.
•
Fit the upper door top trim and the front top
panel hinge covers.
•
Wait for 4 hours for the coolant to settle
before switching on.
5
Before carrying out the bulb replacement
always switch off
and disconnect the
electricity supply.
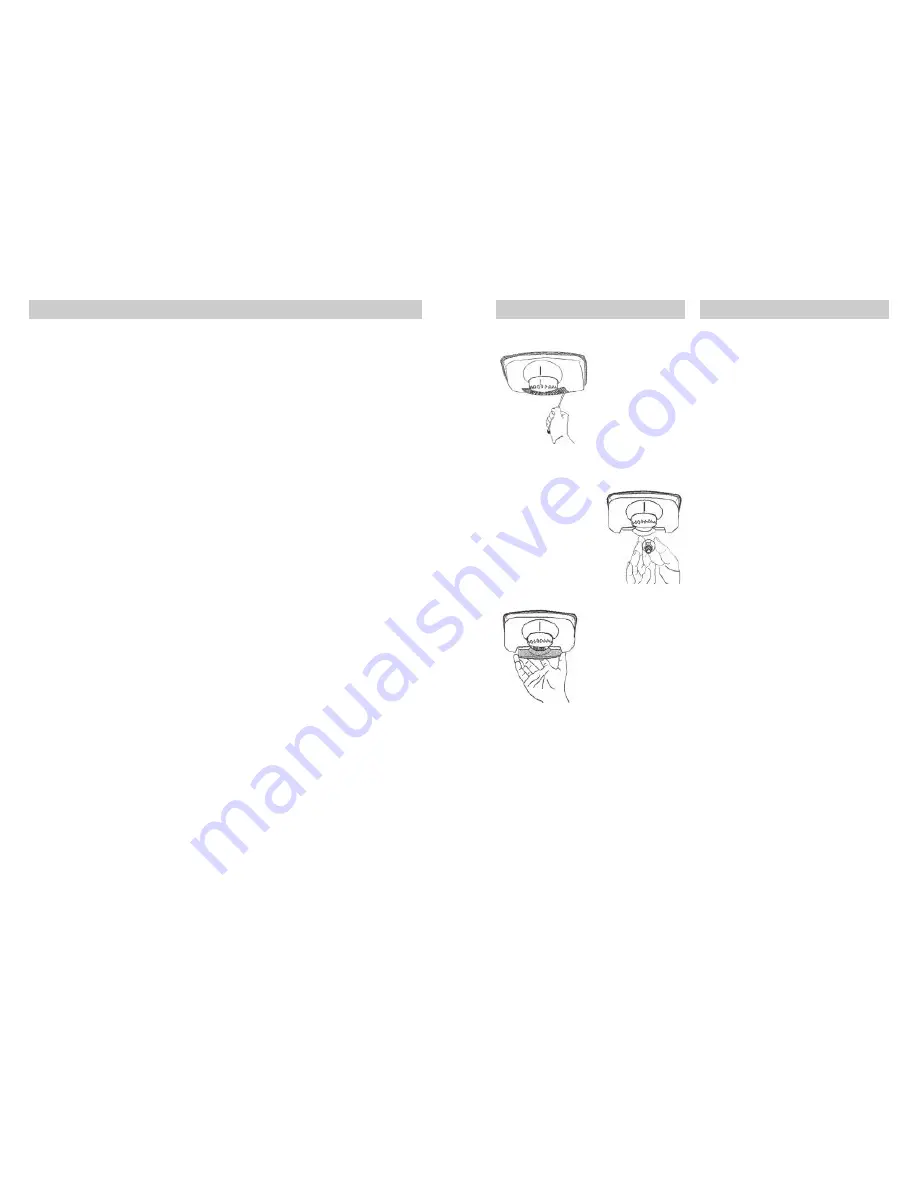
Use a flat tipped
screwdriver to
remove the light
cover by inserting
the tip into each of the two recesses to
prise off each side.
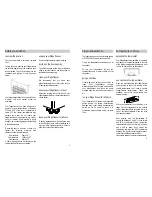
First check that the
bulb hasn’t worked
loose and that it is
screwed securely
into the holder. If the
bulb has failed
replace it with a new
one, 15W SES.
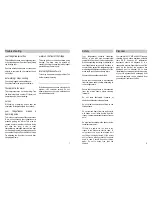
Replace the light
cover by inserting
the rear lug and
pushing up to
locate the two front
lugs.
Re-connect the fridge freezer to the electrical
supply and switch on.
If your appliance is to be out of service for
any length of time ensure that the interior
is carefully cleaned and dried. Leave the
door open and disconnect the plug from
the mains socket.
Carry out regular cleaning as described
previously.
Do not pack shelves too tightly or obstruct
the even distribution of cold air.
Do not leave the cold control at its coldest
setting longer than necessary, freezing of the
contents may occur.
If condensation appears on the outside of
your fridge freezer because it is in a cold
location, cleaning the outside with a good
wax furniture polish may help.
6


