background image

UK - 17 -

CHANGING OF DOOR OPENING DI-

RECTION 

1a-) Unscrew top and bottom screws of head panel.
1b-)Take the head panel off.
1c-) Cut the opposite side of the head panel throughout 

the traced line. 
2a-) Unscrew the screws of top hinge.
2b-) Take the door off.
2c-) Unscrew the pin of the top hinge and assemble it 

to the opposite one.
3-a) Take the kick plate off.
3b-) Cut the opposite side of the kick plate throughout 

the traced line.
3c-) Unscrew the pin of the bottom hinge and assemble 

it to the opposite hole on the hinge.
3d-) Assemble the bottom hinge to opposite side of the 

product.
3e-) Take off the hinge which was assembled with the 

pin.
4a-) Take the bush of the door and insert it to opposite 

hole.
4b-) Unscrew the stopper and assemble it to opposite 

side.
4c-) If the product has door handle, reposition the handle 

according to door handle montage instruction which was 

given with product.
5a-) Insert the door onto the bottom hinge, assemble 

the top hinge and the door together.
5b-) Insert the head panel to its place.
5c-) Insert the kick plate to its place.

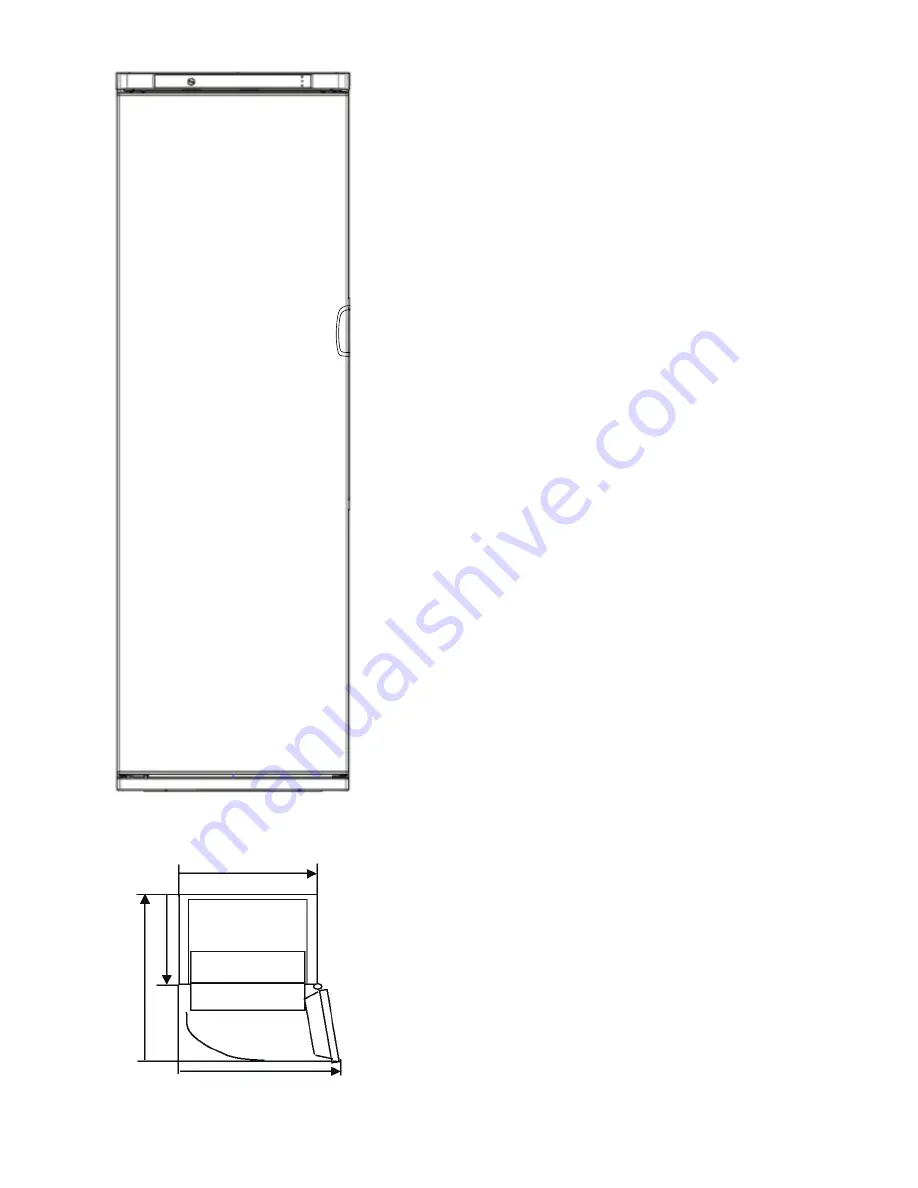
883 mm

595 mm

1094,4 mm

542,5 mm

120°

Summary of Contents for TUN60152W

Page 1: ...USER GUIDE TUN60152W TUN60182W 60cm Frost Free Freezer...

Page 2: ...o answer as many questions as possible and provide you with as much support as possible If however you find something missing or not covered please contact our Customer Care Centre using the number at...

Page 3: ...nd Activating FAST FREEZING Mode 8 Fast Freezing Mode 8 While SF mode is selected 9 Economy mode 9 Warnings about Temperature Adjustments 10 CHAPTER 3 FOOD STORAGE IN THE APPLIANCE 11 CHAPTER 4 CLEANI...

Page 4: ...n off the fridge take the food that needs to be kept in a constant temperature off the fridge and remove the ice gathered in the freezer department periodically The situation is completely different i...

Page 5: ...circuit In the event that the refrigerant circuit is damaged avoid open flames or ignition sources and ventilate the room in which the unit is placed do not use the appliance until you have been advis...

Page 6: ...is symbol It means that used electrical and electronic products should not be mixed with general household waste There is a seperate collection system for these products Attention If you want to dispo...

Page 7: ...authorized electrician for assistance If the plug is damaged in any way do not attempt to use it It must be replaced with a new plug Do not install the appliance in direct sunlight damp or cold condi...

Page 8: ...between Freezer Compartment Indicator Fast Freezing Mode Lamp Economy Mode Lamp When you press once Freezer Compartment Indicator starts to flash Set value is ready to be changed When you press twice...

Page 9: ...our fridge operates with that set value When you press set button until the value for Freezer compartment Indicator reaches 24o C maximum cold position if you press the button again SF letters will fl...

Page 10: ...ls below 32 C If Super Freeze mode is finished automatically SF led will continue to light It is enough to push mode button to turn off SF led Economy mode Your freezer will consume minimum energy at...

Page 11: ...wn occurs Do not pass to another adjustment before completing an adjustment Temperature adjustments should be made according to the frequency of door openings the quantity of food kept inside the frid...

Page 12: ...tents have deteriorated Do not use this food dispose of it as soon as possible The storage life of frozen food depends on the room temperature thermostat setting how often the door is opened the type...

Page 13: ...freeze food that is defrosting or that has already been defrosted These foods must be cooked and eaten For TUN60182W If there is a power cut or malfunction do not open the door This will help maintai...

Page 14: ...apy water Remove the parts individually and clean with soapy water Do not wash in dishwasher Never use flammable explosive or corrosive material like thinner gas acid for cleaning Make sure that your...

Page 15: ...fasten your freezer with thick package bands or strong cords and follow the instructions for transportation on the package for re transportation Remove movable parts drawers etc or fix them into the f...

Page 16: ...UK 15 2 3 3a 3b 3c 3d 3e 2a 2b 2c...

Page 17: ...UK 16 4 4a 4b 5 5a 5c 5b...

Page 18: ...of the bottom hinge and assemble it to the opposite hole on the hinge 3d Assemble the bottom hinge to opposite side of the product 3e Take off the hinge which was assembled with the pin 4a Take the bu...

Page 19: ...fail or there is a problem in the cooling system Call service immedi ately LF Freezer compartment is not cold enough This warning appears if there has been a power failure for a long period and when t...

Page 20: ...g will be disappear in 15 minutes You don t have to call your service this condition may appear due to reasons above You can keep storing your foods in your freezer If LF warning will not disappear in...

Page 21: ...ster when you open the doors more frequently especially if the humidity of the room is high Build up of water drops on the rear wall after automatic defrosting is normal in Static Models If the door i...

Page 22: ...re settings section for the suggested temperature control settings Do not block cold air vents Doing so causes the freezer to run longer and use more energy Keep freezer full Level the freezer so that...

Page 23: ...ing capacity 16kg 24h Climate class T N Size H x W x D mm 1550 X 595 X 634 Net weight 62 Noise 43 dB A Supplier s name or trade mark Model Item TUN60182W Type of appliance GT N391K The energy efficien...

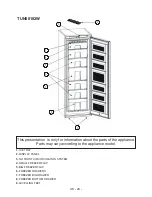
Page 24: ...y according to the appliance model 1 ICE TRAY 2 DISPLAY PANEL 3 NO FROSTAIR CIRCULATION SYSTEM 4 SMALL FREEZER FLAP 5 BIG FREEZER FLAP 6 FREEZER DRAWERS 7 FREEZER BOTTOM DRAWER 8 LEVELLING FEET CHAPTE...

Page 25: ...SMALL FREEZER FLAP 5 BIG FREEZER FLAP 6 FREEZER DRAWERS 7 FREEZER BIG DRAWER 8 FREEZER BOTTOM DRAWER 9 LEVELLING FEET This presentation is only for information about the parts of the appliance Parts m...

Page 26: ...proceed as follows The green and yellow wire must be connected to the terminal in the plug which is marked with the letter E or with the earth symbol or coloured green and yellow The blue wire must b...

Page 27: ...recorded message and be given a number of options This indicates that your call has been accepted and is being held in a queue Calls are answered in strict rotation as our Customer Care Representativ...

Reviews: