background image

4

2

1

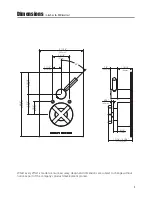
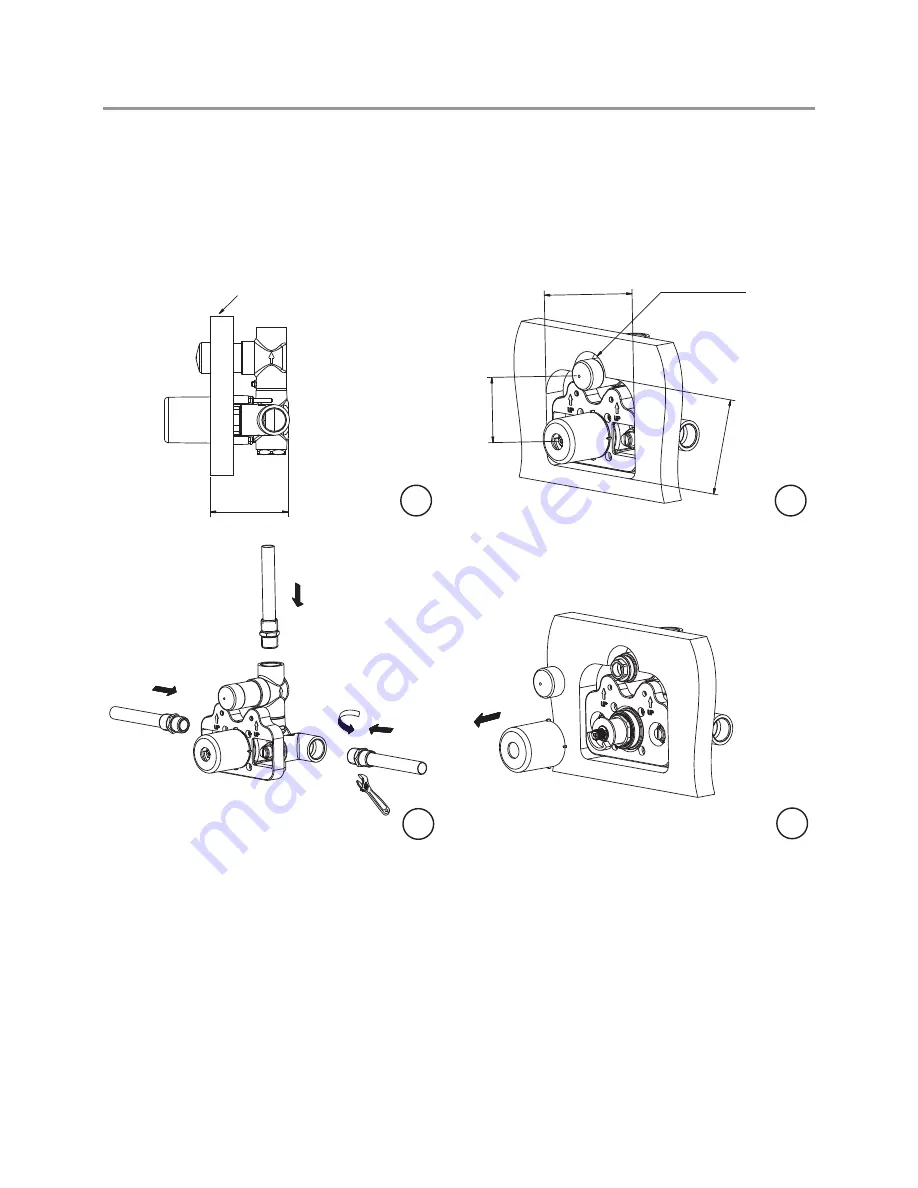
Marble wall

3 1/8 - 4 1/8”

80-105

3

5 3/8"~5 1/2"

(136mm~140mm)

1 3/8"~1 5/8"

(35mm~42mm)

2 5/8"

(67mm)

3 9/16"~4 1/8"

(90mm~105mm)

4

Steps 1-4

Installation Procedure

Lefroy Brooks always recommends that plumbing products be installed by a licensed professional. 
Shut off main water supply before installation.

1


Before installing the valve into the wall, please note that a distance between 3 1/8”~ 4 1/8”  


(80mm ~ 105mm) from the wall surface to the back of valve should be left, so that it can fit the    

 trim 

kit.

2


Install valve assembly into the wall.

3


Cut a hole on the wall surface for fitting the trim kit. The hole dimension should be as shown.

4


Throw away the protective caps only when the building construction is completed and you are    


ready to fit the trim.

Summary of Contents for X1-2010

Page 1: ...INSTALLATION OPERATING MAINTENANCE INSTRUCTIONS X1 2010 CROSS HANDLE THERMOSTATIC WITH ZU LEVER FLOW CONTROL TRIM ONLY TO SUIT M1 4201 ROUGH...

Page 2: ...2 Contents Dimensions 3 InstalLation Procedure 4 Parts List 7 Fault Finder 8 Safety Tips Care and Maintenance 9 Guarantee 10...

Page 3: ...16 3 1 16 212 5mm 145mm 72mm 67mm 42mm 55mm 27 5mm 22 2mm 49mm 4 5mm 15mm 37 78 5mm 3 Dimensions in Inches Millimetres Whilst every effort is made to ensure accuracy design and dimensions are subject...

Page 4: ...water supply before installation 1 Before installing the valve into the wall please note that a distance between 3 1 8 4 1 8 80mm 105mm from the wall surface to the back of valve should be left so th...

Page 5: ...n the ow controller Turn the thermostatic cartridge till you get the water temperature at 38 Suggestion attach a hose to the outlets and guide the water tothe basin or another container to test the te...

Page 6: ...onal Shut off main water supply before installation 9 Install the canopies 10 Fix the front plate with screws 11 Fix the canopy with screw When it is xed ensure the temperature limit button is in the...

Page 7: ...18 11 Plug 028008 12 Handle seat 215479 13 Button 036272 14 Spring 005157 15 Pin 003147 16 Handle stem 108926 17 Handle sleeve 038104 18 Adaptor 205469 19 Screw 008255 20 Screw 008186 21 Extension ste...

Page 8: ...Fault Finder Fault Cause Recti cation Wobbling of handle The xing screw comes loose Check for xing screw and re tighten it properly Wobbling of canopy The canopy comes loose Check and tighten the cano...

Page 9: ...ater pressure between hot and cold supplies to the mixing valve the pressures should be equalized by a plumber in accordance with best practice and legislation Maintenance Your new bathroom faucet is...

Page 10: ...them to be free of design and production faults at the time of delivery and that with correct use and care in accordance with our printed instructions they will function reliably Guarantee period s Th...

Page 11: ...s are protected by law and the use or reproduction outside the terms of an agreement is prohibited The right to modify designs and dimensions is reserved Christo Lefroy Brooks is a member of ACID Anti...

Reviews: