16
®
5 installation
Données par défaut et fonctions spéciales
A l’issue du bon allumage de l’UPS, appuyer sur le bouton Fonctions spéciales
pour passer à
l’option montrée sur la figure Q1.
Q1
avertisseur sonore “On”
Q2
avertisseur sonore “Off”
Appuyer sur la touche
pour modifier les réglages de l’UPS.
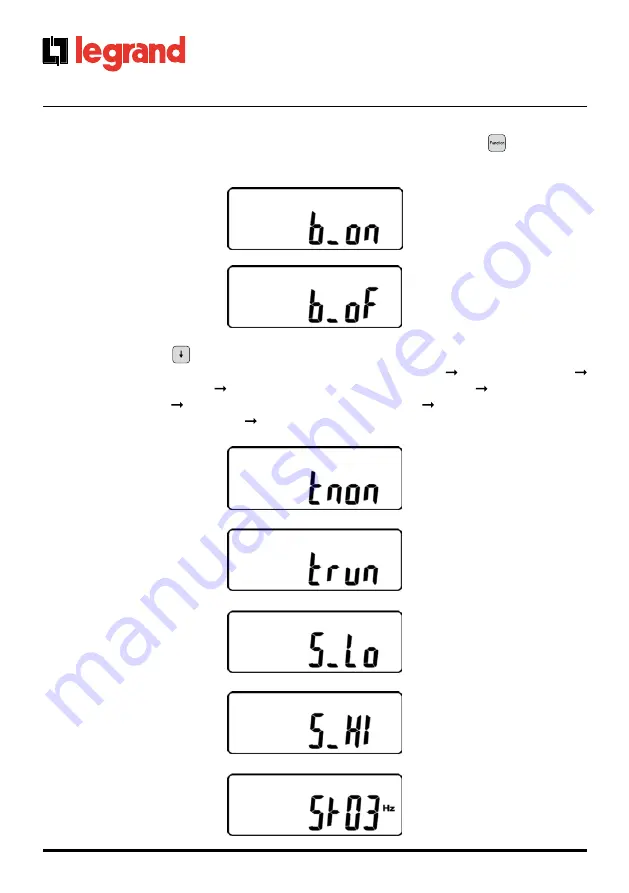
Sur l’écran, s’affichent successivement : figure Q1 (Avertisseur sonore) figure r1 (Self-test)
figure s1 (Tension de By-pass) figure T (Fréquence de sortie synchronisée) figure U (Tension
de sortie du variateur) figure V1 (Modalités de fonctionnement) figure W (Réglage fin de la
tension de sortie), figure X (Id UPS) figure Y (Modalité de fonctionnement en parallèle).
r1
Self-test non Actif
r2
Self-test Actif
s1
Intervalle Tension
de by-pass faible
s2
Intervalle Tension
de by-pass étendu
T
Intervalle de Fré/-3 Hz
Summary of Contents for 3 100 53
Page 1: ... Part LE05380AC 07 13 01 GF Daker DK 4 5 6 10 kVA Manuel d installation Installation manual ...
Page 10: ...10 5 Installation Configuration tower A1 A1 Optional A1 A1 Step 1 Step 2 ...
Page 11: ...11 FR Daker DK 4 5 6 10 kVA Ups armoire batterie A4 Step 1 Step 2 ...
Page 12: ...12 5 Installation Configuration rack 19 B2 B1 S3 90 Step 1 Step 2 Step 3 Step 4 ...
Page 13: ...Daker DK 4 5 6 10 kVA 13 FR Step 5 Step 6 ...
Page 32: ...32 5 Installation Tower configuration setup A1 A1 Optional A1 A1 Step 1 Step 2 ...
Page 33: ...Daker DK 4 5 6 10 kVA 33 EN UPS battery cabinet A4 Step 1 Step 2 ...
Page 34: ...34 5 Installation B2 B1 S3 90 Step 1 Step 2 Step 3 Step 4 Configuration rack 19 ...
Page 35: ...Daker DK 4 5 6 10 kVA 35 EN Step 5 Step 6 ...
Page 54: ...54 5 Installazione Configurazione Tower A1 A1 Optional A1 A1 Step 1 Step 2 ...
Page 55: ...Daker DK 4 5 6 10 kVA 55 IT UPS armadio batteria A4 Step 1 Step 2 ...
Page 56: ...56 5 Installazione Configurazione rack 19 B2 B1 S3 90 Step 1 Step 2 Step 3 Step 4 ...
Page 57: ...Daker DK 4 5 6 10 kVA 57 IT Step 5 Step 6 ...
Page 76: ...76 5 Installation Tower konfiguration A1 A1 Optional A1 A1 Step 1 Step 2 ...
Page 77: ...Daker DK 4 5 6 10 kVA 77 DE USV batteriefach A4 Step 1 Step 2 ...
Page 78: ...78 5 Installation Konfiguration rack 19 B2 B1 S3 90 Step 1 Step 2 Step 3 Step 4 ...
Page 79: ...Daker DK 4 5 6 10 kVA 79 DE Step 5 Step 6 ...
Page 98: ...98 5 Instalación Configuración tower A1 A1 Optional A1 A1 Step 1 Step 2 ...
Page 99: ...Daker DK 4 5 6 10 kVA 99 ES SAI armario batería A4 Step 1 Step 2 ...
Page 100: ...100 5 Instalación Configuración rack 19 B2 B1 S3 90 Step 1 Step 2 Step 3 Step 4 ...
Page 101: ...Daker DK 4 5 6 10 kVA 101 ES Step 5 Step 6 ...
Page 113: ...Note 113 Daker DK 4 5 6 10 kVA ...
Page 114: ...114 Note ...
Page 115: ......


