Installation Instructions
RPAX1
7
6.
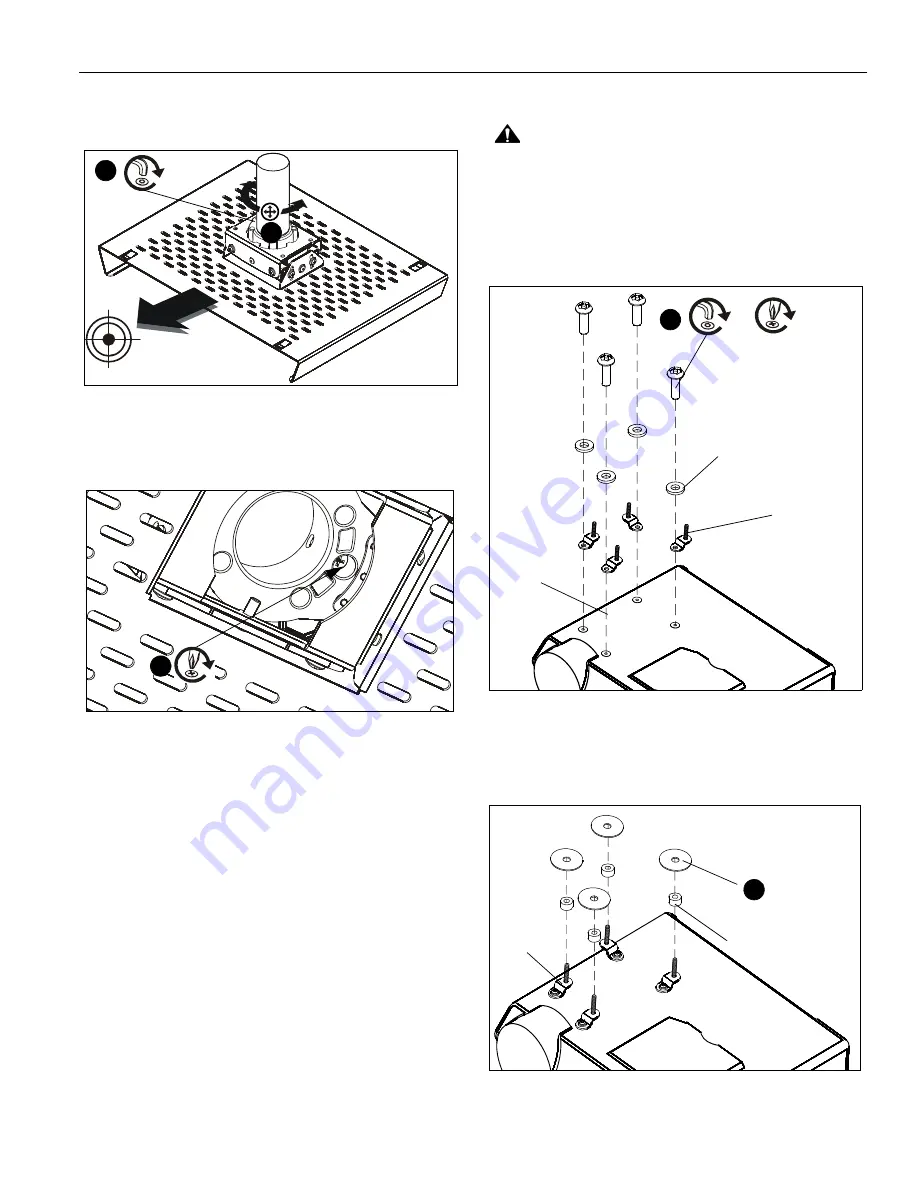
Turn RPAX1 sleeve clockwise or counterclockwise until the
front of the RPAX1 is facing target. (See Figure 4)
Figure 4
7.
Tighten set screw. (See Figure 4)
8.
Tighten security screw until set screw cannot be seen from
set screw access hole. (See Figure 5)
Figure 5
Attaching Projector Security Legs
CAUTION:
Using screws of improper length may damage
your projector! Proper screws will have adequate thread
engagement without contacting the bottom of projector
mounting holes.
1.
Attach the projector security legs (R) to the projector, using
the correct size screws (A-L) and washers (M or N) for your
specific projector. (See Figure 6)
Figure 6
2.
Add washers (U) to the projector security legs (R). Add
spacers (T) as necessary to the projector security legs (R).
(See Figure 7)
Figure 7
6
7
set
screw
8
security
screw
(A-L) x 4
(M) or (N) x 4
(R) x 4
Projector
or
8
(T) x 4
(U) x 4
2
(R) x 4


