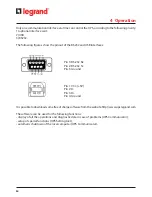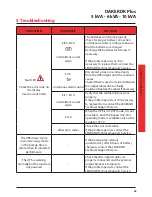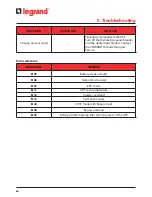
57
DAKER DK Plus
5 kVA - 6 kVA - 10 kVA
Installa
tion manual
4.3.2 Cold start
1. Make sure the internal batteries or the external battery cabinets are connected to the UPS.
2. Press
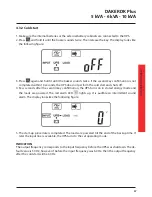
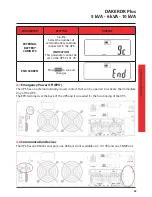
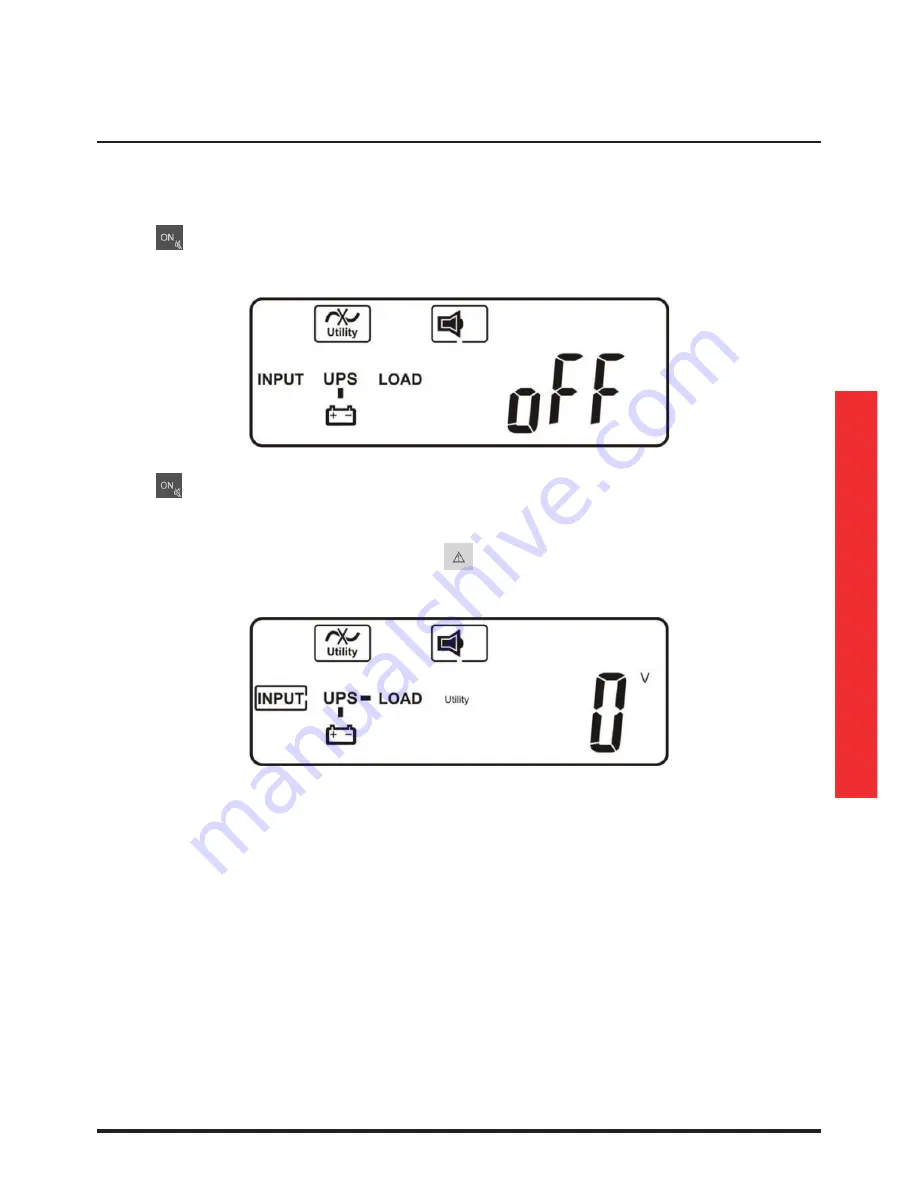
and hold it until the buzzer sounds twice. Then release the key. The display looks like
the following figure:
3. Press
again and hold it until the buzzer sounds twice. If the second key confirmation is not
completed within 10 seconds, the UPS does not perform the cold start and shuts off.
4. Few seconds after the second key confirmation, the UPS turns on in stored energy mode and
the loads are powered. The red alarm LED
lights up. It is audible an intermittent sound
alarm. The display looks like the following figure:
5. The start-up procedure is completed. The loads are powered till the end of the backup time. If
later the input line is available, the UPS turns to the set operating mode.
INDICATION
The output frequency corresponds to the input frequency before the UPS was shutdown. The de-
fault value is 50 Hz; however if before the input frequency was 60 Hz, then the output frequency
after the cold start will be 60 Hz.
Summary of Contents for DAKER DK Plus 3 101 73
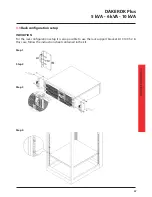
Page 10: ...10 3 2 2 Onduleur armoire batteries option 3 Installation Phase 1 Phase 2 ...
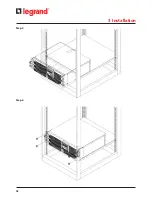
Page 12: ...12 3 Installation Phase 5 Phase 6 ...
Page 38: ...38 ...
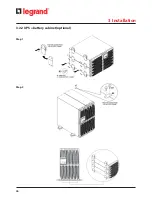
Page 46: ...46 3 2 2 UPS battery cabinet optional 3 Installation Step 1 Step 2 ...
Page 48: ...48 3 Installation Step 5 Step 6 ...
Page 74: ...74 ...
Page 82: ...82 3 2 2 UPS armadio batterie opzionale Fase 1 Fase 2 3 Installazione ...
Page 84: ...84 Fase 5 Fase 6 3 Installazione ...
Page 110: ...110 ...
Page 118: ...118 118 3 2 2 USV Batterieschrank Optional 3 Installation Schritt 1 Schritt 2 ...
Page 120: ...120 3 Installation Schritt 5 Schritt 6 ...
Page 146: ...146 ...
Page 154: ...154 154 3 2 2 SAI armario de la batería opcional 3 Instalación Paso 1 Paso 2 ...
Page 156: ...156 3 Instalación Paso 5 Paso 6 ...
Page 182: ...182 ...
Page 190: ...190 190 3 2 2 ИБП батарейный модуль опциональный 3 Монтаж Шаг 1 Шаг 2 ...
Page 192: ...192 3 Монтаж Шаг 5 Шаг 6 ...
Page 218: ...218 Notes ...
Page 219: ...219 Manuel d installation ...

