117
DAKER DK Plus
Battery Cabinets
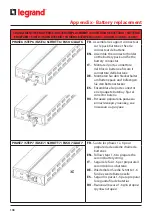
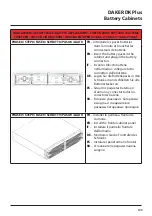
CHANGEMENT DES BATTERIES / BATTERY REPLACEMENT / SOSTITUZIONE BATTERIA /
SUSTITUCIÓN BATERÍA / ЗАМЕНА БАТАРЕЙ 3 106 64 – 3 106 69
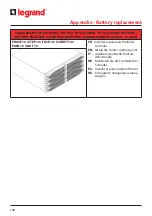
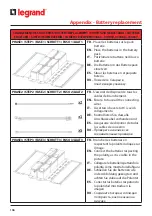
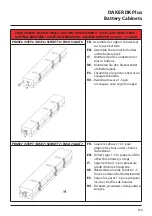
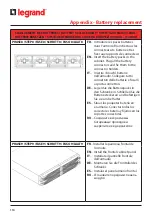
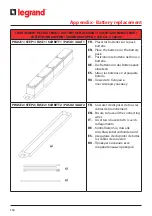
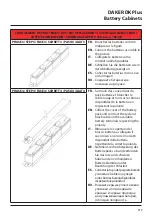
PHASE 3 / STEP 3 / FASE 3 / SCHRITT 3 / PASO 3 / ШАГ 3 FR – Brancher les batteries comme
indiqué sur la figure.
EN – Connect the batteries as visible in
the picture
IT – Collegare le batterie come
mostrato nella figurables
DE – Schließen Sie die Batterien wie in
der Abbildung gezeigt an
ES – Conectar las baterías como se ve
en la imagen
RU – Соедините батареи, как
показано на рисунке
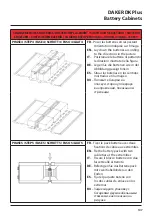
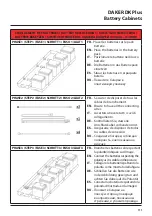
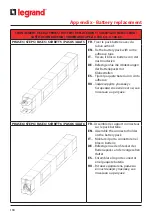
PHASE 4 / STEP 4 / FASE 4 / SCHRITT 4 / PASO 4 / ШАГ 4 FR – Se munir des couvertures du
pack batterie et brancher le
câble rouge et noir sur les bornes
disponibles de la batterie en
respectant la polarité.
EN – Collect the cover of the battery
pack and connect the red and
black cable on the available
battery terminals respecting the
polarity
IT – Rimuovere la copertura del
blocco batterie e collegare il
cavo rosso e nero nei morsetti
disponibili della batteria
rispettando la corretta polarità
DE – Nehmen Sie die Abdeckung des
Batteriepacks ab und verbinden
Sie das rote und schwarze
Kabel an den vorhandenen
Batterieklemmen unter
Beachtung der Polarität
ES – Conectar la tapa del paquete batería
y conectar el cable rojo y negro
en los bornes batería disponibles
respetando la polaridad
RU – Возьмите крышку пластиковой
упаковки и подсоедините
красные и черные провода к
доступным выводам батарей,
соблюдая полярность
Summary of Contents for DAKER DK Plus 3 106 60
Page 8: ...8 3 Installation 3 2 Configuration Tower 3 2 1 Armoire batterie ...
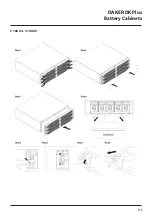
Page 11: ...DAKER DK Plus Armoire batterie 11 FR Phase 4 Phase 5 ...
Page 24: ...24 3 2 Tower configuration setup 3 2 1 Battery cabinet 3 Installation ...
Page 25: ...DAKER DK Plus Battery Cabinets EN 25 3 2 2 UPS battery cabinet ...
Page 27: ...27 DAKER DK Plus Battery Cabinets EN ...
Page 40: ...40 3 2 Impostazione configurazione tower 3 2 1 Armadio batteria Fase 1 Fase 2 3 Installazione ...
Page 43: ...43 DAKER DK Plus Armadi batteria IT Fase 4 Fase 5 ...
Page 56: ...56 3 Installation 3 2 Tower Konfiguration Setup 3 2 1 Batterieschrank Schritt 1 Schritt 2 ...
Page 59: ...59 DAKER DK Plus Batterieschränke DE Schritt 4 Schritt 5 ...
Page 75: ...75 DAKER DK Plus Armarios batería ES Paso 4 Paso 5 ...
Page 88: ...88 3 Монтаж 3 2 Монтаж в вертикальном положении 3 2 1 Батарейный модуль Шаг 1 Шаг 2 ...
Page 91: ...91 ИБП DAKER DK Plus Батарейные модули RU Шаг 4 Шаг 5 ...
Page 99: ...99 DAKER DK Plus Battery Cabinets 3 106 60 3 106 65 Appendix Battery replacement ...
Page 105: ...105 DAKER DK Plus Battery Cabinets 3 106 61 3 106 62 3 106 66 3 106 67 ...
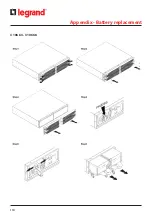
Page 110: ...110 Appendix Battery replacement 3 106 63 3 106 68 ...
Page 115: ...115 DAKER DK Plus Battery Cabinets 3 106 64 3 106 69 ...
Page 121: ...121 ...
Page 122: ...122 ...
Page 123: ...123 ...


