30
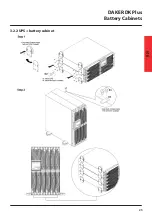
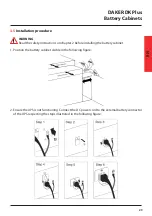
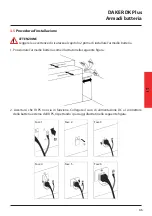
3. If the battery cabinet must be connected to another battery unit, connect the DC power cord to
the external battery connector of the existing battery cabinet following the steps illustrated in
the previous figure.
4. Remove the bracket (if present) that blocks the DC breaker of the battery cabinet.
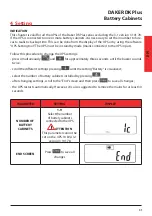
5. Turn on the DC breaker of the battery cabinet.
6. Turn on the UPS.
INDICATION
If it is necessary to replace or add the batteries of the battery cabinet, follow the instructions of
chapter 7.
3 Installation
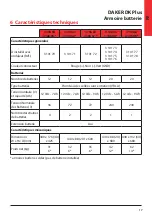
Summary of Contents for DAKER DK Plus 3 106 60
Page 8: ...8 3 Installation 3 2 Configuration Tower 3 2 1 Armoire batterie ...
Page 11: ...DAKER DK Plus Armoire batterie 11 FR Phase 4 Phase 5 ...
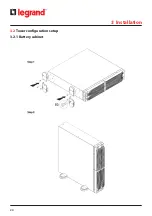
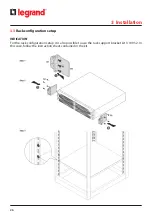
Page 24: ...24 3 2 Tower configuration setup 3 2 1 Battery cabinet 3 Installation ...
Page 25: ...DAKER DK Plus Battery Cabinets EN 25 3 2 2 UPS battery cabinet ...
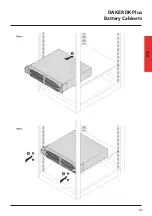
Page 27: ...27 DAKER DK Plus Battery Cabinets EN ...
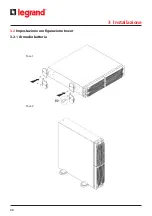
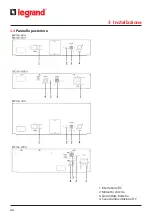
Page 40: ...40 3 2 Impostazione configurazione tower 3 2 1 Armadio batteria Fase 1 Fase 2 3 Installazione ...
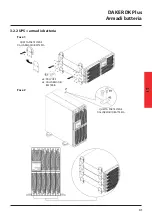
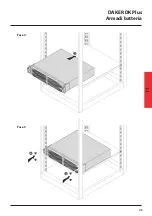
Page 43: ...43 DAKER DK Plus Armadi batteria IT Fase 4 Fase 5 ...
Page 56: ...56 3 Installation 3 2 Tower Konfiguration Setup 3 2 1 Batterieschrank Schritt 1 Schritt 2 ...
Page 59: ...59 DAKER DK Plus Batterieschränke DE Schritt 4 Schritt 5 ...
Page 75: ...75 DAKER DK Plus Armarios batería ES Paso 4 Paso 5 ...
Page 88: ...88 3 Монтаж 3 2 Монтаж в вертикальном положении 3 2 1 Батарейный модуль Шаг 1 Шаг 2 ...
Page 91: ...91 ИБП DAKER DK Plus Батарейные модули RU Шаг 4 Шаг 5 ...
Page 99: ...99 DAKER DK Plus Battery Cabinets 3 106 60 3 106 65 Appendix Battery replacement ...
Page 105: ...105 DAKER DK Plus Battery Cabinets 3 106 61 3 106 62 3 106 66 3 106 67 ...
Page 110: ...110 Appendix Battery replacement 3 106 63 3 106 68 ...
Page 115: ...115 DAKER DK Plus Battery Cabinets 3 106 64 3 106 69 ...
Page 121: ...121 ...
Page 122: ...122 ...
Page 123: ...123 ...


