INSTRUCTION / INSTALLATION SHEET
LCD Console w/lyriQ™
IS-0432 Rev. A
©Copyright 2010 by Legrand All Rights Reserved.
Page 2 of 3
301 Fulling Mill Road, Suite G
Middletown, PA 17057
Phone (800) 321-2343 / Fax (717) 702-2546
www.onqlegrand.com
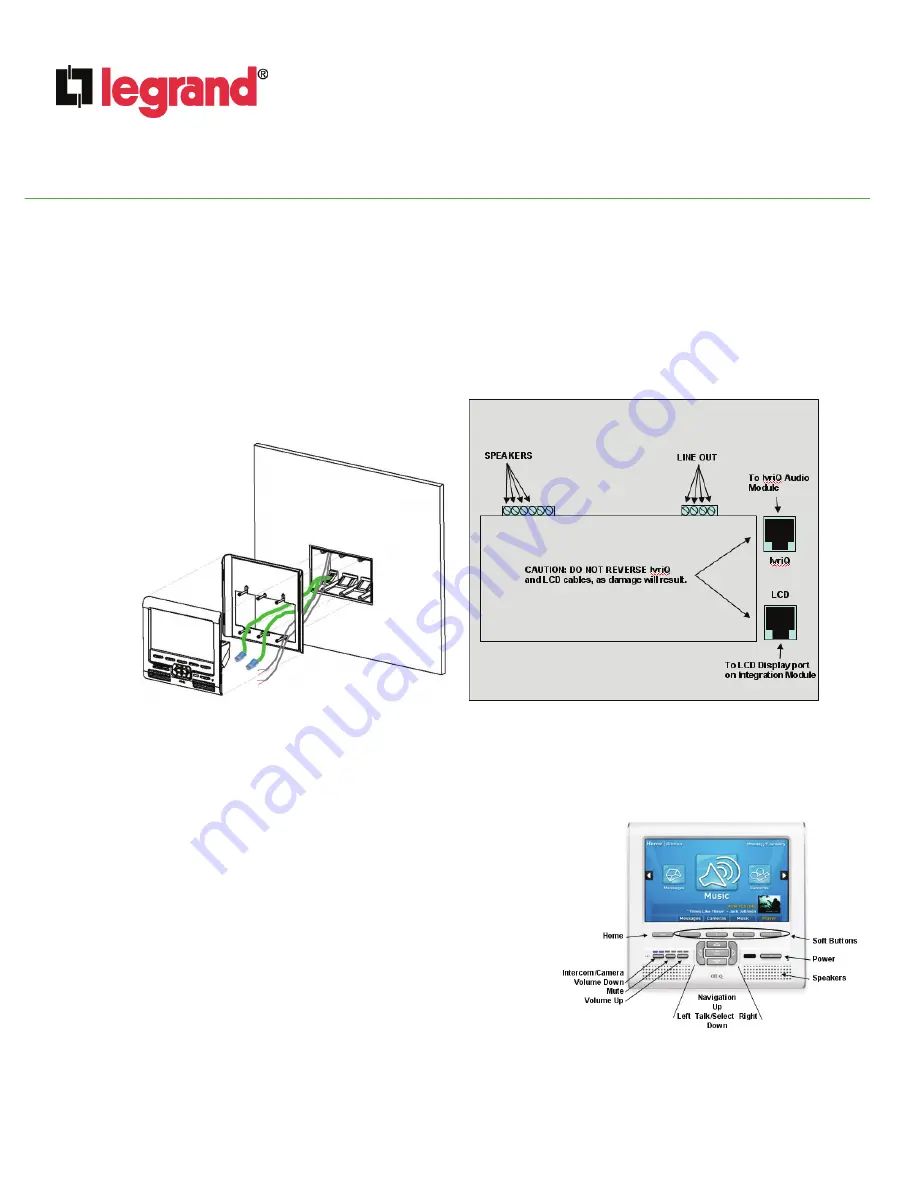
H. Angle the LCD Console into the wall bracket engaging the right side latches first. Then push in the left side of the LCD Console until the
top and bottom latches are engaged and you hear an audible snap.
NOTE: To remove the LCD Console from the bracket, simply slide a credit card or guitar pick along either the right-hand or left-
hand edge of the LCD Console to detach the retaining clips.
I. At the enclosure location, insert the LCD RJ45 plug from the LCD Console location into an available LCD RJ45 jack on the Integration
Module. Insert the lyriQ™ RJ45 plug from the LCD Console location into an available zone RJ45 jack on the lyriQ™ Audio Distribution
Module.
J. At the speaker locations, connect the 16/2 speaker cables to the connectors on the rear of the speakers and mount the speakers in
their location.
K. Apply power to the Integration Module and Audio Distribution Module and test for LED illumination at the LCD Console.
4. OPERATION
NOTE: This Instruction/Installation Sheet provides a brief overview of LCD Console functionality. Please refer to
Figure 6
for a list of Instruction/Installation Sheets for other products referenced here. Refer to
Figure 5
during this section.
A. POWER
Turn the unit on (
active
) or off (
standby
) by pressing the
Power
button.
•
When active, the power indication LED located behind the power button
illuminates
white
, and all other buttons are backlit
white
.
•
When in standby, the power indication LED located behind the power
button illuminates
red
and the display, speaker, and backlighting are
effectively turned off. To come out of standby, simply press the power
button again.
•
The LCD Console can be programmed to enter standby after a certain
period of time passes. The user-selectable settings for active time are 5
minutes (factory default), 10, 15, 30 minutes, or 1 hour.
B. SOFT BUTTONS
The four soft buttons are used to activate the selection indicated just above
the button on the user interface screens.
C. ADJUSTING VOLUME
Adjust the LCD Console's built-in speaker volume using the
Volume
push buttons.
NOTE: These volume controls affect only the LCD Console’s internal speakers. To operate the lyriQ™ volume control function,
use the Integration Module GUI (see
Figure 7
) or utilize the On-Q Universal Remote Control.
Figure 5
Figure 3
Figure 4
Rear View of LCD Console w/lyriQ™


