V
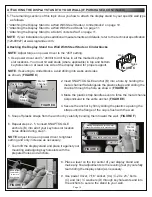
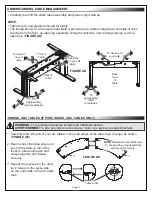
8. Carefully team lift your table top (V) and place it upside-down
(with pre-drilled holes facing up) on an appropriate
work surface. (
FIGURE Z
)
9. Carefully team lift your table legs and trough assembly
and place it upside-down onto the table top.
10. Use power driver, Phillips bit and 10-32 x ⅜” thread
forming screws (R, amounts and locations based on specific
table model purchased) to attach your table legs and trough assembly to the underside of the table
top (V) as shown. (
FIGURE AA
and
FIGURE AB
)
NOTE
: Your hardware includes (24x) 10-32 x ⅜” thread forming screws (R) to provide extra, if needed.
FIGURE Z
Page 18
NOTE
: Only remove the panel and clear the knockouts from the inside of only one table leg assembly.
However, partially attach the (2x) 10-32
x ⅜” thread forming screws (R) to the top inside of both table
leg assemblies (N).
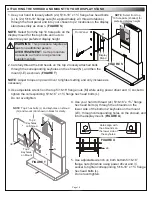
2. Use hammer, screwdriver
and/or awl to clear the knockouts on
the same side/table leg assembly as shown. (
FIGURE X
)
NOTE
: Adjust torque on power driver to lightest
setting and only increase as necessary.
3. Use power driver and Phillips bit to partially attach
(2x) 10-32 x ⅜” thread forming screws (R) to the
top inside of both table leg assemblies (N,
approximately ¼” from the surface).
4. With someone else holding one of the leg
assemblies (N), carefully pick up the trough
(S) and hook the keyholes over the
10-32 x ⅜” thread forming screws (R) on the top inside
as shown. (
FIGURE Y
)
5. Repeat this step to hook the other end of the trough (S)
onto the screws (R) on the second table leg assembly (N).
6. Use adjustable wrench on (4x) 10-32 flange nuts (T)
while using power driver and ¾” socket to tighten (4x) 10-32 x ½”
pan head screws (U) to fully secure the trough to both leg assemblies.
7. Tighten all 8 screws from the previous two steps. Do not overtighten.
ASSEMBLING YOUR TABLE (IF PURCHASED, CONTINUED)
Clear with
Screwdriver or Awl
Clear
with
Hammer
R
FIGURE X
R
S
WARNING:
This procedure requires at
least one additional person.
AVERTISSEMENT:
Cette procédure
nécessite au moins une personne
supplémentaire.
FIGURE Y
T
U
N
NOTE
: Underside of a 3
person angle table pictured.

