Line Interactive UPS User Manual
Connecting the Expandable Runtime Battery Option
20
©2022 |
. All rights reserved.
Connecting the Expandable Runtime Battery Option
An expandable runtime battery option is available for your UPS. If you purchased an expandable battery for your
configuration, the following topic shows you how to properly add it to your system.
NOTE
•
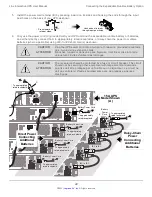
Up to four expandable batteries may be added to your UPS system.
•
Images in this manual typically show a UPX-1000R-2 model to show the location of
connectors, buttons, and lights on the LED panel. The locations of these items are
similar on all available NEXSYS™ Line Interactive UPS models and corresponding
options.
For information about battery replacement, see “Replacing the Battery” on page
For more information, refer to the NEXSYS Line Interactive UPS Expandable Runtime Battery Option User Manual
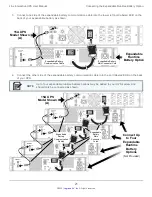
1. Use a #2 Phillips screwdriver to remove the screw and plate covering the expandable runtime battery main
connector ports on the back of both your UPS (A) and expandable runtime battery option.
Carefully set aside the screws and plates for future use.
NOTE
If you are adding exactly one expandable runtime battery to your UPS system, you may
decide to leave the main connector port screw and plate intact on your expandable runtime
battery, if desired.
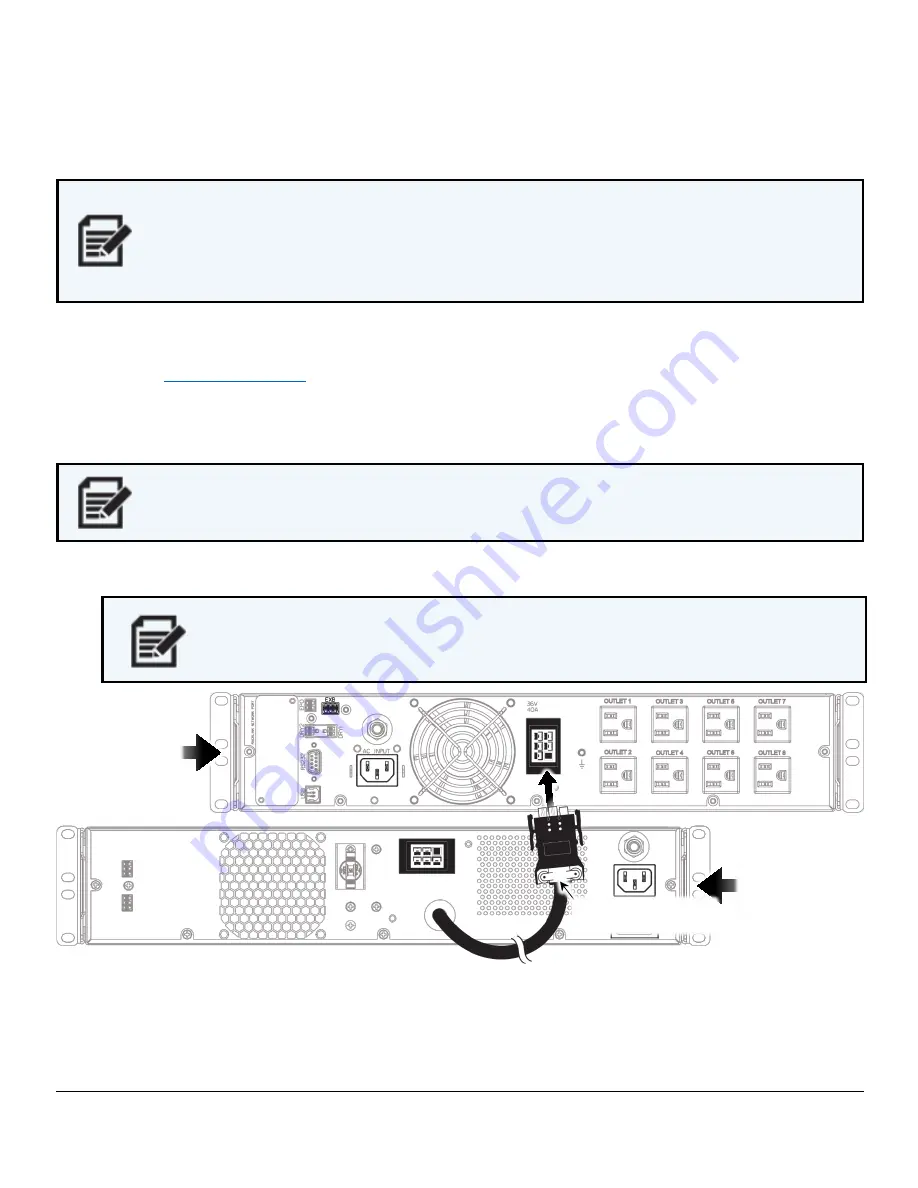
2. Connect the end of the expandable runtime battery main connector cord into the corresponding port on the
back of your UPS as shown.
NOTE
•
Applicable cords, cables, and ports shown in black for clarity.
•
After connecting the battery or batteries, the entire system must be charged
for eight hours before providing direct backup power to connected devices.
For more information, see “Charging Your UPS, the First Time” on page
15A UPS
Model Shown
(A)
EXB
EXB
BATTERY PACK
DETECTION
INPUT
BREAKER
DC
BREAKER
Expandable Battery
Main Connector Cord
Expandable
Runtime
Battery Option


