SET HOUSE ID
New Installation
All LightSense™ wireless devices installed in the same home must acquire the
same unique House ID before use. This process is known as house binding.
Each LightSense wireless device is bound to all other LightSense wireless
devices in the house.
New Installation
1. With all devices installed and energized, make sure that every LightSense
wireless device LED is yellow. If any LED is off, be sure the circuit breaker
is on and the device is correctly
installed.
2. Press
on any device paddle
until the LED flashes yellow
(about 2 seconds). This indicates
that it has acquired a unique
House ID.
3. Make sure that all other
LightSense wireless device LEDs
are flashing green, indicating that
they have acquired the same House ID.
4. Return to the device used in step 2, which is still flashing yellow. Press
until the LED changes to solid green (about 2 seconds). All device LEDs in
the House change to solid green, indicating house binding is complete.
Adding a Device to an Existing Installation
If you’re adding or replacing a device in a LightSense wireless installation that is
already operating, the new device must acquire the same House ID as the other
LightSense wireless devices in the house. After the new device is powered up,
the LED should be solid yellow. This indicates that it has not yet acquired a
House ID. To acquire the House ID for the existing system:
1. Press
on any
previously bound
device until the LED flashes yellow
(about 2 seconds).
2. Verify that the newly added device LED is flashing green, indicating that it
has acquired the House ID.
3. Return to the
same previously bound
device used in step 1 and press
until the LED changes to solid green (about 2 seconds). All device LEDs
should now be solid green.
Call 800.223.4185 for Technical Support
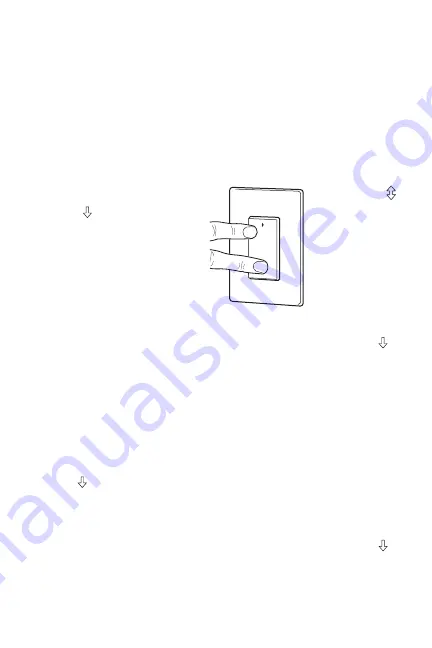
When you see
in the instructions,
firmly press and
hold both the top
and bottom of the
device paddle until
the LED changes
(about 2 seconds).


