TROUBLESHOOTING
Lights will not turn ON (LED does flash):
1. Press and release the button. If the lights turn ON, verify that the correct
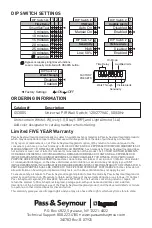
On Mode is selected in the DIP switches.
2. Check all wire connections, in particular, the Load connection.
3. Check to see if light level control is enabled and natural light is holding
OFF light. Test by holding hand over the sensor lens.
4. If lights still do not turn ON, call 800.223.4185 for technical support.
Lights will not turn ON (LED does not flash)
1. Check the wire connections, in particular, the Ground and Line
connections. Verify that connections are tightly secured.
2. Press and release the button. If the lights turn ON, verify that the
Sensitivity is set to High/Auto.
3. If lights still do not go ON, call 800.223.4185 for technical support
Lights will not turn OFF
1. There can be up to a 30 minute time delay after the last motion is
detected. To verify proper operation, place the unit in any Fixed time delay
(any of switches 1, 2, or 3 in the ON position), then select Automatic time
delay (switches 1, 2, and 3 in the OFF position) to temporarily reenable
Test Mode. Move out of view of the sensor. The lights should turn OFF in
approximately 15 seconds.
2. Verify that the sensor is mounted at least six feet away from any
heating/ventilating/air conditioning device that may cause false detection.
Verify that there is no significant heat source (e.g., high wattage light bulb)
mounted near the sensor.
3. If the lights still do not turn OFF, call 800.223.4185 for technical support.
Sensing motion outside desired areas
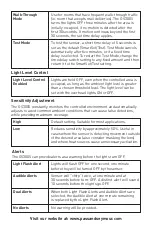
1. Select Sensitivity – Low (dip switch 4 = ON) if necessary.
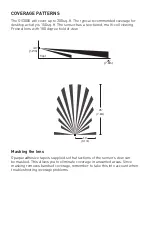
2. Mask the sensor’s lens, using the opaque tape supplied, to limit the field-
of-view to the desired area.
No response to repeated button presses
Rapid pressing of the Auto-ON/OFF button will cause a delay in proper
functioning of sensor. If the sensor does not respond to pressing the Auto
ON/OFF button, wait for 10-15 seconds, and then press the button once again


