PXC_PXO Quick Setup Guide
7
PXC_PXO_QSG_A1_4.0.10
255-80-0059-00 RoHS
2.
Install PDView.
Step 2: Connect the Mobile Device to PXC/PXO
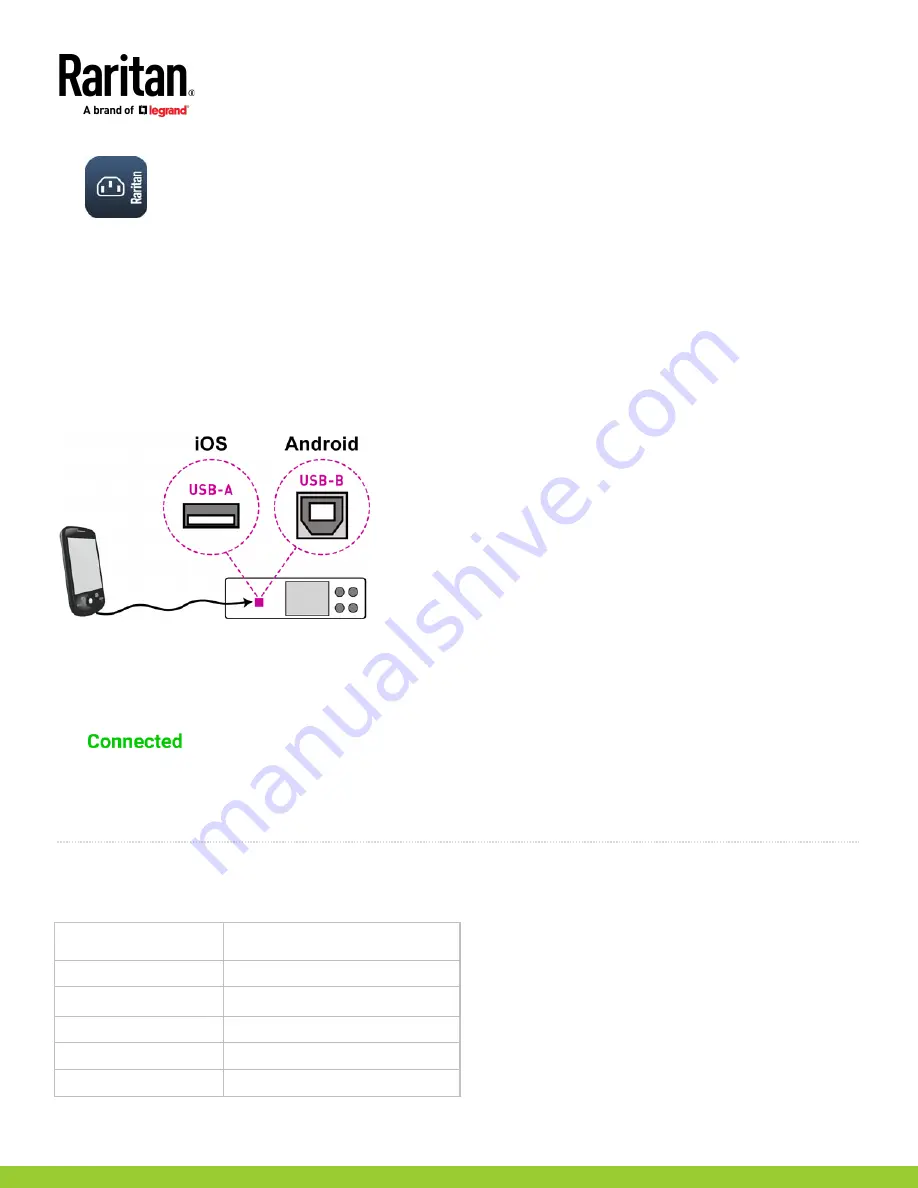
The USB cable and USB port to connect are determined by your mobile operating system.
To connect your mobile device to PXC/PXO:
1.
Get an appropriate USB cable for your mobile device.
▪
iOS
: Use the regular USB cable shipped with your iOS mobile device.
▪
Android
: Use an
USB OTG
adapter cable.
2.
Connect the mobile device to the appropriate USB port on the product.
▪
iOS
: USB-A port.
▪
Android
: USB-B port
Step 3: Launch PDView
To access the PXC/PXO web interface:
1.
Launch PDView on your mobile device.
2.
Wait until PDView detects the connected PXC/PXO and shows the word "Connected" in green.
3.
If the factory-default login credentials remain unchanged, or if PDView has been configured with accurate login credentials, PDView
automatically logs in to the web interface of PXC/PXO.
If PDView can't login automatically, the login screen displays instead and you must enter appropriate user credentials for login.
4.
For initial login, you are prompted to change the password.
QS Rule
Appendix B: Wireless Configuration
USB Wireless LAN Adapters
The PXC/PXO supports the following USB Wi-Fi LAN adapters.
Wi-Fi LAN adapters
Supported 802.11 protocols
SparkLAN WUBR-508N
A/B/G/N
Proxim Orinoco 8494
A/B/G
Zyxel NWD271N
B/G
Edimax EW-7722UnD
A/B/G/N
TP-Link TL-WDN3200 v1
A/B/G/N


