Chapter 7: Using the Web Interface
230
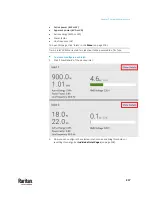
Tip: The above two icons are switched if you manually perform any power
operations on non-critical outlets during the load shedding mode. See
Off
and Lock Icons for Outlets
(on page 231).
▪
The message "Load shedding active" appears next to the 'Outlets' title.
▪
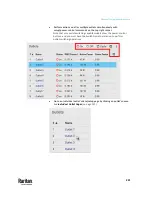
The Non Critical column, if not shown prior to the load shedding mode,
automatically displays on the Outlets page.
Tip: To make the Non-Critical column appear when the load shedding mode is
not activated yet. See
Outlets
(on page 220) or
Available Data of the Outlets
Overview Page
(on page 224).
To exit from the load shedding mode:
1.
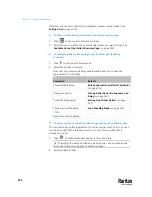
On the Outlets page, click
> Deactivate Load Shedding.
2.
Click Deactivate on the confirmation message.
Now you can turn on/off any outlets.
TIP -- automatic load shedding via contact closure sensors:
If you have connected a Raritan contact closure sensor to PX3TS, you can set up
an event rule in a manner that this sensor's status change automatically
activates or deactivates the load shedding mode. For an example, see
Sample
Environmental-Sensor-Level Event Rule
(on page 433).
Summary of Contents for Raritan PX3TS
Page 4: ......
Page 6: ......
Page 20: ......
Page 80: ...Chapter 4 Connecting External Equipment Optional 60...
Page 109: ...Chapter 5 PDU Linking 89...
Page 117: ...Chapter 5 PDU Linking 97...
Page 441: ...Chapter 7 Using the Web Interface 421...
Page 464: ...Chapter 7 Using the Web Interface 444...
Page 465: ...Chapter 7 Using the Web Interface 445 Continued...
Page 746: ...Appendix A Specifications 726...
Page 823: ...Appendix I RADIUS Configuration Illustration 803 Note If your PX3TS uses PAP then select PAP...
Page 828: ...Appendix I RADIUS Configuration Illustration 808 14 The new attribute is added Click OK...
Page 829: ...Appendix I RADIUS Configuration Illustration 809 15 Click Next to continue...
Page 860: ...Appendix J Additional PX3TS Information 840...
Page 890: ...Appendix K Integration 870 3 Click OK...
Page 900: ......


