Chapter 7: Using the Web Interface
290
Schroff LHX/SHX
You must enable the LHX/SHX support for the PX3TS to detect the presence of
a supported Schroff
®
LHX/SHX heat exchanger. See
Miscellaneous
(on page
462).
After enabling the LHX/SHX support and connecting a supported Schroff
®
LHX/SHX heat exchanger to the PX3TS, the PX3TS shows the connected device
type in place of 'Feature Port' in the menu -- LHX 20, LHX 40 or SHX 30.
Note: For connection instructions, see
Connecting a Schroff LHX/SHX Heat
Exchanger
(on page 74).
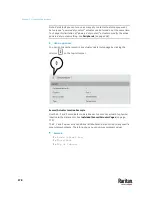
To open the LHX/SHX page, click 'LHX 20', 'LHX 40' or 'SHX 30' in the
Menu
(on
page 176). Then you can monitor and administer the connected LHX/SHX
device with the following.
•
Name the heat exchanger
•
Monitor LHX/SHX built-in sensors and device states
•
Configure the air outlet temperature setpoint
•
Configure the default fan speed
•
Configure the air temperature/fan speed thresholds (for alert generation)
•
Request maximum cooling using the fan speed and opening the cold water
valve
•
Acknowledge alerts or errors remotely, such as failed LHX/SHX sensors or
emergency cooling activation
•
Accumulative operating hours
•
Indicate the number of power supplies present and whether a condenser
pump is present
Available information/operation is model dependent. For example, only LHX
devices can show sensor alerts. See your LHX/SHX user documentation for
details.
Important: The LHX/SHX settings are stored on the port where the LHX/SHX
device is connected, and are lost if that device is re-connected to a different
PX3TS port.
Summary of Contents for Raritan PX3TS
Page 4: ......
Page 6: ......
Page 20: ......
Page 80: ...Chapter 4 Connecting External Equipment Optional 60...
Page 109: ...Chapter 5 PDU Linking 89...
Page 117: ...Chapter 5 PDU Linking 97...
Page 441: ...Chapter 7 Using the Web Interface 421...
Page 464: ...Chapter 7 Using the Web Interface 444...
Page 465: ...Chapter 7 Using the Web Interface 445 Continued...
Page 746: ...Appendix A Specifications 726...
Page 823: ...Appendix I RADIUS Configuration Illustration 803 Note If your PX3TS uses PAP then select PAP...
Page 828: ...Appendix I RADIUS Configuration Illustration 808 14 The new attribute is added Click OK...
Page 829: ...Appendix I RADIUS Configuration Illustration 809 15 Click Next to continue...
Page 860: ...Appendix J Additional PX3TS Information 840...
Page 890: ...Appendix K Integration 870 3 Click OK...
Page 900: ......


