background image

Doc No. FM0851 issue A Page 5  

Registering a Heat Detector onto an


Altec Response 

local carer alarm unit


1. 

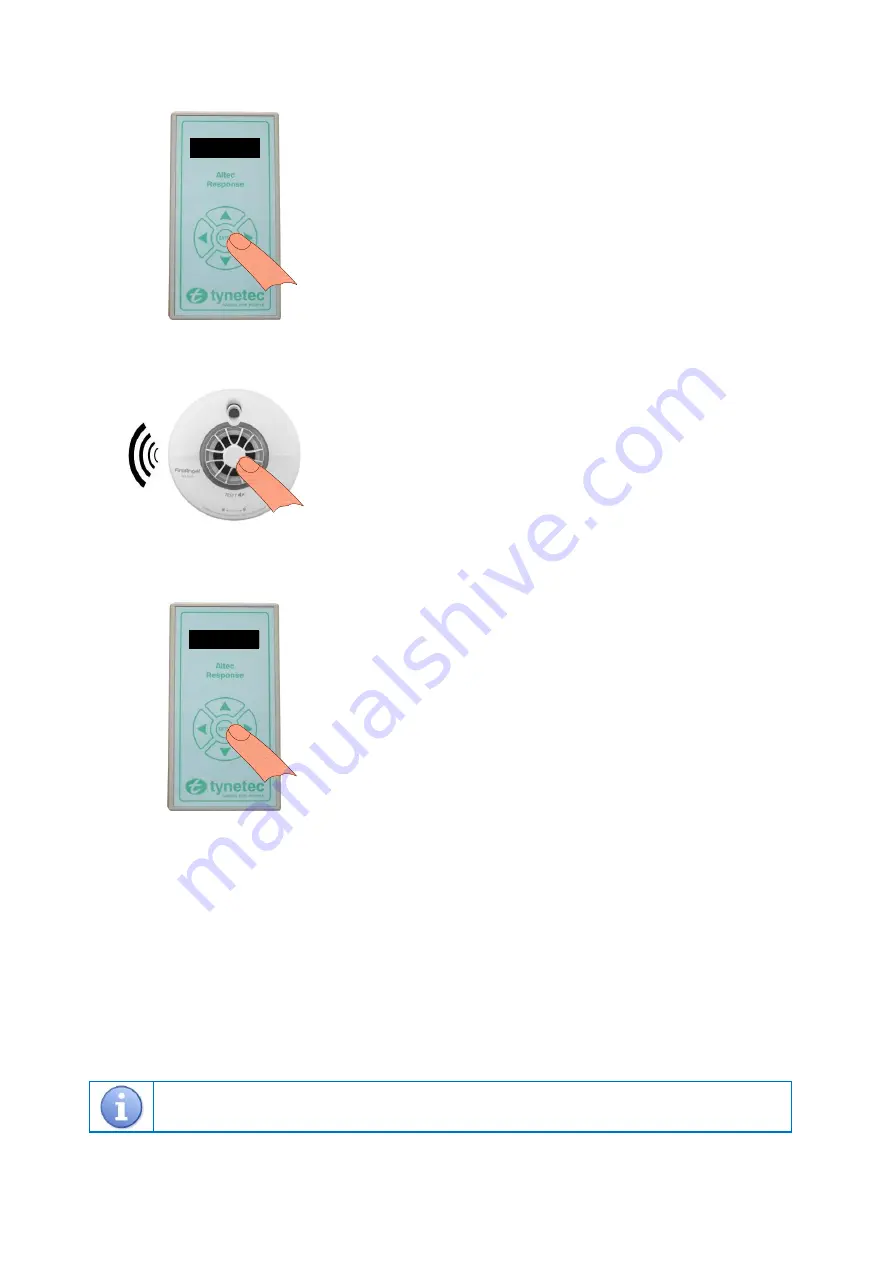
Put the Altec Response unit into radio device learn mode… 


2. Activate the heat detector


3. 

Exit the Altec Response radio device learn mode…


4. Activate the heat detector and check a heat alarm call is displayed on the Altec Response unit.  


Deleting a Heat Detector from an


Altec Response 

local carer alarm unit


Press 

ENTER

 to activate the wake-up display then 

ENTER

 again to display the main menu 

Press 

ENTER

 to select 

 Radio Devices 


Press the 


key


to select 

 Delete Device 

 then press

 ENTER


The display 

will prompt you to “

Trigger the Sensor


Activate the heat detector to be deleted - the display will show the device type and its 8 digit ID number 
If this is the device you activated press the 


key to select  

 Delete 


then press

 ENTER


If it’s NOT the device you activated p

ress the 

ENTER

 key to select 

 Reject 


then try again 

To exit the mode select 


Exit


 then press the 

ENTER

 key. 


Refer to the Altec Response installation guide (Doc No. FM0548) provided with the portable alarm unit for 
more information on programming and testing radio devices.  


Press and hold the TEST button, the horn will sound and the light will flash 

RED


The display will show 

Heat Alarm

 and the heat detector 8 digit ID number. 

Check the ID is correct, press the 

 key to select 

 Accept 


then press 

ENTER

.  

Note: if another device has been picked-up press


ENTER


to


 Reject 


and try again

         The display will show 


Flat 

, use the 

 &


keys to choose the dwelling type.  

Press the 


key


to select 

 No: 000000 


then press the 

ENTER

 key.  

Use the 

 & 


keys to select each digit of the flat number and the 

 &


keys


to move between digits then press the 

ENTER

 key. 

Press 


key


several times to select 


Exit


 then press the 

ENTER

 key.  

The display 

will prompt you to “

Trigger the Sensor

 again. 


Press 

ENTER

 to activate the wake-up display then 

ENTER

 again to display  

the main menu. 


Press 

ENTER

 to select 

 Radio Devices 


Press 

ENTER

 to select 

 Learn Device 


The display 

will prompt you to “

Trigger the Sensor

”.


You now have 20 seconds to activate the heat detector. 

From the 

Learn Device

 menu select 

 Exit 


then press 

ENTER

.  


From the 

Radio Devices

 menu select 

 Exit 


then press 

ENTER


The display will return to the wake-up screen and go blank after 10 seconds. 


The Altec Response is now back in normal operating mode.


tynetec 

tynetec 


Summary of Contents for Tynetec ZXT493

Page 1: ...fixed to the ceiling or wall Use the fixing slots on the base plate as a guide when marking the position of the drill holes Fix with the screws and plugs provided Alternatively the base plate can be fixed with the self adhesive pads provided Ensure the surface is smooth clean and dry Press hard to make sure the self adhesive pads are properly adhered Position the detector on the base plate then tw...

Page 2: ...possible within 30 days Sleep Easy Feature Low battery warnings often start at night or when it may be inconvenient to replace the detector You can silence the audible low battery chirp for a period of eight hours by pressing the Test button After this period the audible chirp will start again This process can be repeated a maximum of 10 times The detector will still detect heat during this time h...

Page 3: ...e the unit will sound a Double Beep and the front light will return to STEADY GREEN The 8 digit ID can be found on a label on the back of the heat detector it will always start with 48xxxxxx The instructions given above for the standard Reach product also applies to the Reach Plus Reach Plus GSM and Reach Ultra models Refer to the instruction booklets provided with these products for more informat...

Page 4: ...t then press the LINE key to clear the connection Refer to the Advent xt operator s manual Doc No FM0420 provided with the warden call system for more information on programming and testing radio devices Using the Manager s DECT telephone Press the LINE key and wait for the Ready prompt Enter 5 0 0 0 followed by the key Enter the flat number the heat detector is being installed in followed by the ...

Page 5: ...alarm unit for more information on programming and testing radio devices Press and hold the TEST button the horn will sound and the light will flash RED The display will show Heat Alarm and the heat detector 8 digit ID number Check the ID is correct press the key to select Accept then press ENTER Note if another device has been picked up press ENTER to Reject and try again The display will show Fl...

Page 6: ...yed in the Room House Code and ID boxes below If the details shown are correct press the Delete button Press the Close button to exit Refer to the Touchsafe Pro Display Panel user guide Doc No FM5505 provided with the Nursecall system for more information Tynetec and Aidcall operate a policy of continuous improvement and reserve the right to change product specifications without notice If any vari...

Reviews: