background image

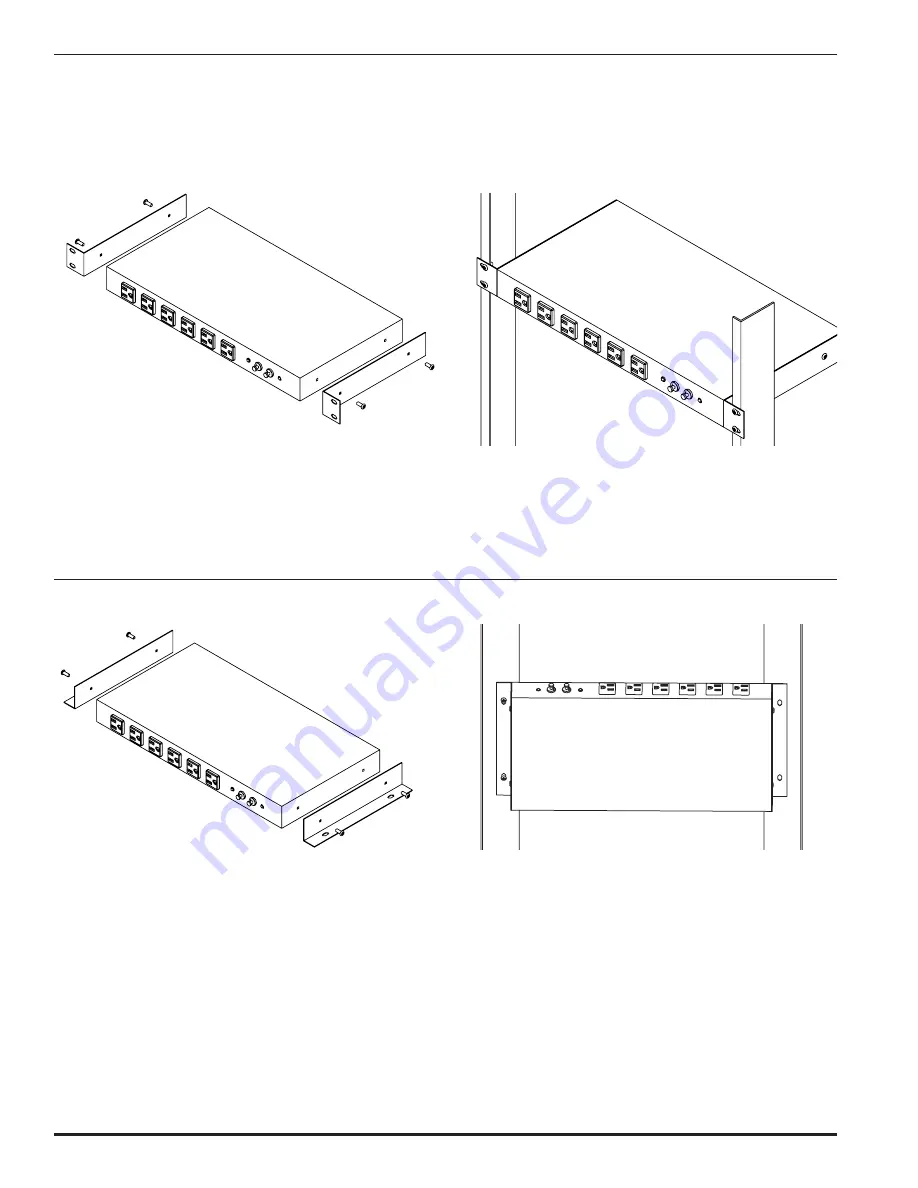
JPDU-A FRONT MOUNT (1U) INSTALLATION MOUNTING INSTRUCTIONS: 

JPDU-A SIDE RAIL (0U) INSTALLATION MOUNTING INSTRUCTIONS: 

With a 5/16" nut driver, unfasten the set of 10-32 Hex head
machine screws on each side of JPDU-A. Take one of the front
mounting brackets and align each side hole with the side hole
on JPDU-A. Attach one front mounting bracket using two of
the unfastened 10-32 Hex screws. Repeat installations steps
for the other front mounting bracket as shown above.

Install JPDU-A in a cabinet or 19" [483mm] rack using
appropriate hardware (not provided) for mounting.

With a 5/16" nut driver, unfasten the set of 10-32 Hex head
machine screws on each side of JPDU-A. Take one of the
rear mounting brackets and align each side hole with the
side hole on JPDU-A. Attach one rear mounting bracket
using two of the unfastened 10-32 Hex screws. Repeat
installations steps for the other rear mounting bracket as
shown above.

Install JPDU-A in a cabinet or 19" [483mm] rack using
appropriate hardware (not provided) for mounting.

The JPDU-A has two 12 amp circuits which are indicated by the two LEDs in the front of the unit.
Each circuit is protected by a 15 amp circuit breaker and 280V clamping level surge protection. A
lighted LED indicates that the circuit is functioning properly and is surge protected. A non-lighted
LED indicates that the circuit is not functioning properly and/or is not surge protected.

Summary of Contents for Wiremold Power Commander

Page 1: ...al current does not exceed 24A The 4B Series is rated 208Vac 32A Each circuit may carry up to 16A as long as the total current does not exceed 32A The JPDU A is UL cUL Recognized and complies with the Standard for Information Technology Equipment UL1950 The JPDU A is rated 120Vac 24A Each circuit may carry up to 12A as long as the total current does not exceed 24A The D Series Custom Power Distrib...

Page 2: ...the set of 10 32 Hex head machine screws on each side of JPDU A Take one of the rear mounting brackets and align each side hole with the side hole on JPDU A Attach one rear mounting bracket using two of the unfastened 10 32 Hex screws Repeat installations steps for the other rear mounting bracket as shown above Install JPDU A in a cabinet or 19 483mm rack using appropriate hardware not provided fo...

Page 3: ...ed Line up the remote display unit with the cleared holes in the rack mount face plate and insert the push pins through the pin holes as indicated Once secured install the face plate into your 19 482mm rack via the closed slots Remote Display Push Pins Insert Rack Mount Face Plate Closed Slots for Rigidity Designed in Accordance with E I A Standards MOUNTING TYPES Snap On Slide Off Mount unit in a...

Page 4: ...o power to your Wiremold product first make sure the unit is plugged firmly into your wall outlet Plug the unit into a different wall outlet to verify the condition If there is still no power the built in circuit breaker may need to be reset If you are still having problems please call technical support Understanding that each cabinet enclosure rack and application is unique Wiremold has designed ...

Reviews: