BD
A CAP
TOS MIF
ARE / CAP
TOS iChar
ge MIF
ARE 22-09-22 (GB)
12
0
12
8
3
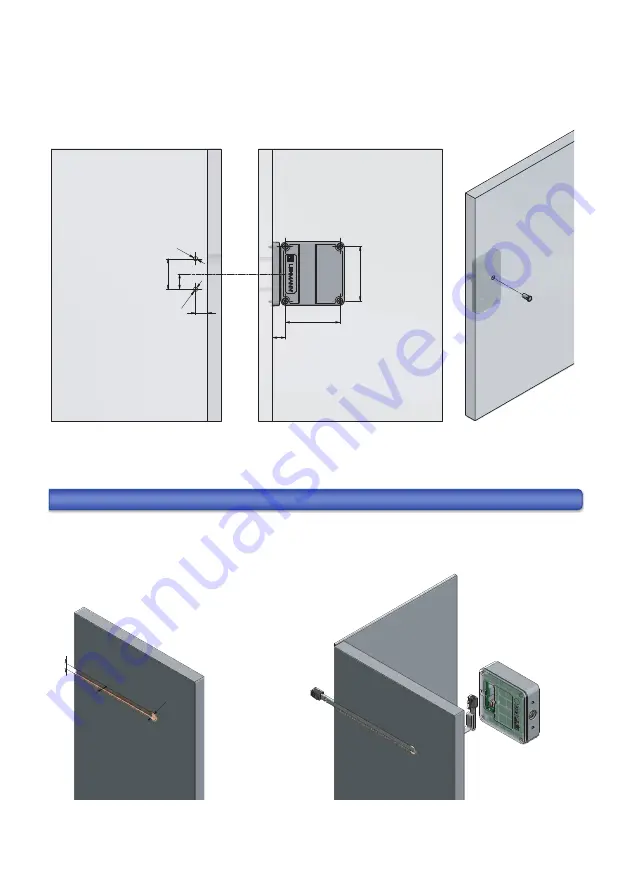
All information in mm
Installation instructions for the optional lightpoint O10.1 or O16.1
Note that the lightpoint can be mounted optionally. Without a lightpoint, only acoustic signals are available.
The lock has two LEDs aligned symmetrically on the front of the lock. Only one lightpoint in the door is
recommended for each lock.
Figure: Mounting the lightpoint
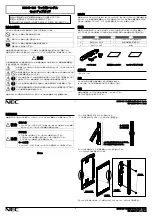
CABLE MANAGEMENT RECOMMENDATIONS
There are different ways to route the cable from the lock on the inside of the body to the controller. Three examples
of possible cable routing are given below. Further cable management recommendations are given in the operating
instructions „Primary Controller / Secondary Controller“.
a) Cable routing on the outside of the body made of wood or HPL with grooves
A lightpoint is recommended. Therefore, drill only one hole for the lightpoint.
The lightpoint can be assembled without tools.
64
15
64
36
18
14
0
5
0
5
Inside of the door
Side wall
Side w
all
Door
0
12
8
3
Side wall of locker with groove 8x3mm
and hole 12mm.
Guide the cable through the hole and connect it with a
lock on the one side. Lay it in the groove on the other
side and lead it to the controller.
Side w
all (outside)
Side w
all (outside)
NOTE: Pay attention
to the cable loop
(see p. 11)!


