EN
Picture mode
77
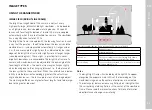
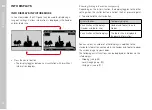
WHEN USING THE RANGEFINDER
Mostly center-weighted metering.
The light reflected by the light-colored shutter blades is captured
and measured by a photodiode. When the measuring range of the
exposure meter is undercut in a manual setting and very low light
density, then the triangular LED ( ) in the viewfinder on the left will
flash as a warning; the LED on the right ( ) will flash when the
measuring range of the exposure meter is surpassed. The shutter
speed icon will flash as a warning if a correct exposure cannot be
achievable using the available shutter speeds in aperture priority
mode. The relevant icon will flash if the required shutter speed
would undercut the fastest possible shutter speed or overshoot the
longest possible shutter speed. As exposure metering is done with
the working aperture, the same can be achieved by a Stop Down of
the lens.
IN LIVE VIEW MODE
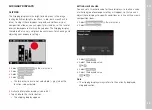
Optional methods are Spot metering, Center-Weighted and
Multi-Field metering. The metering will then be done via the picture
sensor.
▸
Select
Exp. Metering
Exp. Metering
in the main menu
▸
Select a metering method
(
Spot
Spot
,
Center-Weighted
Center-Weighted
,
Multi-Field
Multi-Field
)
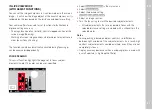
• The selected metering method is displayed in the header of
the screen image in Live View Mode; it appears on the status
screen (see p. 55) if the viewfinder is used.
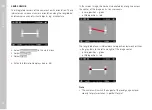
Spot metering allows a shifting of the metering field:
▸
Tap the LCD panel at the desired position
or
▸
Press the directional pad left or right as needed
EXPOSURE MODES
The camera offers two exposure modes: aperture priority mode or
manual setting. Choose one of the two options depending on
image object, situation or individual preference.
Notes
• Image noise becomes apparent when using higher sensitivities,
particularly on uniform dark areas. In order to reduce this
annoying phenomenon, the camera will take a second “black
picture” (taken with the shutter closed) automatically after
pictures taken with slow shutter speeds and high ISO values. The
noise metered in this parallel picture is then digitally “subtract-
ed” from the data for the actual picture. In such cases the
message
Noise Reduction
Noise Reduction
will appear with a relevant time value.
The doubling of the “exposure” time must be taken into account
for long-term exposure times. The camera must not be switched
off during that time.
• The remaining exposure time after shutter release is counted
down in seconds on the display for shutter speeds greater than
2 s.
SELECTING A MODE
▸
Set the shutter speed setting dial
A
(Aperture priority) or select
the desired shutter speed (Manual setting =
M
)
Summary of Contents for 20 002
Page 1: ...LEICA M10 R Instruction manual ...
Page 11: ...EN 11 Safety remarks ...
Page 23: ...EN Part Designations 23 ...
Page 41: ...EN Preparation 41 ...
Page 61: ...EN Camera basic settings 61 ...
Page 99: ...EN Picture mode 99 ...
Page 131: ...EN FAQ 131 ...
Page 141: ...EN Index 141 ...

