Care/Storage
EN
116
SENSOR
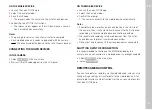
DUST DETECTION
Any dust or dirt particles stuck to the glass cover of the sensor
may result in noticeable dark stains or specks on the pictures.
Use the
Dust Detection
Dust Detection
function to check if and how much dust is on
the sensor. This procedure is more accurate than a visual check
and therefore a reliable method to find out if cleaning is needed.
▸
Select
Sensor Cleaning
Sensor Cleaning
in the main menu.
▸
Select
Dust Detection
Dust Detection
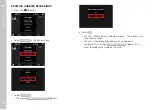
• The following message appears:
Please close the aperture to the largest value (16 or 22), and
Please close the aperture to the largest value (16 or 22), and
take a picture of a homogeneous surface (defocussed).
take a picture of a homogeneous surface (defocussed).
▸
Shutter release
• A “picture” will appear on the display, in which black pixels
represent dust particles.
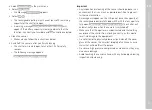
Note
• A relevant message will be displayed if dust detection is not
available. The display will return to the previous screen after a
few seconds. Repeat the process as needed.
SENSOR CLEANING
You can send your camera to the Leica Customer Care department
for sensor cleaning (see p. 138). This service is not part of the
warranty offering and will therefore incur charges. Use the
Open Shutter
Open Shutter
menu function if you feel confident that you can do the
cleaning yourself. The function will keep the shutter open and allow
access to the sensor.
Use clean, possibly ionized gases like air or nitrogen to blow loose
dust from the cover glass of the sensor. We recommend using
(rubber) bellows without a brush. Some specialist, low-pressure
cleaning sprays, e.g. "Tetenal Antidust Professional" can also be
used (follow the instructions provided for the product). Please
contact Leica Customer Care if you are unable to remove the
particles with the methods described above.
Note
• Leica Camera AG will not accept any responsibility for damages
caused by the user when cleaning the sensor.
Summary of Contents for 20 050
Page 1: ...LEICA M10 MONOCHROM Instruction manual ...
Page 11: ...EN 11 Safety remarks Safety remarks ...
Page 23: ...EN Part Designations 23 ...
Page 41: ...EN Preparation 41 ...
Page 123: ...EN FAQ 123 ...
Page 132: ...Index EN 132 W Warranty 15 Wi Fi WLAN 7 WLAN 7 ...
Page 133: ...EN Index 133 ...

