background image

LEICA DIGITAL-MODUL-R

Anleitung/Instructions

Summary of Contents for Digital-Modul R

Page 1: ...LEICA DIGITAL MODUL R Anleitung Instructions ...

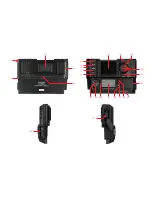
Page 2: ...1 2 1 1 1 3 1 4 1 5 1 25 1 11 1 12 1 13 1 14 1 15 1 16 1 17 1 18 1 19 1 20 1 21 1 22a 1 22 1 23 1 6 1 7 1 9 1 8 1 10 1 24 ...

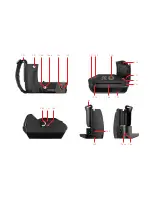
Page 3: ...1 26 1 27 1 28 1 28a 1 29 1 30 1 31 1 39 1 38 1 37 1 36 1 35 1 32 1 33 1 34 1 31 1 45 1 46a 1 40 1 42 1 41 1 43 1 44 1 46 ...

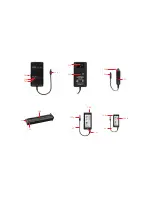
Page 4: ...1 50 1 49 1 52 1 53b 1 51 1 48 1 47 1 53a 1 53 1 56 1 55 1 54 1 57a 1 57 1 58 1 59 1 60a 1 60 1 60b ...

Page 5: ...LEICA DIGITAL MODUL R Anleitung English instructions pages 59 114 ...

Page 6: ...s gesprochen einfach und die Handhabung Ihrer vor handenen Ausrüstungsteile bleibt dabei unverändert Die Bedienungsoberfläche für die digital spezifischen Einstellungen ist ebenso logisch und ergonomisch ausgeführt wie an der Leica R selbst Damit Sie die volle Leistungsfähigkeit Ihres LEICA DIGITAL MODUL R richtig nutzen sollten Sie bitte zunächst diese Anleitung lesen Diese Anleitung wurde auf 10...

Page 7: ...3 ...

Page 8: ...nd 16 Ansetzen der Digital Rückwand 16 Ansetzen der Versorgungseinheit 18 Hinweise zur Funktion des Rückspul Entriegelungsknopfes bzw des Mehrfach Belichtungshebels 18 Einsetzen des Akkus in die Herausnehmen aus der Versorgungseinheit 19 Einstellen der Griffschlaufen Weite 19 Laden des Akkus 20 Ladezustands Anzeigen 21 Netzbetrieb 21 Einsetzen und Herausnehmen der Speicherkarte 22 Die wichtigsten ...

Page 9: ...eb 37 Der Wiedergabe Betrieb 38 Weitere Optionen während des Betrachtens 38 Betrachten anderer Aufnahmen Blättern im Speicher 38 Vergrößern Wählen des Ausschnitts Gleich zeitige Betrachten von mehreren verkleinerten Aufnahmen 38 Löschen von Aufnahmen 40 Löschen einzelner Aufnahmen 41 Löschen aller Aufnahmen auf der Speicherkarte 41 Schützen von Aufnahmen Aufheben des Löschschutzes 42 Nachträgliche...

Page 10: ...Firmen und Produktnamen die in dieser Anleitung erwähnt werden sind Warenzeichen bzw eingetragene Warenzeichen der betreffenden Firmen Entsorgung elektrischer und elektronischer Geräte Gilt für die EU sowie andere europäische Länder mit getrennten Sammelsystemen Dieses Gerät enthält elektrische und oder elektronische Bauteile und darf daher nicht im normalen Hausmüll entsorgt werden Stattdessen mu...

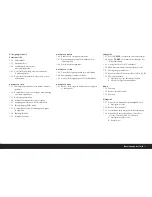
Page 11: ...Schieber zum Abnehmen der Kamera Rückwand C Digital Rückwand mit a Schutz Abdeckung für Sensor mit b Entriegelungsschieber und c Entriegelungswippe D Versorgungseinheit mit a Griffschlaufe E Akku F Ladegerät mit a 3 Wechselsteckern für unterschiedliche Steck dosen Systeme b KFZ Ladekabel G 512MB SD Speicherkarte in Antistatik Behältnis H FireWire Kabel I FireWire Adapter J CD Adobe Photoshop Eleme...

Page 12: ... zum Blättern im Aufnahme speicher und zum Vergrößern Verkleinern der betrachteten Aufnahmen 1 14 Kreuztasten zum Navigieren im Menü zum Einstellen der angewählten Menüpunkte Funktionen mit oberer und unterer und zum Blättern im Aufnahmespeicher mit linker und rechter 1 15 Taste zur Ausschalter bzw zur Eingabe Bestätigung OK OFF 1 16 Abdeckklappe über dem Speicherkarten Schacht 1 17 Kontaktleiste ...

Page 13: ...ift 1 42 Stativ Anschlussgewinde Ansicht von rechts 1 43 Oberer Befestigungspunkt für Griffschlaufe 1 44 Entriegelungsschieber für Akku 1 45 Unterer Befestigungspunkt für Griffschlaufe Ansicht von links 1 46 Buchse für Netzgerät und Fernsteuerung mit a Indexpunkt Ladegerät 1 47 Rote CHARGE Leuchtdiode zur Ladeanzeige 1 48 Grüne POWER Leuchtdiode zur Anzeige der Netzverbindung 1 49 2 polige Buchse ...

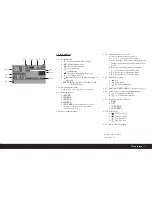
Page 14: ...ingestellt 2 1 8 Datum Uhrzeit 2 1 9 Bildnummer Gesamtzahl der vorhandenen Aufnahmen 2 1 10 Bilddaten a Verschlusszeit b Blende1 c Empfindlichkeit d Belichtungskorrektur e Belichtungs Messmethode f Brennweite1 2 g Kompression Dateiformat h Auflösung i Weißabgleich j Moiré Filtereinstellung k Benutzer Profil l Ordnernummer Dateiname 1 Die meisten Objektive mit ROM Ausstattung einschließlich des EXT...

Page 15: ...wenn angewählt beinhaltet Funktionen 2 2 1 3 8 9 10 sowie Menü Einstellungen a keine Anzeige momentane Einstellung en entsprechen keinem gespeicherten Benutzer Profil1 b 0 Werkseinstellung nicht veränderbar c 1 1 gespeichertes Benutzer Profil d 2 2 gespeichertes Benutzer Profil e 3 3 gespeichertes Benutzer Profil 2 2 6 Akku Ladezustand a Voll b Teilentladen c Erschöpft blinkend 2 2 7 Hinweis auf I...

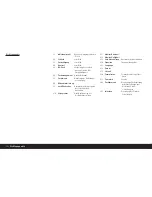
Page 16: ...erierung 3 9 Auto Rückschau Automatische Wiedergabe der jeweils letzten Aufnahme 3 10 Histogramm Grafik zur Anzeige der Helligkeitsverteilung 3 11 Monitor Kontrast 3 12 Monitor Helligkeit 3 13 Auto Abschaltung Automatische Abschaltung 3 14 Signalton Tastenquittungstöne 3 15 Language 3 16 Datum 3 17 Uhrzeit 3 18 Formatieren Formatieren der Speicher karte 3 19 Firmware Version 3 20 Zurücksetzen Glei...

Page 17: ... Lösen Sie für die Aufnahme mit einem der 3 Aus löser aus s S 24 Betrachten der Aufnahmen Für unbegrenzte Betrachtungsdauer 1 Drücken Sie die PLAY Taste 1 10 um die letzte Aufnahme zu betrachten 2 Drücken Sie die linke oder rechte Kreuztaste 1 14 um andere Aufnahmen zu betrachten Hinweise Für automatische kurzzeitige Wiedergabe nach jeder Aufnahme steht die Auto Rückschau Funktion zur Verfügung 3 ...

Page 18: ...r Einstellscheiben Die Einstellscheibe in der Kamera muss gegen die mit gelieferte A ausgewechselt werden Diese besitzt einen Rahmen der dem etwas kleineren Format des Sensors entspricht Wichtig Motivteile die im Sucher der Kamera zwar zu sehen sind jedoch außerhalb dieses Rahmens lie gen werden nicht vom Sensor erfasst erscheinen also nicht im Bild Herausnehmen 1 Nehmen Sie falls ein Objektiv an ...

Page 19: ...en Sie dann in ihrem Fach einrasten Reinigen der Einstellscheiben Staubpartikel können mit Hilfe des beiliegenden Pin sels entfernt werden Es empfiehlt sich den Pinsel in das dafür vorgesehene Loch im Behälter einzustecken und die Einstellscheiben mit der Pinzette über das Pin selhaar zu führen Grobe Verschmutzungen und Fingerabdrücke werden durch ein Ultraschallbad beim Optiker oder beim Customer...

Page 20: ...kten Führung auf der senkrechten Leiste rechts neben der Achse Pfeil liegen 3 Drücken Sie den Schieber und damit den beweg lichen oberen Scharnierstift der Rückwand nach unten Die Rückwand ist damit entriegelt und kann 4 gekippt Bild 2 und abgenommen werden Zum Ansetzen der Kamera Rückwand gehen Sie in umgekehrter Reihenfolge vor Ansetzen der Digital Rückwand 1 Setzen Sie den unteren starren Schar...

Page 21: ... Deckglas irreparabel beschädigen Setzen Sie die Abdeckung immer sofort nach Abnehmen der Digital Rückwand von der Kamera auf und nehmen Sie sie nur zum Ansetzen an die Kamera ab Dies ist auch notwendig um das Farb filter vor Verblassen durch längere Einwirkung von hellem Licht oder UV Strahlung zu schützen Sorgen Sie dabei dafür dass auch die Abdeckung staubfrei ist Sollten der Sensor dennoch ver...

Page 22: ...nach hinten und sofort wieder zurück und 3 drehen Sie an der Filmtransportwalze wie in der Abbildung dargestellt Wichtig Achten Sie bitte darauf unter keinen Umstän den den Verschluss Bildfenster zu berühren 4 Sobald die Walze blockiert und der Rückspul Entrie gelungsknopf herausgesprungen ist können Sie mit dem Ansetzen des Digital Modul R fortfahren wie auf den Seiten 16 18 beschrieben ist Hinwe...

Page 23: ...al Modul R geladen werden s S 20 Vor dem Entnehmen des Akkus sollte das Digital Modul R ausgeschaltet werden Herausnehmen 5 Drücken Sie den Entriegelungsschieber 1 44 nach oben Der Akku springt daraufhin Federkraft unter stützt so weit hervor dass Sie ihn greifen und 6 ganz herausziehen können Einstellen der Griffschlaufen Weite Die integrierte Griffschlaufe 1 26 bewirkt auch auf Dauer und in Verb...

Page 24: ... ausschließlich am Ladegerät aufgela den werden In der Versorgungseinheit wird er auch bei Netzbetrieb s S 21 nicht geladen Der Akku sollte vor der ersten Verwendung des Digi tal Modul R geladen werden Der Akku muss eine Temperatur zwischen 0 35 C aufweisen um geladen werden zu können anson sten schaltet sich das Ladegerät nicht ein Lithium Ionen Akkus wie der des Digital Modul R entwickeln keinen...

Page 25: ... gegenüber der serienmäßigen Versorgung durch den Wechselakku eine erhebliche Arbeitserleichterung bedeuten Zur Verbindung 1 Der 8 polige Stecker 1 57a wird in die entsprechen de Buchse 1 46 des Versorgungsteils des Digital Modul R gesteckt wobei darauf zu achten ist dass die Führungen an Stecker und Buchse gegenüberste hen am Gehäuse des Digital Modul R durch einen weißen Punkt gekennzeichnet 1 4...

Page 26: ...e 1 18 über dem Spei cherkarten Schacht auf der rechten Seite des Digi tal Modul R indem Sie sie zunächst entsprechend dem Pfeilsymbol ein Wenig nach hinten drücken ziehen Die Federkraft unterstützte Klappe springt daraufhin selbsttätig auf 3 Setzen Sie die Speicherkarte G mit den Kontakten nach hinten und mit der abgeschrägten Ecke nach oben zeigend in den Schacht 1 24 Schieben Sie sie gegen den ...

Page 27: ...grund sätzlich im Aufnahme Betrieb d h der Monitor 1 11 bleibt nach Erreichen der Betriebsbereitschaft dunkel Die Bedienung der Kamera einschließlich der Einstel lung sämtlicher Kamera Funktionen bleibt auch bei der Verwendung des Digital Modul R völlig unverän dert Lediglich bei der Bestimmung des Ausschnitts müssen Sie die Begrenzungslinien für das Digital Format s S 14 auf der Einstellscheibe b...

Page 28: ...pen aktiviert das Messsystem der Kamera und startet eine evtl vorgewählte Selbst auslöser Vorlaufzeit War das Digital Modul R vorher ausgeschaltet wird es dadurch eingeschaltet s S 23 Hinweise Die Betriebsbereitschaft wird beim Einschalten nach ca 3s erreicht Ggf muss nach dem Einschalten der Verschluss der Kamera noch gespannt werden entweder manuell mit dem Schnellschalthebel oder durch erneutes...

Page 29: ...t der automatischen Belichtungsreihe mehrere Alterna tiven mit abgestufter Belichtung erstellen Im Anschluss können Sie die passendste Aufnahme zur weiteren Verwendung auswählen Mit dem Digital Modul R besteht eine automatische Belichtungsreihe Bracketing aus jeweils 3 Aufnah men Zwei Abstufungen stehen zur Verfügung sie wer den mit dem Hebel 1 29 angewählt Die Aufnahmen werden entsprechend jeweil...

Page 30: ...sse anpassen können Hinweis Die Einstellung der Helligkeit wirkt sich auf die Akku Standzeit aus Je heller desto höher der Stromverbrauch und daher desto kürzer die Standzeit Anzeige der Aufnahme Daten Mit der INFO Taste 1 6 können Sie sich eine ganze Reihe von Aufnahme Daten zusammen mit einem ver kleinerten Bild anzeigen lassen Über die Menüsteuerung Histogramm 3 10 können Sie zusätzlich verschi...

Page 31: ... benötigt werden 1 Kompressionsrate Dateiformat COMP compres sion s S 31 2 Auflösung RES resolution s S 31 3 Empfindlichkeit ISO s S 34 4 Struktur Überlagerungen Moire s S 35 5 Weißabgleich WB white balance s S 32 Ebenfalls zur gleichen Gruppe gehören 6 Benutzerprofile USER s S 36 7 Selbstauslöser s S 37 Die jeweiligen Einstellungen dieser Funktionen werden bei eingeschaltetem Digital Modul R im D...

Page 32: ...eils vorher eingestellte Funktionsvariante aufgeführt 2 Den gewünschten Menüpunkt können Sie sowohl durch Drehen des Einstellrades 1 13 als auch mit der oberen unteren Kreuztaste 1 14 anwählen Hinweis Die Menüpunkte sind nicht in einer Endlos Schleife angeordnet d h an den End Menüpunkten Individualprofil 3 1 und Interface 3 21 steht jeweils nur eine Einstell Richtung zur Verfügung im ersten Fall ...

Page 33: ...nd im dazugehörigen Untermenü die gewünschte Sprache Bis auf wenige Ausnahmen Tastenbezeichnungen Kurzbegriffe wechseln alle sprachlichen Angaben Datum und Uhrzeit Datum und Uhrzeit werden jeweils über eigene Menü punkte eingestellt Datum Es stehen 3 Varianten für die Reihenfolge der Darstel lung zur Verfügung Einstellen 1 Wählen Sie im Menü s S 12 28 Datum 3 16 und rufen Sie das Untermenü auf Es ...

Page 34: ...chalteter Kamera das Digital Modul R ausgeschaltet ist kann es jederzeit durch Drücken einer der drei Auslöser Kamera Auslöser nur bei LEICA R9 Haupt 1 27 und Hochformat Aus löser 1 28 oder durch betätigen des Abblend Schie bers der Kamera nur bei LEICA R9 wieder in Betrieb genommen werden s dazu auch Ein und Ausschal ten S 23 Tastenquittungs bzw Signaltöne Mit dem LEICA DIGITAL MODUL R können Sie...

Page 35: ...ssion Dateiformat Die Aufzeichnung der Bilddaten ist mit vier unter schiedlichen Kompressionsraten bzw Dateiformaten möglich Dies erlaubt eine genaue Abstimmung auf den vorgesehenen Verwendungszweck bzw auf die Nutzung der vorhandenen Speicherkarten Kapazität Geringer komprimierte bzw unkomprimierte Daten sätze die mehr Bildinformationen beinhalten und die Sie z B für großformatige Abzüge oder die...

Page 36: ...ab darauf abgestimmt wird welche Farbe als Weiß wiedergege ben werden soll Im LEICA DIGITAL MODUL R können Sie dazu zwi schen neun verschiedenen Einstellungen wählen A für die automatische Steuerung die in den meisten Situationen neutrale Ergebnisse liefert sechs feste Voreinstellungen für die häufigsten Lichtquellen z B für Innenaufnahmen mit vorherrschen dem Glühlampen Licht z B für Innenaufnahm...

Page 37: ...e drücken Für die manuelle Einstellung durch Messung 1 Drehen Sie das Wählrad 1 22 auf WB white balance halten Sie die SET Taste 1 23 gedrückt und wählen Sie mit dem Einstellrad 1 13 die Vari ante M 2 2 1h 2 Geben Sie die SET Taste wieder frei Im Datenfeld blinkt das M als Hinweis auf die Ein stell Bereitschaft gleichzeitig erscheint im Moni tor die Meldung Richten Sie die Kamera auf eine weiße Fl...

Page 38: ...im dazugehörigen Untermenü die gewünschte Funktion Bildeigenschaften Schärfe Farbsättigung Kontrast Eine der vielen Vorteile der elektronischen gegenüber der herkömmlichen Bildaufzeichnung liegt in der sehr einfachen Veränderung wesentlicher d h den Charak ter entscheidend bestimmender Bildeigenschaften Während Bildbearbeitungsprogramme dies nach der Aufnahme und am Rechner in großem Umfang erlau ...

Page 39: ...nstellrad 1 13 die gewünschte Variante s dazu auch S 27 Im Datenfeld verändert sich die Anzeige entspre chend 2 2 11 Hinweise Diese Filterfunktion sollte nur eingesetzt werden wenn sich die entsprechenden Effekte in einer Auf nahme gezeigt haben Die Moiré Filterfunktion bedingt einen erhöhten Rechenaufwand Infolgedessen verlängert sich die Daten Verarbeitungszeit und damit auch die Speicherzeit in...

Page 40: ...n Nach der Wahl einer der Speicherplätze verän dert sich die Anzeige entsprechend Hinweise Zusätzlich zu den drei Speicherplätzen gibt es auch noch die Einstellung 0 mit der Sie jederzeit wieder die Werks Grundeinstellungen aufrufen können und zwar unabhängig davon ob eine der Speicherplätze gerade genutzt wird oder beliebige andere nicht gespeicherte Funktionseinstellungen Somit ent spricht Indiv...

Page 41: ... 1 13 die gewünschte Variante s S 27 Im Datenfeld erscheint eine entsprechende Anzeige 2 2 8 Zum Starten der Vorlaufzeit tippen Sie einen der Aus löser Kamera Auslöser 1 27 28 an Vorne an der Kamera zeigt die blinkende Leuchtdio de das Ablaufen der Vorlaufzeit an im Datenfeld wird sie gleichzeitig zurückgezählt Hinweis Während der laufenden Selbstauslöser Vorlaufzeit kann der Betrieb jederzeit dur...

Page 42: ...u den mit höheren Nummern Längeres Drücken ca 2s ergibt einen schnellen Durchlauf Nach den höchsten und niedrig sten Nummern beginnt die Reihe der in einer Endlos Schleife angeordneten Aufnahmen wieder von vorne so dass Sie sämtliche Aufnahmen in beiden Richtun gen erreichen können Im Monitor wechseln dementsprechend die Bild und Datei Nummern B Vergrößern Wählen des Ausschnitts Gleichzeitiges Bet...

Page 43: ...e des Ausschnitts beliebig wählen Dazu wird die Taste mehrfach gedrückt in deren Richtung Sie den Ausschnitt ver schieben möchten Das Rechteck innerhalb des Rahmens 2 1 2 in der rechten unteren Ecke des Monitors symbolisiert zusätzlich zur Vergrößerung die Lage des gezeig ten Ausschnitts Durch Drehen des Einstellrades nach links gegen den Uhrzeigersinn ausgehend von der Normalgröße kön nen sie gle...

Page 44: ...ie nicht mehr benötigt werden oder wenn mehr Speicherplatz auf der Karte benötigt wird Das LEICA DIGITAL MODUL R bietet Ihnen dazu die Möglichkeit je nach Bedarf einzelne oder gleichzeitig alle Aufnahmen zu löschen Hinweise Löschen ist unabhängig davon möglich ob eine Auf nahme gerade in Normalgröße oder ob mehrere verkleinerte gezeigt werden Bei geschützten Aufnahmen muss der Löschschutz zunächst...

Page 45: ...elles Bild Löschen Die Anzeigen nach dem Löschen Löschen einzelner Aufnahmen Nach dem Löschen erscheint die vorhergehende Auf nahme Falls jedoch keine weitere Aufnahme auf der Karte gespeichert war erscheint die Meldung Löschen aller Aufnahmen auf der Speicherkarte Nach dem Löschen erscheint die Meldung Falls jedoch eine oder mehrere Aufnahmen löschge schützt waren erscheint diese bzw die erste di...

Page 46: ...rscheint im Bild das entspre chende Untermenü Hinweise Der Einstellvorgang kann jederzeit durch erneute Betätigung der PROTECT Taste abgebrochen wer den Während des gesamten Einstellvorgangs stehen die folgenden Bedienungselemente bzw deren Funktionen nicht zur Verfügung die MENU 1 12 DELETE 1 9 und INFO 1 6 Tasten Die weitere Bedienung erfolgt Menü gesteuert d h prinzipiell genauso wie in den Abs...

Page 47: ...r als Teile einer Website nutzen möch ten Es stehen maximal 3 Verringerungsstufen zur Verfü gung die fest mit zwei Kompressionsraten s dazu auch S 31 gekoppelt sind 2896 x 1920 Groß JPEG fine 1920 x 1280 Mittel JPEG fine und 1280 x 848 Klein JPEG basic Hinweis Die Auflösung kann nur verringert werden wenn mindestens eine niedrigere Auflösung als die der ursprünglichen Aufnahme zur Verfügung steht ...

Page 48: ...Schalten Sie das Digital Modul R nicht aus während die Speicherkarte formatiert wird Falls die Speicherkarte in einem anderen Gerät wie z B einem Rechner formatiert worden ist sollten Sie sie im Digital Modul R erneut formatieren Falls sich die Speicherkarte nicht formatieren lässt sollten Sie Ihren Händler oder Leica um Rat fragen Beim Formatieren der Speicherkarte werden selbst geschützte Aufnah...

Page 49: ...ferten FireWire Kabel H und evtl dem mitge lieferten Adapter I an eine FireWire Buchse des Rechners an 3 Halten Sie beim ersten Anschließen des Digital Modul R die Windows 98 SE Installations CD bereit da evtl ein Treiber auf die Festplatte des Rechners kopiert werden muss Wenn der Treiber für die Datenübertragung bereits auf der Festplatte vorhanden ist setzen Sie die Datenübertragung fort wie un...

Page 50: ...tgelieferte FireWire Kabel H und ggf den mitgelieferten FireWire Adapter I Solange Daten vom Digital Modul R auf den Rech ner übertragen werden darf die Verbindung keines falls durch Herausziehen des FireWire Kabels unter brochen werden da sonst Rechner und oder Digital Modul R abstürzen können ggf kann sogar die Speicherkarte irreparabel beschädigt werden Solange Daten vom Digital Modul R auf den...

Page 51: ...och darauf sie nicht zu verwech seln und wenden Sie keine Gewalt an da es dann zu einer falschen Polung kommen könnte dies kann Schäden an den Geräten verursachen 4 Starten Sie FlexColor 5 Die erfolgreiche Verbindung des Rechners mit dem Digital Modul R erkennen Sie durch das Erschei nen des entsprechenden Symbols im Monitor 1 11 sowie der Anzeige CAMERA ONLINE in der FlexColor Fußzeile 6 Durch Kl...

Page 52: ...n bietet Rohdatendateien im standardisier ten DNG Format zu öffnen beispielsweise das mitge lieferte Adobe Photoshop Elements 3 oder Adobe Photoshop CS mit dem Camera RAW Plugin ab Version 2 3 oder FlexColor über die Leica Homepage www leica camera com digitalekameras digitalmodul downloads index html per Download zu erhalten Bei der Bearbeitung haben Sie die Möglichkeit nach träglich Parameter wi...

Page 53: ...R in Kontakt bleiben Stellen Sie sicher dass Sand oder Staub nicht in das Digital Modul R eindringen können z B am Strand Sand und Staub können Kamera und Speicherkarte beschädigen Achten Sie insbesondere beim Einset zen und Herausnehmen der Karte darauf Stellen Sie sicher dass kein Wasser in das Digital Modul R eindringen kann z B bei Schnee Regen oder am Strand Feuchtigkeit kann Fehlfunktionen u...

Page 54: ...ontakte auf etwaige Schäden Das Einsetzen eines beschädigten Akkus kann seinerseits das Digital Modul R beschädigen Akkus haben nur eine begrenzte Lebensdauer Geben Sie schadhafte Akkus an einer Sammelstelle zwecks korrekten Recyclings ab Werfen Sie Akkus keinesfalls in ein Feuer da sie sonst explodieren können Für das Ladegerät Wenn das Ladegerät in der Nähe von Rundfunk Empfängern eingesetzt wir...

Page 55: ...mit teln Im Zweifelsfall wenden Sie sich bitte an den Leica Infodienst Adresse s S 56 Wichtig Versuchen Sie nicht Staubpartikel mit dem Mund vom Sensor Deckglas zu blasen bereits kleinste Speicheltröpfchen können schwer zu entfernende Flecken verursachen Druckluft Reiniger mit hohem Gasdruck dürfen nicht eingesetzt werden da sie ebenfalls Schäden verursachen können Vermeiden Sie es sorgfältig die ...

Page 56: ...t Verzögerung Auf die Speicherkarte konnte nicht zugegriffen werden Nehmen Sie sie heraus und setzen Sie sie erneut ein s S 22 Möglicherweise ist die Speicherkarte beschädigt Kein Bild vorhanden Es sind keine Aufnahmen auf der eingesetzten Karte gespeichert Für eine Wiedergabe müssen erst noch Aufnahmen erfolgen oder eine andere Karte mit gespeicherten Aufnahmen eingesetzt werden s S 22 Datenübert...

Page 57: ...der Mehrfach Belichtungshebel der Kamera in seiner Ruhestellung der Rückspulknopf ist sicht bar siehe dazu auch S 18 4 Der Monitor ist zu dunkel oder zu hell 4 1 Stellen Sie die gewünschte Helligkeit ein 5 Die gerade erfolgte Aufnahme wird nicht im Monitor gezeigt 5 1 Ist bei Einstellung des Digital Modul R auf die Aufnahme Betriebsart die Auto Rückschau Funktion eingeschaltet 6 Die Aufnahme lässt...

Page 58: ...Tastenquittungs Rückmelde töne 30 Griffschlaufe 19 Histogramm 26 Installation der beigefügten Software 48 ISO Empfindlichkeit 34 Kompressionsrate 31 Kontrast siehe Bildeigenschaften Kurzanleitung 13 Lautstärke Einstellen der Tastenquittungs Rückmelde töne 30 Lieferumfang 7 Löschen der Aufnahme 40 aller Aufnahmen auf der Speicherkarte 41 einzelner Aufnahmen 41 Menüpunkte 12 Menüsprache 29 Menüsteue...

Page 59: ...rch Antippen einer der Auslöser oder Aus und erneutes Einschalten des Digital Modul R Verschlussaufzug Motorisch mit Hilfe der Versorgungs einheit Max Belichtungszeit 16 Sekunden Serienaufnahme 2 Bilder s max 9 Bilder in Serie Automatische Belichtungsreihe Wählbar 3 Aufnahmen mit 0 5 oder 1EV Abstufungen Kompatibilität Mac OS X Windows 98 ME 2000 XP Software Adobe Photoshop Elements 3 Mac Win Selb...

Page 60: ...n sind erhältlich bei Leica Camera AG Leica Akademie Oskar Barnack Str 11 D 35606 Solms Tel 49 0 6442 208 421 Fax 49 0 6442 208 425 e mail la leica camera com Leica im Internet Aktuelle Informationen zu Produkten Neuheiten Veranstaltungen und dem Unternehmen Leica erhalten Sie auf unserer Homepage im Internet unter http www leica camera com Leica Infodienst Anwendungstechnische Fragen zum Leica Pr...

Page 61: ...57 ...

Page 62: ...58 ...

Page 63: ...LEICA DIGITAL MODUL R Instructions Illustrations inside front and rear covers ...

Page 64: ...e is no change in the handling of your existing items of equipment The user interface for the specific digital settings is just as logically and ergonomically structured as on the Leica R itself In order to be able to use the full capabilities of your LEICA DIGITAL MODUL R correctly you should read this manual first This manual has been printed on 100 chlorine free bleached paper The complex manuf...

Page 65: ...e inter ference by one or more of the following measures Reorient or relocate the receiving antenna Increase the separation between the equipment and receiver Connect the equipment into an outlet on a circuit different from that to which the receiver is connected Consult the dealer or an experienced radio TV technician for help FCC Caution To assure continued compliance follow the attached install...

Page 66: ... motor 74 Removing the camera back 74 Attaching the digital back 74 Attaching the power unit 76 Notes on the use of the rewind release button and the multiple exposure lever 76 Inserting removing the battery into from the power unit 77 Setting the grip strap length 77 Charging the battery 78 Charge level displays 79 Mains operation 79 Inserting and removing the memory card 80 The most important se...

Page 67: ...tional options when viewing 96 Viewing other pictures Scrolling in the memory 96 Enlarging selecting the trimming simultaneous viewing of several reduced pictures 96 Deleting pictures 98 Deleting individual pictures 99 Deleting all pictures on the memory card 99 Protecting pictures Clearing delete protection 100 Reducing the resolution after recording 101 Formatting the memory card 102 Transferrin...

Page 68: ...l are trademarks or registered trade marks of the relevant companies Disposal of electric and electronic equipment Applicable in the EU and other European coun tries with separate collection systems This equipment contains electric and or electronic parts and must therefore not be disposed of as nor mal household waste Instead it should be disposed at the respective collection points for recycling...

Page 69: ... B Slider for removing the camera back C Digital back with a Protective cover for sensor with b Unlocking slider and c Unlocking rocker D Power unit with a Grip strap E Battery F Charger with a 3 interchangeable plugs for different mains outlet systems b Car charging lead G 512MB SD memory card in antistatic case H FireWire cable I FireWire adapter J Adobe Photoshop Elements 3 CD ...

Page 70: ...us setting the selected menu items functions scrolling in the memory and for enlarging reducing the pic tures viewed 1 14 Direction buttons for navigation in menu setting the selected menu items functions up and down and scrolling in the memory left and right 1 15 Button to switch off or confirm input OK OFF 1 16 Flap over memory card slot 1 17 Contact strip for connection with power unit 1 18 Spe...

Page 71: ... 1 42 Tripod connecting thread View from right 1 43 Upper fastening point for grip strap 1 44 Unlocking slider for battery 1 45 Lower fastening point for grip strap View from left 1 46 Socket for mains unit and remote control with a Index mark Charger 1 47 Red CHARGE LED to indicate charging 1 48 Green POWER LED to indicate mains connection 1 49 2 pin socket for car charging cable 1 50 Battery con...

Page 72: ...set 2 1 8 Date time 2 1 9 Picture number total number of available pictures 2 1 10 Picture information a Shutter speed b Aperture1 c Sensitivity d Exposure compensation e Exposure measuring method f Focal length1 2 g Compression file format h Resolution i White balance j Moiré filter setting k User profile l Folder number file name 1 Most lenses equipped with ROM including the EXTENDER R2x 11 269 ...

Page 73: ...user profile only if selected includes functions 2 2 1 3 8 9 10 and menu settings a No display Current setting s do not correspond to a stored user profile1 b 0 Factory setting cannot be changed c 1 1st stored user profile d 2 2nd stored user profile e 3 3rd stored user profile 2 2 6 Battery charge level a Fully charged b Partially discharged c Flat flashing 2 2 7 Indication for ISO PUSH only in c...

Page 74: ...esolution after recording 3 8 Picture Numbering 3 9 Auto Review Automatic review of last picture 3 10 Histogram Graphic to indicate bright ness distribution 3 11 Monitor Contrast 3 12 Monitor Brightness 3 13 Auto Power Off 3 14 Acoustic Signal Button acknowledgement tones 3 15 Language 3 16 Date 3 17 Time 3 18 Format Formatting the memory card 3 19 Firmware Firmware version 3 20 Reset Simultaneous...

Page 75: ...hutter with one of the 3 shutter release buttons to take the picture see p 82 Viewing pictures For an unlimited viewing duration 1 Press the PLAY button 1 10 to view the last pic ture taken 2 Press the left or right direction button 1 14 to view other pictures Notes The Auto Review function 3 9 see p 81 is avail able for brief automatic review after taking each pic ture The INFO function see p 84 ...

Page 76: ...CA DIGITAL MODUL R Preparation Changing the focusing screen The focusing screen in the camera must be replaced with the one supplied A This has a frame correspond ing to the slightly smaller format of the sensor Important Parts of the subject that can be seen in the camera s viewfinder but lie outside this frame are not captured by the sensor and therefore do not appear in the picture Removing 1 I...

Page 77: ...he container and click it into place in its compartment Cleaning the focusing screen Dust particles can be removed using the brush sup plied It is recommended that you place the brush in the hole provided in the container and then move the focusing screen over the hair of the brush using the tweezers More severe dirt and fingerprints can be removed in an ultrasonic bath by an optician or by the Le...

Page 78: ...r must be aligned with the vertical strip to the right of the axis arrow 3 Press the slider and thus the moving upper joint pin on the back downwards The back is thus unlocked and can be 4 tilted Figure 2 and removed To attach the camera back follow this procedure in reverse order Attaching the digital back 1 Insert the lower rigid joint pin 1 1 on the digital back which is held slightly diagonal ...

Page 79: ...rty For example fingerprints can cause irreparable damage to the sensor cover glass Always attach the cover immediately after removing the digital back from the camera and only remove it to attach it to the camera This is also necessary to protect the color filter against fading due to the long term effects of bright light or UV radiation Ensure that the cover is also free of dust However if the s...

Page 80: ...back once and immediately return it to its resting position and 3 rotate the film sprocket wheel as indicated in the image Important Be very careful not to touch the shutter curtain 4 As soon as the sprocket wheel blocks and the rewind release button has sprung back up you can continue attaching the Digital Modul R as described on pp 75 76 Notes Should you accidentally have pressed the rewind rele...

Page 81: ...e Digital Modul R for the first time see p 78 The Digital Modul R should be switched off before removing the battery Removing 4 Press the unlocking slider 1 44 upwards The spring force then causes the battery to spring upwards so that you can take hold of it 5 and completely remove it Setting the grip strap length The integrated grip strap 1 26 provides extremely convenient handling and carrying e...

Page 82: ...s not charged when in the power unit even during mains operation see p 79 The battery should be charged before using the Digital Modul R for the first time The battery must have a temperature of 0 35 C to be charged otherwise the charger does not switch on Lithium ion batteries such as the one used in the Digital Modul R do not develop a memory effect They can therefore be charged at any time rega...

Page 83: ...ctor 1 57a into the corre sponding socket 1 46 on the supply unit for the Digital Modul R ensuring that the guides on the connector and the socket are aligned a white dot on the Digital Modul R s housing indicates the cor rect position 1 46a Then secure the connection by tightening the union nut on the connector 2 Next connect the appropriate mains cable 1 59 for the system you are using i e plug ...

Page 84: ...lling it slightly back as indicated by the arrow The spring force then causes the flap to auto matically spring up 3 Insert the memory card G into the slot 1 24 with the contacts to the rear and the beveled corner pointing upwards Slide it completely into the slot against the spring resistance until you hear it click into place 4 Close the cover by pressing it and sliding it forward until it click...

Page 85: ...3 13 see p 70 86 88 and it is not operated during this time Taking photographs After switching on the Digital Modul R is always in record mode i e the monitor 1 11 remains dark once it is ready to use Operation of the camera including the settings for all camera functions remains unchanged when using the Digital Modul R The only difference is that you must take account of the frame for digital for...

Page 86: ... brief tap activates the camera s metering system and starts any preset self timer delay time If the Digital Modul R was previously switched off this switches it on see p 81 Notes After switching on the camera is ready to use after approx 3s It may be necessary to cock the camera s shutter after switching on either manually using the quick wind lever or by pressing one of the shutter release butto...

Page 87: ... base your exposure on In such cases you can use automatic exposure bracketing to produce several alternatives with graduated exposure You can then select the most appropriate picture for further use With the Digital Modul R an automatic exposure series bracketing consists of 3 pictures at a time Two grad uations are available and are selected using the lever 1 29 The pictures are exposed differen...

Page 88: ...s Note The brightness setting affects the life of the battery The brighter the image the higher the power consumption and the shorter the battery life Displaying image data You can use the INFO button 1 6 to display a whole range of picture information along with a reduced image You can also use menu control Histogram 3 10 to select different additional histogram variations see next section Histog...

Page 89: ...lications etc 1 Compression rate file format COMP compression see p 89 2 Resolution RES resolution see p 89 3 Sensitivity ISO see p 92 4 Pattern overlays Moire see p 93 5 White balance WB white balance see p 90 This group also includes 6 User profiles USER see p 94 7 Self timer see p 95 The relevant settings for these functions are displayed in the data panel 1 21 when the Digital Modul R is switc...

Page 90: ...d a red border The previous function variation set is always listed to the right of the line 2 You can select the desired menu item either by turn ing the setting ring 1 13 or by pressing the up down direction key 1 14 Note The menu items are not arranged in an endless loop i e at the ends of the list the User Profile 3 1 and Interface 3 21 menu items only one set ting direction is available down ...

Page 91: ...se the desired language in the corre sponding submenu Apart from a few exceptions button names short designations all linguistic information changes Date and time Date and Time are each set using separate menu items Date There are 3 variations available for the sequence of the date Setting 1 In the menu see p 70 86 select Date 3 16 and open up the submenu It consists of the 2 items Setting and Seq...

Page 92: ...hed back on at any time by pressing one of the three shutter release buttons camera shutter release button on LEICA R9 only main 1 27 and portrait format shutter release buttons 1 28 or by pressing the stop down slider on the camera on LEICA R9 only see also Switching on and off p 81 Button acknowledgement or signal tones With the LEICA DIGITAL MODUL R you can decide whether you want your settings...

Page 93: ...ngly 2 2 9a b c d Compression file format Picture data can be recorded at four different compres sion rates or file formats This allows you to adjust the setting precisely to the intended use or to the available memory card capacity Of course less compressed or uncompressed data which contains more picture information and should be selected for large prints or further processing in photo graphic p...

Page 94: ...of color in any light It is based on the Digital Modul R being set in advance to reproduce a particular color as white On the LEICA DIGITAL MODUL R you can choose between nine different settings A For automatic control which provides neutral results in most situations Six fixed presets for the most frequent light sources e g for indoor pictures with prevailing incandescent lamp light e g for indoo...

Page 95: ...hange it you must press the SET but ton again to do so For manual setting by measurement 1 Turn the setting dial 1 22 to WB white balance keep the SET button 1 23 pressed and use the set ting ring 1 13 to select the M option 2 2 1h 2 Release the SET button again In the data panel the M flashes to indicate readi ness to make the setting at the same time the message Point the camera at a white surfa...

Page 96: ...ntrast One of the many advantages of electronic photography over traditional photography is that it is very easy to change critical properties of a picture i e those that determine its character While photographic software after recording and transfer to a computer provides great scope for doing this the LEICA DIGITAL MODUL R allows you to influence three of the most important image properties eve...

Page 97: ...play in the data panel changes accordingly 2 2 11 Notes This filter function should only be used if the corre sponding effects have occurred in a picture The Moiré filter function is associated with increased calculation work As a consequence the data pro cessing time is extended as is the storage time par ticularly when used in conjunction with the series exposure function see p 83 Color space de...

Page 98: ...mory slots After you select one of the memory slots the dis play changes accordingly Notes In addition to the three memory slots there is also the 0 setting which you can use to restore the facto ry default settings at any time regardless of whether you are currently using one of the memory slots or any other unsaved function settings To a great extent user 0 therefore corresponds to the Reset fun...

Page 99: ...desired option see p 85 A corresponding display 2 2 8 appears in the data panel To start the delay time tap one of the shutter release buttons camera shutter release button 1 27 28 The flashing LED on the front of the camera indicates that the delay time is running and it simultaneously counts down in the data panel Note While the self timer delay time is running it can be aborted at any time by p...

Page 100: ...to those with higher numbers Holding the button down approx 2s results in fast scrolling After the highest and lowest numbers the series of pictures begins again in an endless loop which means you can reach all pictures in either direction The picture and file numbers in the monitor change accordingly B Enlarging selecting the trimming simultaneous viewing of several reduced pictures With the LEIC...

Page 101: ...elect any position for the trimming To do this press the button several times for the direction in which you want to shift the trimming In addition to the enlargement the rectangle within the frame 2 1 2 in the lower right hand corner of the monitor symbolizes the position of the trimming displayed By turning the setting ring to the left anticlockwise starting from normal size you can simultaneous...

Page 102: ...a if you no longer require them or if you need to free up more space on the memory card The LEICA DIGITAL MODUL R therefore offers you the option of deleting individual or all pictures as required Notes Deleting is possible regardless of whether a picture is currently displayed at normal size or several reduced pictures are displayed For protected pictures the protection must first be cancelled be...

Page 103: ...urrent picture All pictures Delete Current picture Delete Displays after deleting Deleting individual pictures After deleting the preceding picture appears If there are no more pictures saved on the card the following message appears Deleting all pictures on the memory card After deleting the following message appears However if one or more pictures were protected the picture or the first of the p...

Page 104: ...splay 1 11 Notes The setting process can be cancelled at any time by pressing the PROTECT button again The following controls and their functions are not available during the entire setting process the MENU 1 12 DELETE 1 9 and INFO 1 6 buttons Subsequent operations are controlled by the menu i e in principle in exactly the same way as described in the Setting operations Menu functions sections on ...

Page 105: ...achment or use it for part of a web site A maximum of 3 reduction levels are available which are linked to two fixed compression rates see also p 89 2896 x 1920 Large JPEG fine 1920 x 1280 Medium JPEG fine and 1280 x 848 Small JPEG basic Note The resolution can only be reduced if at least one lower level than the original resolution is available Setting the function In the menu see p 70 86 select ...

Page 106: ...t switch off the Digital Modul R while the mem ory is being formatted If the memory card has been formatted in a different device e g a computer you should format it again in the Digital Modul R If the memory card cannot be formatted you should ask your dealer or Leica for advice Even protected pictures see previous section are deleted when formatting the memory card Procedure In the menu see p 70...

Page 107: ...e cable supplied H and if necessary the adapter supplied I 3 When connecting the Digital Modul R for the first time have the Windows 98 SE installation CD ready as it may be necessary to copy a driver onto the computer s hard drive If the driver for data transfer is already installed on the hard drive continue the data transfer as described under point 5 if not follow point 4 4 Insert the Windows ...

Page 108: ...he FireWire adapter supplied I While data is being transferred from the Digital Modul R to the computer the connection may not under any circumstances be broken by removing the FireWire cable as otherwise the computer and or the Digital Modul R can crash and the memory card may even be irreparably damaged While data is being transferred from the Digital Modul R to the computer the Digital Modul R ...

Page 109: ...heless be careful not to confuse them and do not use force otherwise this could lead to a false polarity and damage to the equipment 4 Start FlexColor 5 A successful connection between the computer and the Digital Modul R is indicated by the appear ance of the corresponding symbol in the monitor 1 11 and the message CAMERA ONLINE in the FlexColor footer 6 You can take a picture with your LEICA R9 ...

Page 110: ...dardized DNG format for example the Adobe Photoshop Elements 3 soft ware supplied or Adobe Photoshop CS with the Camera RAW plugin from version 2 3 or FlexColor available for download from the Leica homepage www leica camera com digitalekameras digitalmodul downloads index e html During editing you have the option of adjusting param eters such as white balance tone values gradation sharpness etc t...

Page 111: ...ul R for a long time Ensure that no sand or dust can penetrate into the Digital Modul R e g on the beach Sand and dust can damage the camera and the memory card Take particular care when inserting and removing the card Ensure that no water can penetrate into the Digital Modul R e g in snow and rain or on the beach Moisture can cause malfunctions and even perma nent damage to the camera the Digital...

Page 112: ...d check the housing and the contacts immediately for any damage Using a dam aged battery can damage the Digital Modul R Batteries have only a limited service life Take damaged batteries to a collection point to ensure correct recycling Never throw batteries into a fire as this can cause them to explode For the charger If the charger is used in the vicinity of radio receivers it can interfere with ...

Page 113: ...t In case of doubt please turn to the Leica Information Service address see p 114 Attention Do not attempt to blow dust particles off the sensor cover glass using your mouth even tiny droplets of saliva can cause marks that are difficult to remove Compressed air cleaners with high gas pressure may not be used as they can also cause damage Take care to avoid touching the sensor surface with any har...

Page 114: ...ued with a delay It was not possible to access the memory card Remove it and re insert it see p 80 The memory card may be damaged NO VALID IMAGE TO PLAY No pictures are saved on the inserted card In order for review to take place pictures first of all need to be taken or another card with saved pictures inserted see p 80 Data transfer The image data is being transferred to the SD card During this ...

Page 115: ... exposure lever in its home position the rewind release button is visible see also p 76 4 The monitor is too dark or too bright 4 1 Set the desired brightness 5 The picture I have just taken is not shown in the monitor 5 1 Is the Auto Review function activated when the Digital Modul R is set to recording mode 6 I cannot display the picture 6 1 Is a memory card inserted 6 2 The memory card does not...

Page 116: ...ontrol 86 Menu items 70 Menu language 87 Monitor 70 84 Parts designation 66 Photographing 81 Precautions 107 Protecting pictures Clearing delete protection 100 Quick guide 71 Record and review modes 81 Resetting all custom menu settings 94 Resolution Reducing after recording 101 Setting 89 Review mode 96 Enlarging 97 Four nine single pictures simultaneously 97 Selecting the trimming 97 Single pict...

Page 117: ...y mode reactivation by tapping one of shutter releases or switching Digital Modul R off and back on Shutter cocking Motorized using power unit Max exposure time 16 seconds Series exposures 2 fps max 9 pictures in series Automatic exposure bracketing Optional 3 pictures with 1 2 or 1 EV graduations Compatibility Mac OS X Windows 98 ME 2000 XP Software Adobe Photoshop Elements 3 Mac Win Self timer D...

Page 118: ...Barnack Str 11 D 35606 Solms Phone 49 0 6442 208 421 Fax 49 0 6442 208 425 e mail la leica camera com Leica on the Internet Current information about products news events and the Leica company is available on our homepage on the Internet at http www leica camera com Leica info service The Leica Informations Service can provide you with an answer to any technical questions relating to the Leica ran...

Page 119: ...my point of view Leica Camera AG Oskar Barnack Str 11 D 35606 Solms www leica camera com info leica camera com Telefon 49 0 64 42 208 0 Telefax 49 0 64 42 208 333 93093 XI 05 FLW B ...

Reviews: