88 / Detailed guide /
Presets
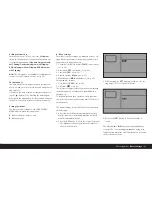
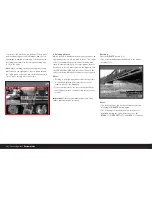
5. To change the way in which the figures are dis-
played, select
Sequence
in the submenu.
• The 3 possible sequences
Day
/
Month
/
Year
,
Month
/
Day
/
Year
, and
Year
/
Month
/
Day
appear.
6. The preferred option is set and confirmed as
described in points 3 and 4.
Note:
Even if no battery is inserted or the battery is flat
and the mains unit is not connected, the date and time
setting is retained for around 10 days by a built-in
buffer battery. However, the date and time must then
be set attain as described above.
Time
The time can either be shown in 24- or 12-hour format.
Setting
Both the two groups of figures and the display format
are set under the
Time
menu item (3.17) using the
Setting
and
Format
sub-items, essentially as described
for
Date
on p. 87.
Automatic switch off
This function automatically switches off the Digital-
Modul-R after a specified period of time. You can
choose whether you wish to activate this function and,
if so, how long you want the set time to be. In this way,
you can tailor this function to your own personal work-
ing methods and also significantly extend the life of
your battery charge.
Setting the function
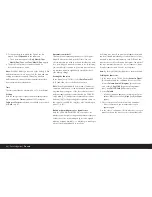
In the menu (see p. 70/86), select
Auto Power Off
(3.13) and then choose the desired function.
Note:
If the Digital-Modul-R is switched off while the
camera is switched on, it can be switched back on at
any time by pressing one of the three shutter release
buttons (camera shutter release button [on LEICA R9
only]/main [1.27] and portrait format shutter release
buttons [1.28]) or by pressing the stop-down slider on
the camera [on LEICA R9 only] (see also “Switching on
and off”, p. 81).
Button acknowledgement or signal tones
With the LEICA DIGITAL-MODUL-R, you can decide
whether you want your settings and particular sequences
of functions to be acknowledged by acoustic signals –
with two volumes available – or whether you want oper-
ation of the Digital-Modul-R to be silent.
A clicking tone is used as an acknowledgement, which
can be activated individually to confirm presses of but-
tons and to indicate a full memory card. Different dou-
ble tones are used for the audio histogram: The pitch of
the tone remains the same for correct exposure, drops
for underexposure and rises for overexposure.
Note:
By factory default, the signal tones are deactivated.
Setting the functions
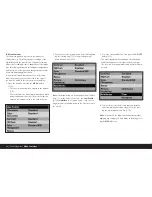
1. In the menu (see p. 70/86), select
Acoustic Signal
(3.14) and open up the submenu. It consists of the
4 items
Volume
,
Audio Histogram
(acoustic expo-
sure control),
Key Click
(key acknowledgement
tone), and
Full SD Card
(full memory card).
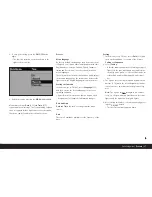
2. Select
Volume
,
• A further submenu appears containing the 3 alter-
natives
Off
(no tones at all),
High
(loud) and
Low
(quiet).
3. Choose the desired function from this submenu.
• After confirmation, the initial monitor screen
appears again.
4. In the other 3 submenus, choose whether or not you
want to activate the tones for the relevant functions.

