background image

50

Shade

Shade patterns on the staff normally do not affect 
the measured results. Extremely dark shade can 
have the same effects as  an interfering cover has 
on the field-of-view. 

Focus

A slightly unfocussed image does not influence the 
measuring time and the accuracy. When large focus 
errors occur, measurement is stopped.  

Measuring through window panes

Avoid measuring through window panes.

Precision Mode for line levelling

The Precision Mode is meant as a helpful tool to 
increase measuring accuracy. The Precision Mode 
should be activated for line levelling jobs that 
require high accuracy.Further details are on 
page 15.

Important instrument settings

Before starting any measurement, use the list to 
check how the measurement is to proceed and 
what corrections have to be made. Set or change 
the relevant instrument parameters.

Current line-of-sight error ok?

Earth curvature correction on or off?

Which measurement mode to use?

The collimation error entered into the instrument is 
automatically applied as a correction to every rea-
ding of the staff. 

There are two ways of determining the line-of-sight 
error:

1

Using the integrated field level test procedure or 
the laboratory test with the collimator 
(DNA03 only). See Check & Adjust, resp. check 
with collimator.

2

Determine the values  through your own 
measurements and procedures and enter them 
manually ([MENU]/ All settings/ System). 

The earth curvature correction can be switched on 
or off. [MENU]/ Quick settings.

Summary of Contents for DNA 10

Page 1: ...Leica DNA03 DNA10 User Manual Version 2 0 English ...

Page 2: ...rademarks Windows and Windows CE are a registered trademark of Microsoft Corporation CompactFlash and CF are trademarks of SanDisk Corporation All other trademarks are the property of their respec tive owners Product ID The type and the serial no of your instrument are written on the label located on the underside of the instrument Enter the type and serial number in your manual and always refer t...

Page 3: ... use or inappropriate applica tion that lead to personal injuries or even death CAUTION Hazards of use or inappropriate applica tion that lead to minor personal injuries but appreciatble material financial or enviromental damage Useful information for the operator to use the instrument properly and efficiently ...

Page 4: ...ower supply 25 Measurement preparations 26 Levelling up 27 Focussing the telescope 29 Centering 30 Measuring 31 General notices 31 Height reading 31 Distance measurement 32 Angle measurement 33 Operating the instrument 34 Keyboard and display 35 Fixed keys 36 Key combinations 36 Navigation keys 37 Entry keys 38 Display keys 39 Navigating the menus 41 Illumination menu 41 User input 42 Entering num...

Page 5: ...oints 62 Set out 64 Functions FNC 67 Test measurement 68 View measurement 68 Code 69 Point ID and increment 70 Manual entry of measured values 70 Start programs 72 Set job 73 Set line 74 Set tolerances 76 Select method 78 Check list 78 Start programs error messages 79 Measurement programs 80 Introduction 80 Line levelling 81 Typical measurement display of Line points B F 82 Last measurement backsi...

Page 6: ... list 119 Delete memory 120 Memory information 121 Data export 122 Data import 124 Data storage 126 Start programs 126 Measurement program 127 Measurement mode and corrective parameter 128 Coding 129 Fix points coordinates 129 RS232 interface 130 Safety Directions 131 Intended use of instrument 131 Adverse uses 132 Limits of use 132 Responsibilities 133 Hazards of use 134 Electromagnetic Compatibi...

Page 7: ...7 Check and adjust 145 Stand 145 Circular level 145 Reticle 146 Technical data 147 Corrections formulas 150 Accessories 151 Sensor error messages 152 Index 153 ...

Page 8: ...ptically read from a conventional metered staff and manually enterred with the keypad Leica digital levels come with a wide range of soft ware functions Single height measurements are easy to make and also just as easy is measuring all the elements in a line levelling job With the pro gram Line Adjustment measured heights can be compared directly with the height of fixed points and adjusted to the...

Page 9: ...eference signal This results in the height reading and hori zontal distance The staff must be perpendicular during measurement as for optical levelling With artificial lighting of the staff mesurements can be made in the dark The sensitivity of the sensor ran ges from the highest frequiencies of visible light down to the frequency of infra red light Validity This manual is valid for both instrumen...

Page 10: ..._01 Large display alphanumeric keyboard Bi directional horizontal drive Camcorder batteries Magnetically damped compensator Onboard programs Data storage to internal memory Data backup to PCMCIA card or to CF card with adapter ...

Page 11: ...ing sight 12 Ocular 13 Keyboard 14 Objective 15 Battery GEB111 optional 16 PCMCIA or CF card with adapter optional 17 Battery GEB121 optional 18 Battery adapter GAD39 6 single cells optional 19 Light duct for circular level 20 Plug stopper for crosshair adjustment knob 21 RS232 serial interface with external power supply 22 Measuring button 23 Focussing drive 24 Endless horizontal drive bi directi...

Page 12: ...is almost horizonal A minimal instrument tilt remains this is the vertical axis tilt Compensator DNA03_06 The compensator corrects for the vertical axis tilt on the line of sight so that the instruments aim is exa ctly horizontal 1 Vertical axis 2 Plumb line 3 Line of sight 1 2 3 2 ...

Page 13: ...13 Collimation error DNA03_07 The Collimation error α is the vertical angle bet ween the actual line of sight and the ideal horizontal line It is determined by a level test α ...

Page 14: ... DF Foresight distance DInt Intermediate sight distance set out sight distance Ho Starting point height e g as height above sea level H Height of foresight point intermediate point dH Height difference between backsight and foresight intermediate sight set out sight dh Height difference between two measurements taken in sequence intermediate sight set out sights foresight HCol Instrument horizon h...

Page 15: ...ame rules for levellling and regulations within the given coun tries apply as for optical levelling Adhere to the following general rules Maintain same target distance for back and foresight Measure a fore and back run and check it by the error after the closing point Exclusively for precision levelling Limit target distance 30m Minimum ground clearance of 0 5m required to minimize refractionary i...

Page 16: ... converted to a 3m Invar staff In order to use different staff sizes the limit values can be manuallly adjusted The precision mode also monitors measuring distances critical to the staff These distances depend on the physical properties of the instrument and of the staff The measuring accuracy of height measurements within these distance ranges may also be slightly lower A warning is displayed if ...

Page 17: ...rea levelling may be very different Depending on the required accuracy a possible line of sight error or the influence of the earth s curvature may have be taken into consideration In strong sunlight and when working for long periods cover instrument and stand with an umbrella ...

Page 18: ...nate Editor Import export create edit coordinate data Codelist Manager Creates and edits code lists Software Upload Uploads system software and measuring programs Format Manager Creates and edits user defined output formats Configuration Manager Creates and edits user defined instrument settings DNA GSI Converter Converts DNA03 DNA10 data in the new GSI format into data in the old GSI format of th...

Page 19: ...er of job data from the instrument to the computer is then also done through the Data Exchange Manager As LGO LevelPak Pro read in lev files by default we recommend giving the file to be transferred to the computer a lev name The following input mask is displayed in the LGO Data Exchange Manager when transferring data to the computer As an example the format file DNAXml5 was selected We advise aga...

Page 20: ...sh SRAM or CF memory cards Data exchange with the computer is done via an internal PCMCIA drive or with the external OMNI drive offe red by Leica Geosystems Files can also be exchanged between the memory card in the instrument and the computer via the RS 232 serial interface using the Leica Survey Office software Due to possible incompatibility with internal drives data exchange with SRAM cards is...

Page 21: ...r completeness DNA03_03 Unpack 1 Instrument 2 Charger with accessories optional 3 Lemo 0 RS232 data cable optional 4 Allen key 2x 5 Battery GEB121 optional 6 Memory card 7 Lense hood optional 8 Battery GEB111 optional 9 Rain cover 10 User Manual CD ROM 1 2 3 4 5 6 7 8 9 10 ...

Page 22: ...le cell batteries 1 5 V each supply 9 Volts The voltmeter on the instrument is designed for a voltage of 6 Volts GEB111 GEB121 The battery charge is not displayed correctly when using single cells Use the single cells with the bat tery adapter as emergency power supply The advantage of the single cells is in a lower rate of discharge even over long periods Use the Leica Geosystems batteries char g...

Page 23: ...en pull the lever towards the display press battery upwards until it locks in place Removing the batteries DNA_BTTR_2 Place one of your hands below the open battery compartment to catch the battery and with the other hand pull the lever towards the display The battery will fall out into your waiting hand a ...

Page 24: ...rotect it from water and dirt Inserting the card DNA03_PCMCIA_1 Insert card with the Leica logo facing up until it locks in at the end position Check the card s eject button is flush with the card Removing the card DNA03_PCMCIA_2 Firmly press down on the card eject button the card is ejected Only use clean and dry cards Only insert or eject the card with the instrument off ...

Page 25: ...te core electroma gnetic compatibility EMV Always plug the Lemo plug with the ferrite core into the instrument Only plug in or remove the plug when the instrument is switched off Cables delivered by Leica Geosystems come standard with a ferrite core Ferrit_01 ...

Page 26: ...ighten screws 2 To guarantee a firm foothold press the tripod legs firmly into the ground 3 While pressing apply the force along the legs of the tripod DNA03_Stativ2 DNA03_Stativ3 Level the tripod plate as much as possible The remaining tilt of the tripod plate will be compensated with the foot screws on the instrument ...

Page 27: ... bolts During transport always use the cover supplied Only use the tripod for surveying Levelling up DNA03_Horiz_1 1 Place level on the tripod Tighten tripod s central fixing screw 2 Turn foot screws of tribach to their middle positions 3 Center circular level by turning the foot screws 2 1 ...

Page 28: ...NA03_Horiz_2 1 Position ocular above foot screw C 2 Turn foot screws A and B simultaneously in opposite directions until the bubble is in the center of the imaginary T NA03_Horiz_3 3 Turn foot screw C until the bubble is centered A B C ...

Page 29: ... Turn ocular until reticle is focussed and appears sharp and black NDNA03_Monok_fok_l 3 Aim telescope on staff using the coarse aiming device 4 Turn focussing knob until image of staff is sharp Moving the eye up and down behind the ocular should not show the staff and reticle be displaced against one another ...

Page 30: ...er For possible centering over a ground point 1 Attach plummet 2 Loosen central fixing screw slightly and shift instrument parallel on the tripod until the plummet is exactly over the point 3 Tighten central fixing screw ...

Page 31: ... After long transportation Keep the optics clean Dirt or condensation on the optics can limit measurements Before starting work let the instrument adjust to the ambient temperature approx 2 minutes per C of temperature difference Height reading Example of an optical rmeasurement DNA_03_Höh_ables 1 Set up instrument level it and focus the reticle 2 Set up staff verically 3 Coarsly aim at staff d H ...

Page 32: ...mple shown H 2 586 m Perform electronic measurement according to steps 1 6 and trigger measurement Distance measurement Example of an optical measurement NDNADNA_Dist Mess Perform points 1 to 6 according to height readings Reading Distance line above 2 670 m Distance line below 2 502 m Difference L 0 168 m Distance d 16 8 m Result Distance d 100 x L 25 26 27 25 26 27 ...

Page 33: ... instrument is equipped with a rotatable horizon tal circle The angle unit is 360 subdivided into 1 intervals The gon division is printed in steps of 50 gon below the 360 division Angle conversion from degree to gon has to be done by the user ...

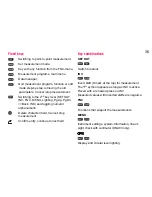
Page 34: ...instrument DNA03_03 On switch Press briefly Off switch Press for 1 second Measure button Press lightly to trigger measurement The shown displays are examples and local software versions may deviate from the base version ...

Page 35: ...5 Circular level 6 Fixed keys left row of keys Keys with fixed functions 7 Fixed keys 2nd level Function is triggered with SHIFT plus fixed key 8 Entry keys To enter number letters and special characters 9 Navigation keys Functions vary depending on application 10 Enter key SET 1 2 3 4 7 9 8 ENDE 5 6 10 EC T ...

Page 36: ...g PgUp PgDn Back INS and toggling numeric alphanumeric Delete character field Cancel stop measurement Confirm entry continue to next field Key combinations SET OUT Switch to setout INV Invert staff 0 mark at the top for measurement The T symbol appears as long as INV is active Revert with a renewed press on INV Measured values with inverted staffs are negative FNC Functions that support the measur...

Page 37: ... next page if display contains multiple pages Back Return to last sight e g return to backsight and repeat Navigation keys The navigation keys take on different functions depending on the mode in which they are used Focus control Cursor control Navigate through the selection Select resp confirming parameters ...

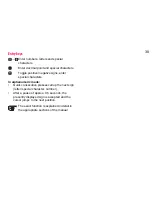
Page 38: ...ns enter special characters In alphanumeric mode Quick consecutive presses call up the next sign letter special character number After a pause of approx 0 5 seconds the presently displayed sign is accepted and the cursor jumps to the next position The exact function is explained in detail in the appropriate sections of the manual ...

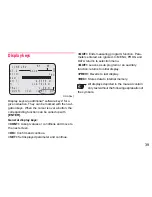
Page 39: ...irm and continue SET Set displayed parameter and continue QUIT Ends measuring program function Para meters entered are ignored In MENU PROG and DATA returns to selection menu QUIT Leaves a sub program or an auxillary function returns to initial display PREV Reverts to last display REC Stores data to internal memory All displays depicted in the manual contain only text without the following explana...

Page 40: ...ights are automatically corrected for earth s curvature Inverse staff switched on It is only possible to take measurement with the staff inverted SHIFT was pressed Numeric digits activated Alphanumeric characters activated QC QuickCode QuickCode is activated when a codelist is loaded into the instrument and when the cursor is over a button Enter the corresponding two digit Quick Code to trigger th...

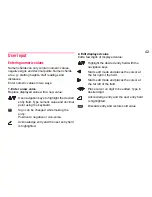
Page 41: ...h off all illumination Display illumination in economic mode The circular level remains on permanently The display switches off after a few seconds and comes back on at the press of a key Display and circular level illuminations remain on permanently Switches on the circular level illumination The illumination cannot be switched on when messages are being displayed FUNCTIONS 1 TEST MEASUREMENT 2 V...

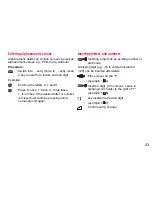
Page 42: ... point using the keyboard Sign can be changed while making the entry Positive to negative or vice versa Acknowledge entry and the next entry field is highlighted 2 Edit displayed value Edit a few digits of displayed value Highlight the desired entry field with the navigation keys Starts edit mode and places the cursor at the far right of the field Starts edit mode and places the cursor at the far ...

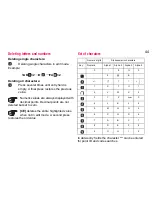
Page 43: ...ice U three times 1 four times If the desired letter or number is missed just continue pressing until it comes around again Inserting letters and numbers Inserting a digit into an existing number in edit mode A missing digit e g 15 is entered instead of 125 can be inserted afterwards Place cursor on the 1 example 5 Inserts a digit 0 in numeric space in alphanumeric fields to the right of 1 example...

Page 44: ...displayed with decimal points Decimal points are not deleted but set to zero CE deletes the entire highlighted value when not in edit mode A second press restores the old value Set of charaters In data entry fields the character can be entered for point ID and code searches C B Numeric digits Alphanumeric characters Key Numeric Alpha 1 Alpha 2 Alpha 3 Alpha 4 0 0 1 S T U 1 2 V W X 2 3 Y Z Space 3 ...

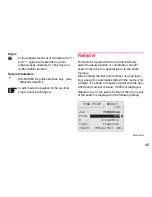
Page 45: ...ind internally stored measured points or coordinates A point search may refer to a special job or to the entire memory After entering the first point number of a line level ling a search is automatic started in the memory for a height If no fixed or measured point with the spe cified point number is found 0 000m is displayed Should one or more points be found then the result of the search is displ...

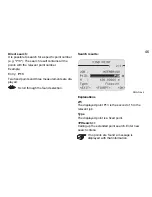
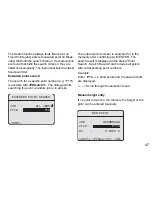
Page 46: ... fixed points and three measurements are dis played Scroll through the found selection Search results DNA Dde 5 Explanations 2 5 The displayed point P13 is the second of 5 in the relevant job Type The displayed point is a fixed point PtSearch Calling up the extended point search Enter new search criteria If no points are found a message is displayed with that information ...

Page 47: ... permits searching the point a random job or in all jobs The entered point number is searched for in the memeory after confirming it with ENTER The search result is displayed in the dislog Point Search Search Results and includes all points with corresponding point numbers Example Enter P13 2 fixed points and 2 measurements are displayed Scroll through the selection found Manual height entry If no...

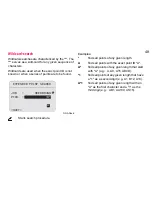
Page 48: ...s search procedure Examples finds all points of any given length A finds all points with the exact point ID A A finds all points of any given length that start with A e g A A9 A15 ABCD 1 finds all points of any given length that have a 1 as a second digit e g A1 B12 A1C A 1 finds all points of any given length with an A as the first character and a 1 as the third digit e g AB1 AA100 AS15 EXTENDED ...

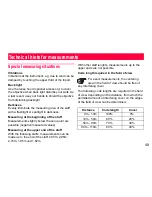
Page 49: ...nts slightly below the zero point are possible negative measured values Measuring at the upper end of the staff With the following staffs measurements can be made up to the end of the staff 4 05m 2 95m 2 70m 1 95m und 1 82m With other staff lenghts measurements up to the upper ends are not possible Code length required in the field of view For exact measurements the centering area in the field of ...

Page 50: ...mportant instrument settings Before starting any measurement use the list to check how the measurement is to proceed and what corrections have to be made Set or change the relevant instrument parameters Current line of sight error ok Earth curvature correction on or off Which measurement mode to use The collimation error entered into the instrument is automatically applied as a correction to every...

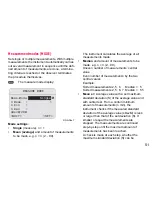
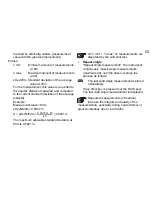
Page 51: ...number of measurements central value Even number of measurements by the two central values Example Sorted measurements 2 5 6 Median 5 Sorted measurements 2 5 6 7 Median 5 5 Mean s Average value with a set maximum standard deviation S of the average value and with outlier test From a certain minimum amount of measurements n min the instrument checks if the measured standard deviation of the average...

Page 52: ... m S sDevM 60m 0 0021m The maximum allowable standard deviation at 60m is 0 0021m At n min n max no measurements are discarded by the wild shot test Repeat single Repeat single measurement The instrument continuously makes single measurements maximum 99 until the observer stops the process as follows The last valid single measurement is stored immediately If any other key is pressed not the DATA k...

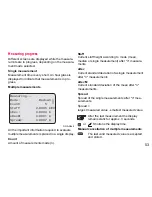
Page 53: ...nt staff height according to mode mean median or single measurement after n measure ments sDev Current standard deviation of a single measurement after n measurements sDevM Current standard deviation of the mean after n measurements Spread Spread of the single measurements after n mea surements Spread largest measured value smallest measured value After the last measurement the display remains sta...

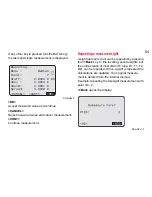
Page 54: ...d out can be repeated by pressing the Back key In line levelling several sights but the entire station at most B and F resp B1 F1 F2 B2 can be repeated When a sight is repeated the calculations are updated The original measure ment is deleted from the internal memory Example repeating the foresight measurement with point ID 2 Back opens the display DNA Dde 10 EC Measuring Mode Median Count 7 Staff...

Page 55: ...ment Swit ching the instrument on set PtID value to A1 Manually entered foresight point IDs are taken as individual numbers and are only valid for single measurements The next foresight number will automatically be a running point ID Intermediate points intermediate setout sight A special range of numbers are reserved for inter mediate and setout sights When switching on the instrument they begin ...

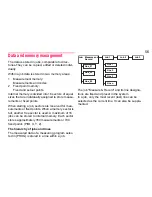
Page 56: ...ed for mea surements or fixed points When a memory sector is full another free sector is used A maximum of 16 jobs can be stored to internal memory Each sector stores approximately 350 measurements or 700 fixed points PtID X Y Z The hierarchy of jobs and lines The measured data of a measuring program selec ted in PROG is stored in a line within a job The job Measure Record and its line designa tio...

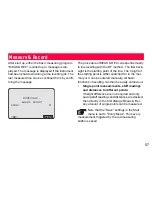
Page 57: ... the line The height of the starting point is either searched for in the mer mory or it can be entered manually All basic functions of levelling can then be easily carried out Single point measurements staff readings and distances to different points If height difference are not required and only saving staff readings and distances are desired then directly in the first dialog of Meas Rec any amou...

Page 58: ... not job was created then a DEFAULT job is automatically created In the Start dialog of Meas Rec set whether every measurement every measurement triggered with the red measuring button should be saved or only the last measurement made before pressing REC If the data back up settings in the menu is set to RS232 then the data are transferred to the imter face in GSI format and not saved internally B...

Page 59: ...he job Measure Record its height is automati cally entered After the measurement HCol Staf and Dist are displayed with their respective values The measurement can be repea ted as often as desired PtID is not incremented in the display for the same sight JOB LINE Call up the Start dialog to enter names of the job and line The job and line names can not be changed afterwards REC Save measurement and...

Page 60: ...he measurement H FS Height Foresight dH Staf and Dist are displayed with corresponding vales REC Save measurement and continue to backsight LAST Data and measured values of the last backsight are displayed END Quits the Meas Rec program As long as no new line is started the current line can always be continued MEAS REC BF PtFS 1 Rem H FS 251 0257 m dH 0 6413 m Staf 2 4966 m Dist 12 67 m END LAST R...

Page 61: ...played END Quits the Meas Rec program As long as no new line is started the current line can always be continued Switching to intermediate sight or set out sight Switching is only possible from the foresight to cal culate the intermediate and setout sights Requires a valid backsight for the station Note that this is a significant difference to line levelling programs Point to point and stakeout po...

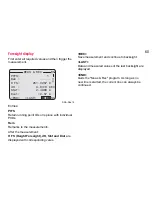
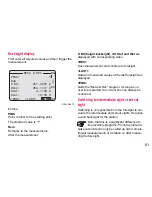
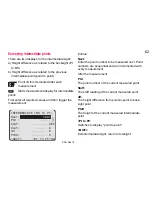
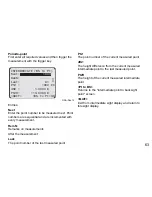
Page 62: ...asurement DNA Dde 14 Entries Next Enter the point number to be measured next Point numbers are sequential and are incremented with every measurement After the measurement Pt2 The point number of the current measured point Staff The staff reading of the current measured point dH The height difference from point to point to back sight point Pt2H The height of the current measured intermediate point ...

Page 63: ...t The point number of the last measured point Pt2 The point number of the current measured point dH2 The height difference from the current measured intermediate point to the last measured point Pt2H The height of the current measured intermediate point Pt to BS Returns to the intermediate point to backsight point screen QUIT Exit from intermediate sight display and return to foresight display INT...

Page 64: ...point is searched for in the current job as soon as the entry is confirmed with ENTER Should a suitable point number be found the dialog Find Point Result is displayed From here it is also pos sible to search in other jobs or to search with the wildcard for random point numbers Rem Remarks to the measurements SO H If any set out point heights are stored in the fixed point memory they are displayed...

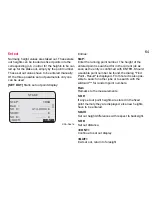
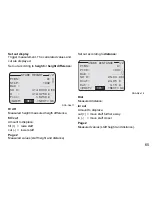
Page 65: ...er staff Page 2 Measured values staff height and distance Set out according to distance DNA Dde 18 Dist Measured distance in out Amount to displace out move staff further away in move staff closer Page 2 Measured values staff height and distance STAKE HEIGHT 1 2 PtBS A1 StkP 1002 Rem SO H 414 0000 m H 412 3750 m Fill 1 6250 m QUIT REC NEXT QC EC STAKE DISTANCE 1 2 PtBS A1 PtID 1001 Rem SO D 25 00 ...

Page 66: ...epeat measurement until the diffe rence fill cut in out meets the cut Then select one of the three functions REC Store measurements and results with the possibility of subsequent measurements NEXT Set out next point QUIT Exit from set out return to foresight ...

Page 67: ... to the call up then the function is not appropriate for the current application and is there fore blocked Each of these functions can be assigned to the USER key in MENU Quick settings Example Place the function View measurement in the USER key if you want to frequently inspect the results of measurements FUNCTIONS 1 Test Measurement 2 VIEW MEASUREMENT 3 CODE 4 PtID Incremen 5 Manual Input QUIT ...

Page 68: ...nts are always sin gle measurements disregarding the currently set measuring mode Calling up Test measurement DNA Dde 20 View measurement This function displays the result of the last measure ment made again Calling up the View measurement display Example for the mean measuring mode DNA Dde 21 TEST MEASUREMENT Staff m Dist m QUIT EC VIEW MEASUREMENT Mode Mean s Staff 1 68859 m n 5 sDev 0 00036 m s...

Page 69: ...utomatically suggested 2 Enter a code manually Call up the Code function A check is made to see if a code list is stored in the instrument Example Code entered manually no code list available DNA Dde 22 Entries on page 1 Code and info 1 4 Entries on page 2 Info 5 8 REC The code is stored but not placed in the code list For more information see section Coding CODE ATTR ENTRY 1 2 Code Info1 Info2 In...

Page 70: ...staff less than 1 8 m away are not possible These measurements must be done optically and the data entered into the instrument manually The following applies Earth curvature correction is taken into consideration according to instrument settings With inverted staffs the read values are negative If distance value is missing a zero is stored Available decimal positions correspond to the decimal posi...

Page 71: ...71 Calling up the Manual input function DNA Dde 24 This function is blocked in the level test measuring program MANUAL INPUT Staff 0 00000 m Dist 0 00 m QUIT CONT ...

Page 72: ... Dde 25 4 Start continue If the desired job and line are displayed and all tole rances are set then the measuring program can be started at any time Meas Rec Line levelling BF aBF BFFB aBFFB Level test Set job Set job Set job Set line Set line Set method Setting the Mermory Mode Set tolerances Start Start Start LINE LEVELLING 1 Job DEFAULT 2 Line LINE00002 3 Set Tolerances 4 Start CONT END ...

Page 73: ...tive NEW Enter and open a new job DNA Dde 27 Entries Job One time job name using same job names is not possible Oper Operator s name optional or the most recent entry remains active Cmt1 Cmt2 Comments on the job optional Date Time Stored in the system 1 1 SELECT JOB Job DEFAULT Oper Cmt1 Cmt2 20 06 2006 09 20 33 QUIT NEW SET NEW JOB Job Oper Cmt1 Cmt2 20 06 2006 10 00 03 QUIT BACK SET ...

Page 74: ...lling DNA Dde 28 SET Accept current line NEW Branches off to enable the entry of a new line Display New line line levelling DNA Dde 29 Entries Name One time line name no same line names possible in same job Meth Observation method BF aBF BFFB aBFFB PtID Start PtID Stf1 Stf2 Designation for staffs 1 and 2 optional ACTUAL LINE Name LINE00001 Meth BF PtID A1 HO 426 00000 m Stf1 INVAR1 Stf2 QUIT NEW S...

Page 75: ...point measured point manually input point standard value 0 000 PtSearch Extented point search including other jobs If the point is not found in the memory even with the extended search then the manual entry box opens automatically DNA Dde 31 Entries PtID Start PtID H0 Height of start PtID standard value 0 0000 FIND POINT RESULT Job HEERBRUGG PtID P13 H 412 2259 m Type Fixpoint QUIT PtSearch OK 1 3...

Page 76: ... 50cm a warning is displayed When this mode is activated the top and bottom limits of the staff are automatically converted to a 3m Invar staff In order to use different staff sizes the limit values can be manuallly adjusted The precisioin mode also monitors measuring distances critical to the staff These distances depend on the physical properties of the instrument and of the staff The measuring ...

Page 77: ...ximum difference for double obser vations Change tolerances To check or change tolerance values open the dis play as follows VALUE Branches to the entry of tolerance values DNA Dde 34 SET TOLERANCES Precise Off DistBal Off MaxDist Off StafEnds Off StatDif Off B B F F Off QUIT VALUE SET ENTER TOLERANCES TDistBal 3 00 m MaxDist 50 00 m StafHigh 2 5000 m StafLow 0 5000 m StatDiff 0 0003 m B B F F 0 0...

Page 78: ...ed before starting the measurement is a check list with important settings To change the settings call up the corresponding function DNA Dde 36 Meas Mode n Meas sDevM 20m Change values in MODE USER Key Change assigned keys in MENU Quick settings PtID Incr Change values in FNC PtID increment PtID PtID of foresight SELECT METHOD Method A x Bx Stf1 Stf2 QUIT SET CHECK LIST Meas Mode Single n Meas 6 s...

Page 79: ...n usually be derived Message Explanation Counter measure Memory is full Create space delete an existing job Job exists in memory Invalid job name Name is empty or reserved for the system Enter a different job name Line exists in the job Invalid Line Name Name is empty Enter a different line name ...

Page 80: ...ives and processes commmands sent via a serial inter face from a computer Transferring measured data via the RS232 interface by triggering a measure ment is only possible in GSI format and only from the basic measurement program Meas Rec Introduction As opposed to the simple measuring program Meas Rec the display switched automatically to the next screen in the measuring programs Line Levelling an...

Page 81: ... Start Up programm Line levelling The line levelling measuring program supports the BF aBF BFFB and aBFFB method that are select able in the Set line start program Meaning of the methods PROGRAMS 1 MEAS REC 2 LINE LEVELLING 3 LINE ADJUSTMENT 4 CHECK ADJUST Method Uneven station Even station BF BF BF aBF alternating BF BF FB BFFB BFFB BFFB aBFFB alternating BFFB BFFB FBBF ...

Page 82: ...e here B St 4 Displays the current station number starting with 1 PtID PtID of next aiming can only be edited in foresight Rem Remarks to the next measurement optional dH T Total height difference between currrent backsight and starting point H Height of the current backsight point TBal Total current distance compensation between all back and foresights BF BF EC LINE LEV ST 4 PtID 3 Rem dH T 1 017...

Page 83: ... any time as long as no new line is ope ned no data from other programs were saved in the current job and the current job was not changed CUT Complete the line at a known point Display all infor mation on the line Refer to section Line Cut LAST Last measurement with calculated values Last measurement backsight LAST Example for BF method Displaying measured values with the instruments height of col...

Page 84: ...nts are possible The displays and the procedures are analogous to Meas Rec Opens the display to record intermediate sights SETOUT Opens the display for set outs After a station change always complete the measurement of the backsight or the entire station before measuring intermediate or stake out sights The results would otherwide relate to the backsight of the previous station and would therefore...

Page 85: ...on is made Station results When using the double sight procedure BFFB aBFFB at the end after completing the 4th measu rement each the station results are displayed Example with the BFFB method The 4th measurement to an uneven station is completed DNA Dde 41 LINE LEV ST4 PtID 7 Rem dH T 1 1310 m H 282 5023 m TBal 3 40 m END STAT CL LAST QC BFFB BFFB EC ...

Page 86: ...umber B1 B2 Difference of the two backsight measurements F1 F2 Difference of the two foresight measurements Exceeding tolerances If the tolerence is exceeded during measurement with the activated tolerence check see Section Set tolerences a message is displayed showing the current parameters STATION RESULTS 1 2 Stat No 3 StatDif 0 0200 m ΣStatDif 0 0080 m dH 0 7900 m H 282 5023 m PREV STATION RESU...

Page 87: ...am line levelling there is the possibility of comparing the height of the last point of a line with a known fixed point and to calcu late the misclosure After completing the measurement of a station the CUT key is displayed It starts the calculation of the line misclosure CUT Displays the current line information DISTANCE BALANCE CHECK TBal 6 75 m Limit 3 00 m Distance Bal too big IGNORE REMEAS BF...

Page 88: ...height of the fixed point or if it is not available the measured height of the last point of the line is searched for in the memory and displayed PtSearch Search for other fixed point heights in memory REC Save the end result and return to the program Menu LINE INFO Line LINE225 Stations 3 dH T 0 5100 m DTot 96 90 m TBal 0 70 m QUIT CONT QUICK CLOSURE LstId 225 Hline 412 7359 m PtId 225 H fix 412 ...

Page 89: ...h a b and Adj Job to select a job containing level lines Line to select a level line in the current job Lines recor ded with the line leveling program can be adjusted The symbol 7 is displayed if no line to adjust is available Meth Two methods are available to adjust the level line The selected method is also used to calculate the closing tolerance by Distance Closing tolerance with L total line l...

Page 90: ... first point of the se lec ted line Any point of the line can be selected Fixpoint 2 Default for FixPoint 2 is the last point of the se lec ted line Any point of the line can be selected as long as it is different from FixPoint 1 H Defaults for H are the measured heights Enter the fixed heights here after selecting the FixPoint ID s Changing the PixPoint ID will reset H CONT to calculate the miscl...

Page 91: ...e per station Meth Method used for the adjustment in this example by Distance RUN to adjust and record all points of the selected point types DNA Dde 48 to step through all adjusted points OK to exit the line adjustment program PtID The current point ID and the point type e g Line Point are displayed The adjusted points can also be viewed in the data manager ...

Page 92: ...d the heights of all adjusted points can be read out and stored in a file on the PC card or trans ferred to the PC Data Management The original measurements are kept in the job With every adjustment a new data block with all new point heights is recorded in the current job The calculated heights can be viewed using the on board data manager to view the adjusted heights ...

Page 93: ...stner and Näbauer The line of sight error is displayed in arc seconds With the following approximation arc seconds are converted to circular measure 1 0 1mm 20m resp 2 0 001ft 100ft The sequence of the staff to be measured A1 B1 B2 A2 must be adhered to in all four procedures Station 1 A1 B1 Station 2 B2 A2 The shorter of two aimings must always be done first not valid for measurements from the ce...

Page 94: ...rmined and is called Check Adjust Should the level test result in a line of sight error 100 an error message is displayed With the A x Bx procedure make sure that for the first station B1 is not erroneously measured This can lead to a wrong large line of sight error 100 that the system does not recognize as faulty ...

Page 95: ...nter of the staffs and close to staff B inside or outside a approx 30m DNA03_Nivellierprobe_1 1 1st Position 2 2nd Position A Staff A B Staff B Conditions on the distances 1 Station The center has to be within an accuracy of 1 m 2 Station b 2 5 m A B 1 2 1 2 1 2 a b min 2 5 m ...

Page 96: ...ment positioned in the center of the staffs and on the outside of staff B at a distance b b a a approx 20 m Distance conditions as before DNA03_Nivellierprobe_2 1 1st Position 2 2nd Position A Staff A B Staff B A B 1 2 1 2 1 2 a b ...

Page 97: ...ument positioned at each third between the staffs Staff distance D approx 45 m 60 m Distance conditions 1 Station 0 2 x D Dist_A1 0 4 x D 2 Station 0 2 x D Dist_B2 0 4 x D D Dist_A1 Dist_B1 DNA03_Nivellierprobe_3 4 1 1st Position 2 2nd Position A Staff A B Staff B A B 1 2 1 3 2 3 A B 2 3 1 3 Dist_A1 Dist_B1 Dist_B2 ...

Page 98: ...98 Näbauer procedure Instrument position outside of the staffs a approx 15 m 20 m Distance condition same as above DNA03_Nivellierprobe_5 1 1st Position 2 2nd Position A Staff A B Staff B A B 1 2 a a a ...

Page 99: ... measurement display DNA Dde 49 Heading Procedure is displayed and where station x is placed Station 1 Position number A1 Dist Displays the measurement A1 B1 Dist Displays the measurement B1 in this display not taken yet CONT Continue to the next Set Up and Measurement B2 and A2 proceed in the same manner Display of the final result DNA Dde 50 Coll err old Old collimation error Coll err new New co...

Page 100: ...r adjusting the reticle see section Check Adjust SET The new collimation error is stored in the system as corrective value QUIT The old collimation error remains set The Back function is blocked No sight is repeatable The measurement is repeated if a disturbance occures during a measurement ...

Page 101: ...be written in the field Desc of each measuring display Coding with the code list A code list can be created in the Leica Geo Office program with the Code List Manager and then loaded into the instrument It also contains the follo wing elements User definable attribute name given while creating the code list Designation Input Code Code value Desc Description Attr1 Attribute value 1 Attr8 Attribute ...

Page 102: ...ction Code Should no code list exist then the prompt for a manual input appears automatically see section Code Calling up CODE with an existing code lists DNA Dde 51 Procedure Find Enter a search criteria all values Code Make selection from the list of codes found Designation Input Code Code value Info1 Information value 1 Info8 Informations value 8 CODE Find Select Find Code K1 Rem CHANNAL1 QUIT ...

Page 103: ...sor can be placed on the soft key QC Press ENTER to determine if a codelist with Quick Code numbers is loaded in the insru ment or if the codelist is empty The corresponding message is then displayed for a brief period The entry of Quick Code digits in a measurement display activates QC as soon as the cursor is pla ced on a soft key of the current display After the two desired Quick Code digits ar...

Page 104: ...4 instrument requires assigning a two digit number the Quick Code nummer to the codes Codes wit hout a Quick Code number are automatically assi gned the next highest free Quick Code number 01 02 03 99 00 ...

Page 105: ...ent settings are made MENU opens the main menu DNA Dde 52 MENU over view 1 QUICK SETTINGS Contrast Earth curvature correction USER key Decimal position 2 ALL SETTINGS 1 System Beep Initial data Auto OFF Contrast USER Key Display heater Collimation error 2 Measuring Code setting Decimal position GSI format Earth curvature correction 3 Communication Baudrate Data bit Parity ...

Page 106: ...ey Battery Instrument temperatue Display heater Collimation error Software version 4 CHECK WITH COLLIMATOR Measuring program DNA03 Example MENU Quick settings DNA Dde 53 Select appropriate setting from the list SET Accept and store new settings QUIT Quit display possible setting changes are ignored ...

Page 107: ...minutes after the last keypress Standby Sleep The instrument switches into energy saving mode about 15 minutes after the last key press At the next key press it reverts to normal mode Contrast Sets contrasts in steps of 10 USER key Has a function assigned in FNC TestMeas Performs a test measurement without storing ViewMeas Displays the last measurements with standard deviation and spread for repea...

Page 108: ...on error Displays the current collimation error The value can be edited to a new collimation value if e g it was determined by other means than with the integrated level test Measuring Important settings for measuring Set code Refers to Quick code Before Stores code before making a measurement After Stores code after making a measurement Decimals Number of decimals displayed and for manual input t...

Page 109: ...anually entered staff heights Yes With correction No Without correction Communication Communication parameters of the RS232 interface for data transfer between computer and instrument Leica standard settings 19200 baud 8 data bits no parity CR LF 1 stop bit Baudrate Data transfer rates 1200 2400 4800 9600 19200 bits second Data bits 7 7 data bits are set automatically for data transfer when parity...

Page 110: ...New line and line feed CR New line Stop bit Set to 1 Unit selection Distance Meter Meter US foot US foot INT foot International foot US foot inchUS foot inch DNA03 only Temperature C Degree Centigrade F Degree Fahrenheit ...

Page 111: ...month year Time Format hh mm ss hour min sec System information Display important and useful information Free jobs Amount of free jobs maximum 16 USER key Current assignment of the USER key Battery remaining battery capacity Instr Temp Inner temperature of the instrument Display heater Settings on off Collimation error Currently set collimation error ...

Page 112: ...ontains a graticule with a reticle with the scale of the digital level and is used to make the adjustments The collimator is not listed in the scope of delivery of the measuring instru ment For more information please contact Leica Geosystem s technical services Procedure MENU Testing with the collimator DNA Dde 54 Entries Co Staff Collimator calibration value for the staff height Co Dist Collimat...

Page 113: ... are also vailable with the staff Aim at and focus on the bar code of the staff Trigger measurement with the measurement key or with the external command GET M WI32 WI330 Staff Staff height Distance Distance Coll err old Old collimation error Coll err new New collimation error SET Store new collimation error ...

Page 114: ...er CARD VIEW EDIT DATA Change create view and delete job data measurements fixed points and code lists INITIALIZE JOB Delete the entire memory single jobs or single storage areas fix points measurements MEMORY INFORMATION Information on jobs and of memory status DATA EXPORT Export measured data fix points of a job from internal memory to a card or via the interface DATA IMPORT Load fix points code...

Page 115: ... the list as search criteria File Select file from the list 1 Page Dir Directory of the card Size File size in KB Free Free memory space on the card in KB 2 Page File File name Dir Directory of the card Date Date the file was created File first line Displays the first 23 characters as identification aid FORMAT Format card DELETE Delete selected files from the card ...

Page 116: ...can be searched dis played and partially deleted First enter search cri teria of the job line and point DNA Dde 59 Procedure Job Select job from the list Line Select line from the list PtID Set criteria for point search VIEW EDIT DATA 1 MEASUREMENTS 2 IMPORT FIXPOINTS 3 JOBS 4 CODELIST QUIT ...

Page 117: ...rough the data Class Displays block type measurement and measuring program line levelling DEL Deletes record necessary records for line calcula tion can not be deleted SEARCH Returns to data search display ready for the entry of new search criteria More information on the structure of data block is in section Data storage VIEW 1 3 4 Class Meas Meas Rec PtID A1 Rem Back 1 6500 m Dist 16 30 m Type m...

Page 118: ...ter search criteria for the PtID all Display PtID Lists the found points E N H Point coordinates With height points only enter the height DEL Delete single points NEW Enter new point PtID and height with or without position coordinates Jobs Contents Displays jobs with relevant supplemantary information DEL Delete single jobs NEW Create new job ...

Page 119: ...n 1 8 on a code extend over two pages DNA Dde 62 Procedure Find Enter search criteria Code Select code from the list DEL Delete selected code NEW Enter a new code DNA Dde 63 After entering the desired value SAVE Code is stored in code list PREV Return to code search without storing VIEW CODELIST 1 2 Find Code Rem QCNo QUIT DEL NEW INPUT CODELIST 1 2 Code Rem QCNo Info1 Info2 QUIT PREV SAVE ...

Page 120: ...DNA Dde 64 Procedure Job Select relevant job Data Select data area fix point measurements fix points measurements DEL Deletes selected data area DEL ALL Deletes entire memory After confirming the ques tion whether to delete all records are deleted DELETE DATA JOBS Job DEFAULT Data Measurements QUIT ALLMEM DEL ...

Page 121: ...t job Lines Amount of stored lines in the job MeasRecds Amount of stored data blocks in the job measure ments codes etc FixPoints Amount of strored fix points in the job Free Jobs Displays the amount of free jobs available if only measurements were stored Jobs containing mea surements and fix points display twice the amount of space for free jobs than is actually available ...

Page 122: ...SI 16 The description is on the CD ROM as a PDF file in the directory GSI_Online To collect data in your own format the instrument can load four additional user formats Create and load the user formats with the Leica Survey Office program Target directory on card GSI Formats GSI User Formats DATA DNA Dde 66 Target Select memory target card or serial interface Job Select job Data Select data type m...

Page 123: ...ata export If the device receiving the data is too slow data loss may occur as transfer is done without protocol Further information on data flow can be found in the section Computer software package Leica Geo Office LGO ...

Page 124: ...points and code lists must be in GSI format DNA Dde 67 Type Select data type fix points or code list Find Select data extension GSI or all File Select file Dir Card directory Data Data file was created OK Confirm and continue Data are searched and viewed in all directories of the card For fix points a job has to be selected as the target DNA Dde 68 Job Select target job ...

Page 125: ...125 File Displays the file for checking IMPORT Start data import NEWJOB Create new job ...

Page 126: ... the line definition in the start program Set line is done The data blocks of the measurements are displayed in the data manager in the sequence they were measured and stored The following list shows the data blocks in the sequence of their creation with the most important variables as displayed in the data manager Start programs Job Job Job name Oper Operator name Cmt1 Comment 1 Cmt2 Comment 2 Da...

Page 127: ...urement PtID Point number Rem Remarks Back Staff height Back B1 B2 Fore F1 F2 Intm SOut Meas Dist Horizontal distance Type Measurement manual input dH Height difference refering to backsight dH_seq Height difference of two successive measured points H Height Date Date Time Time n Number of measurements made sDev Standard deviation single measurement sDevM Standard deviation mean Spread Spread max ...

Page 128: ... Difference double sighting foresight Set out results Diff dH H D Set out result Measurement mode and corrective parameter These data blocks are stored at the beginning of a new line even when a setting is changed during a measurement Measurement mode Mode Measurement mode n Preset amount of measurements 2 99 for mean and median modes n min Minimum preset amount of measuremenrs for Mean s mode n m...

Page 129: ...ribute name 1 Attr8 Attribute name 8 Instead of attr1 attr8 a user defined attribute name can be used Coding without code list Code Code name Info1 Information 1 Info8 Information 8 Fix points coordinates PtID Point number E Coordinate Eastings N Coordinate Northings H Height ...

Page 130: ...ing via serial interface RS232 is only possi ble in the basic measuring program Meas Rec and only in the GSI format Set data output to RS232 MENU All settings System and select GSI 8 or GSI 16 format MENU All settings Measuring ...

Page 131: ...operational hazards The person responsible for the instrument must ensure that all users understand these direc tions and adhere to them Intended use of instrument Permitted uses Electronic and optical height and distance measurements to a staff Angle measurement with the horizontal circle Recording of measurement data Calculations using measuring programs ...

Page 132: ...or express approval of Leica Geosystems Aiming directly into the sun Inadequate safeguards at the surveying site e g when measuring on roads etc WARNING Adverse use can lead to injury malfunction and material damage It is the task of the person responsible for the pro duct to inform the user about hazards and how to counteract them The product is not to be operated until the user has been instruct...

Page 133: ...tiveness of those safety concepts in combination with the Leica Geosystems product Person in charge of the product The person in charge of the product has the follo wing duties To understand the safety instructions on the product and the instructions in the user manual To be familiar with local regulations relating to safety and accident prevention To inform Leica Geosystems immediately if the pro...

Page 134: ...s Precautions Only use chargers recommended by Leica Geosy stems to charge the batteries CAUTION Watch out for erroneous measurement results if the product has been dropped or has been misused modified stored for long periods or trans ported Precautions Periodically carry out test measurements and per form the field adjustments indicated in the User Manual particularly after the instrument has bee...

Page 135: ... CAUTION Be careful when pointing the product towards the sun because the telescope functions as a mag nifying glass and can injure your eyes and or cause damage inside the product Precautions Do not point the product directly at the sun WARNING Inadequate securing of the surveying site can lead to dangerous situations for example in traffic on building sites and at industrial installations Precau...

Page 136: ...use indoors are used in the field there is a danger of electric shock Precautions Adhere to the instructions given by the computer manufacturer with regard to field use in conjunction with Leica Geosystems instruments CAUTION During the transport shipping or disposal of batteries it is possible for inappropriate mechanical influences to constitute a fire hazard Precautions Before shipping the prod...

Page 137: ...hold waste Dispose of the product appropriately in accordance with the national regulations in force in your country Always prevent access to the product by unauthorized personnel Product specific treatment and waste management information can be downloaded from the Leica Geo systems home page at http www leica geosys tems com treatment or received from your Leica Geosystems dealer CAUTION Only Le...

Page 138: ...mpatibility pro vided by the manufacturer CAUTION Disturbances caused by electromagnetic radiation can result in erroneous measurements Although the product meets the strict regulations and standards which are in force in this respect Leica Geosystems cannot completely exclude the possibility that the product may be disturbed by very intense electromagnetic radiation for example near radio transmi...

Page 139: ...terference will not occur in a particular installation If this equipment does cause harmful interference to radio or television reception which can be determi ned by turning the equipment off and on the user is encouraged to try to correct the interference by one or more of the following measures Reorient or relocate the receiving antenna Increase the separation between the equipment and receiver ...

Page 140: ...ing two conditions 1 This device may not cause harmful interference and 2 this device must accept any interference received including interference that may cause undesired operation Type DNA 03 Art No 723289 S No Power 12 6V 0 1Amax Leica Geosystems AG CH 9435 Heerbrugg Manufactured 2002 Made in Switzerland ...

Page 141: ...se and shipping container Check the field adjustment parameters specified in this manual after long storage or transport periods In the field Im Feld_1 Always make sure that the instrument is transported in its transport case ImFeld_2 or that the tripod is carried on your shoulders with the instrument held upright ...

Page 142: ... the instrument Always transport the instrument secured in the casing Shipping PerFracht For shippping by train plane or ship always use the Leica Geosystems original packaging transport case and shipping container or other sui table packaging The packaging protects the instru ment from shock and vibrations ...

Page 143: ...e 40 C to 70 C 40 F to 158 F Koffer_gedreht If the instrument gets wet remove it from the case clean and dry it Do the same with the conainer foam insert and accessories at most at 40 C 104 F Only place the instrument back into the case after everything has dried Keep the transport case closed as often as possi ble F C ...

Page 144: ... and if necessary dampened with a small amount of suds Objective and Ocular Blow dust off the lense Do not touch the glass with your fingers Use only a clean soft and lint free cloth for cleaning If necessary moisten the cloth with water or pure alcohol Cables and plugs Protect plug from humidity and dirt Blow out dirty plugs of connecting cables ...

Page 145: ...ew 2 if one is used 2 Tighten the joint on the stand head 1 just enough so that with the legs extended the stand can be lifted off the ground and the legs remain in the same position Circular level Dosenlibelle_1 1 Level instrument 2 Turn instrument by 180 3 Center bubble if it extends beyond the centering circle 1 2 1 2 3 ...

Page 146: ... level bubble is centered at any random telescope pointing Marked screw may not be used to adjust the bubble Reticle Fadenkreuz If the collimation error exceeds 3mm per 30m the collimation needs to be adjusted 1 Turn Allen key until design value is reached 2 Check collimation See Check Adjust on page 93 2 ...

Page 147: ...m 60m Staff lengths 2 7m 1 8m 100m Staff lengths 1 82m 2m 1 8m 60m Measuring time single measure typically 3 sec Telescope Magnification 24x Free objective diameter 36mm Opening angle 2 Field of view 3 5m at 100m Min target distance 0 6m Multiplication constant 100 Addition constant 0 Level sensitivity Circular level 8 2mm Compensator Magnet damped pendulum compensator with elec tronic range contr...

Page 148: ... or about 1650 stations BF Serial interface RS232 from Measure Record in GSI 8 16 format Data backup PCMCIA card flash SRAM up to 32MB capacity Temperature range Storage 40 C 70 C Operation 20 C 50 C Environmental conditions Water and dust proof IP53 acc IEC60529 Humidity up to 95 humidity no condensation Magnetic field sensitivity Line of sight difference in horizontal constant magnetic field at ...

Page 149: ...149 Powered via serial interface Voltage range using an external cable 11 5V 14V DC Current consumption at 12V maximum 500mA Instrument on and without lighting typically 70mA ...

Page 150: ...t1 and Int2 B Int1 Int2 F dh1 B Int1 dh2 Int1 Int2 dh3 Int2 F Earth curvature correction E x2 2R x measured distance R 6 378 000m earth radius Line of sight error α arctan A1 B1 B2 A2 d1 d2 d3 d4 A1 B1 B2 A2 staff height d1 d2 d3 d4 distances of the respective staff heights Distance balances D Bal Σ DB Σ DF DB back sight distance DF fore sight distance Total distance D Tot Σ DB Σ DF Station distan...

Page 151: ...od Staffs ground plate of staff struts Power supply batteries charger Recording PCMCIA card Computer cable serial interface Computer software Leica Geo Office LevelPak Pro Documentation User Manual Field Manual GSI Online ...

Page 152: ...mage too bright Darken staff or reduce lighting to staff No staff or staff covered or insuff code length Check targeting Distance out of measuring range Move staff or instrument closer together Staff inverted or wrong INV setting Check staff position and INV setting Bad focussing Check focus Compensator out of range Level instrument ...

Page 153: ...28 30 Change tolerances 77 Check and adjust 145 Check list 78 Check with collimator 106 112 Circular level 28 145 Code 69 Code list 101 119 Coding 101 129 Collimation error 112 Communication 109 Computer software package 18 Contrast 107 Corrections 150 Corrective parameter 128 D Darkness 49 Data and memory management 56 Data bits 109 Data export 122 Data flow 19 Data import 124 Data manager 114 Da...

Page 154: ...Error messages 79 Exceeding tolerances 86 EXPORT 123 External power supply 25 F Ferrite core 25 Fix point 118 Fix points 129 Fixed keys 35 36 FNC 67 Focus 35 50 Focussing knob 29 Focussing the telescope 29 Formulas 150 Förstner 97 G GSI format 109 H Hazards of use 134 Height reading 31 I Illumination 41 IMPORT 125 Increment 70 Instrument settings 50 Intermediate points 55 Intermediate sight 61 Int...

Page 155: ...0 Measurement blocks 121 Measurement mode 128 Measurement preparations 26 Measurement program 127 Measurements only 81 Measuring Record 57 Measuring at the beginning of the staff 49 Measuring at the upper end of the staff 49 Measuring procedure 99 Measuring progress 53 Menu settings 105 Mesasurement programs 80 Multiple measurements 53 N Näbauer 98 Navigating the menus 41 Navigation keys 35 37 Num...

Page 156: ...s 44 Set out 64 65 Set out results 128 Set tolerances 76 Single measurement 53 Special characters 45 Start programs 72 Station results 85 Surveying intemediate points 62 Symbole 3 Symbols 3 40 System information 106 111 T Technical data 147 Temperature range 148 Temperature unit 110 Test measurement 68 Time 111 Transport 141 U Unit 106 Unit selection 110 USER key 107 111 V Vibrations 49 View edit ...

Page 157: ...157 ...

Page 158: ...ement and Quality Systems ISO standard 9001 and Environmental Management Systems ISO standard 14001 Ask your local Leica dealer for more information about our TQM program Leica Geosystems AG Heinrich Wild Strasse CH 9435 Heerbrugg Switzerland Phone 41 71 727 31 31 www leica geosystems com 726203 2 0 0en Translation from original text 726204 2 0 0de Printed in Switzerland Copyright Leica Geosystems...

Reviews: