background image

Leica IC80 HD 

Manual 

21


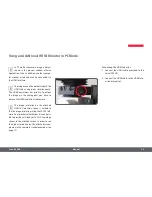
Before capturing the image, ensure
that enough memory is available on

theSDcardandthatwriteprotectionhasnot
beenactivated.IftheSDmemorycardisfullor
protected,theLEDoftheLeicaIC80HDremains
red,andyoucannotacquireanymoreimages.


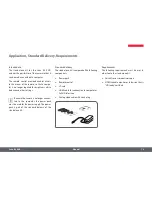
If you want to use the stand-alone kit,
thecameramustnotsimultaneouslybe

connected to a computer. If it is, you cannot
saveanyimagestotheSDcard.


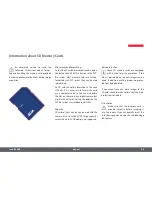
Inthehighestresolution,asingleimage
takesupapprox.1.3megabytesofstorage

spaceontheSDcard.Thismeansthatpergiga-
byteofcapacity,youcansaveover700images.

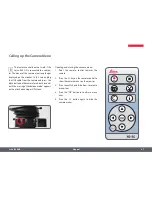
Capturing images

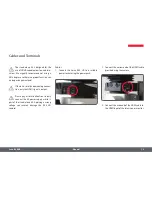
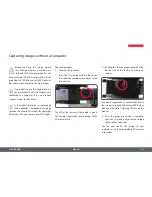
1. Focusonthespecimen.

2. InserttheSDmemorycardintothesloton

thesideofthecamerauntilyouhearitclick
intoposition.

TheLEDofthecameraisilluminatedingreen.
Thecameraisnowreadytosaveimagestothe
SDmemorycard.

3. Brieflypresstheredimagecapturebutton

on the side of the camera to acquire an
image.

You hear a signal tone as confirmation.While
theimageisacquired,thecameraLEDflashes
greenandtheword"Capturing"flashesonthe
monitor.

4. After the image acquisition is complete,

presstheSDmemorycardintothestorage
spacesothatitpopsout.

You can now transfer the images to your
computer using a corresponding SD memory
cardreader.

Capturing Images without a Computer

Summary of Contents for IC80 HD

Page 1: ...Leica IC80 HD Manual ...

Page 2: ...and Terminals 19 Information about SD Memory Cards 20 Capturing Images without a Computer 21 Adjusting the White Balance 22 Remote Control 23 Remote Control Changing the Battery 24 Analog Video Display without a Computer 25 The Camera Menu Calling up the Camera Menu 27 COLOR Automatic White Balance 28 COLOR Manual White Balance 29 EXPOSURE 30 RESOLUTION 31 SETUP CAM Camera Settings 32 SETUP USER U...

Page 3: ...icals to clean colored surfaces or accessories with rubberized parts This could damage the surfaces and specimens could be contaminated by abra ded particles Ϙ Ϙ In most cases we can provide special solu tions on request Some products can be modified and we can offer other accesso ries for use in clean rooms Servicing Ϙ Ϙ Repairs may only be carried out by Leica Microsystems trained service techni...

Page 4: ...k requirements and the handling of the stereo microscope electrical and other accessories as well as general safety instructions You can combine individual system articles with articles from external suppliers e g cold light sources etc Please read the user manual and the safety requirements of the supplier Before installing operating or using the inst ruments read the user manuals listed above In...

Page 5: ...unctions and damage Warning of hazardous electrical voltage This symbol indicates especially impor tant information Failure to comply can cause the following Ϙ Ϙ Hazards to persons Ϙ Ϙ Instrument malfunctions and damage Danger due to hot surface This symbol warns against touching hot surfaces such as light bulbs Important information This symbol indicates additional infor mation or explanations th...

Page 6: ...o the instrument or noncompliant use shall void all rights to any warranty claims Installation location Ϙ Ϙ Refer to the Safety Concept brochure Ϙ Ϙ Electrical components must be placed at least 10 cm away from the wall and from flammable substances Ϙ Ϙ Avoid large temperature fluctuations direct sunlight and vibrations These conditions can distort measurements and microgra phic images Ϙ Ϙ In warm...

Page 7: ... third party products Ϙ Ϙ Refer to the Safety Concept brochure Disposal Ϙ Ϙ Refer to the Safety Concept brochure Legal requirements Ϙ Ϙ Refer to the Safety Concept brochure EC Declaration of Conformity Ϙ Ϙ Refer to the Safety Concept brochure Health risks Workplaces equipped with stereomicroscopes make it easier to examine extremely small structures but they also impose high demands on the eyes an...

Page 8: ...Leica IC80 HD Manual 8 Leica IC80 HD ...

Page 9: ...ready This resolution is suitable for display on televisions labeled HD ready Leica Application Suite Along with your Leica IC80 HD you also obtain the Leica Application Suite EZ software LAS Core on request It allows additional scenarios to be implemented in which the television and monitor can even be used together Thus you are ideally prepared for every situation work at the computer presentati...

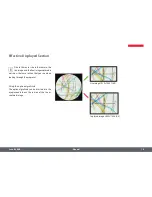
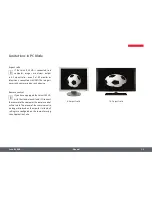
Page 10: ...ure do not show the same section that you see when looking through the eyepieces Using the optional graticule The optional graticule can be inserted into the eyepiece and shows the section of the live or captured image Effective Displayed Section Live image 1920 1080 16 9 Captured image 2048 1536 4 3 ...

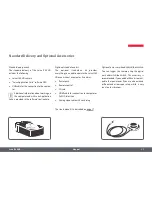
Page 11: ...vides everything you need to operate the Leica IC80 HD even without a computer It contains Ϙ Ϙ Power pack Ϙ Ϙ Remote control Ϙ Ϙ SD card Ϙ Ϙ HDMI cable for connection to computer or Full HD television Ϙ Ϙ Analog video cable with cinch plug The stand alone kit is described on page 17 Optional accessory handswitch footswitch You can trigger the camera using the optio nal handswitch footswitch This a...

Page 12: ...Leica IC80 HD Manual 12 Installation ...

Page 13: ...icroscope is already installed remove it according to the User Manual provided with the microscope Assembly 1 Loosen the locking screw on the optics carrier 2 Place the Leica IC80 HD on the optics carrier 3 Tighten the locking screw carefully without applying too much force 4 Install the tube on the Leica IC80 HD as described in the manual for your stereomicroscope Assembling the Camera ...

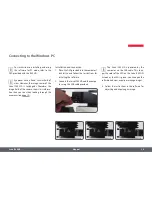
Page 14: ...ieces see page 10 Installation and connection 1 Place the DVD provided into the computer s disk drive and follow the instructions for installing the software 2 Connect the Leica IC80 HD and the compu ter using the USB cable provided The Leica IC80 HD is powered by the computer via the USB cable This chan ges the color of the LED on the Leica IC80 HD As soon as the LED is green you can open the sof...

Page 15: ...necessarily compressed on such a device Remote control If you have equipped the Leica IC80 HD with the stand alone kit and still connect the camera to the computer the remote control will not work The menus of the camera are also no longer displayed on the monitor Instead all settings are configured on the computer using Leica Application Suite Limitations in PC Mode 4 3 aspect ratio 16 9 aspect r...

Page 16: ...e HDMI cable from the camera The image resolution on the attached HDMI or television screen is limited to the live image resolution inside the LAS EZ soft ware Due to technical limitations it is not possi ble to provide a HD ready or Full HD live image stream to the attached screen In order to see the higher resolution on the attached screen please use the camera in standalone mode see page 17 Con...

Page 17: ...Leica IC80 HD Manual 17 Stand alone Kit ...

Page 18: ...mputer the power pack must be used for the power supply The power pack is part of the standard delivery of the stand alone kit Standard delivery Thestand alonekitiscomposedofthefollowing components Ϙ Ϙ Power pack Ϙ Ϙ Remote control Ϙ Ϙ SD card Ϙ Ϙ HDMI cable for connection to computer or Full HD television Ϙ Ϙ Analog video cable with cinch plug Requirements The following requirements must be met i...

Page 19: ...ly the HDMI signal is output Please pay ultimate attention to only connect the 5V power supply which is part of the stand alone kit Applying a wrong voltage can severely damage the IC80 HD camera Cables 1 Connect the Leica IC80 HD to a suitable power socket using the power pack 2 Connect the narrow end of the HDMI cable provided using the camera 3 Connect the wide end of the HDMI cable to the HDMI...

Page 20: ...nd 6 can be used with the camera Also so called SDHC high capacity cards with up to 32 GB memory are supported Be absolutely certain to read the following instructions about format ting and handling the memory card provided in order to prevent malfunctions during image acquisition Write protection Some SD memory cards are equipped with a slide for write protection If the slide is pressed down no n...

Page 21: ...apacity you can save over 700 images Capturing images 1 Focus on the specimen 2 Insert the SD memory card into the slot on the side of the camera until you hear it click into position The LED of the camera is illuminated in green The camera is now ready to save images to the SD memory card 3 Briefly press the red image capture button on the side of the camera to acquire an image You hear a signal ...

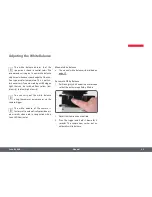
Page 22: ...t the white balance using the camera s own menu or via the camera trigger The white balance of the camera is factory set to automatically provide opti mum results when used in conjunction with a Leica LED illuminator Manual white balance Ϙ Ϙ The manual white balance is described on page 29 Automatic White Balance 1 Position a gray chart under the microscope so that the entire image field is filled...

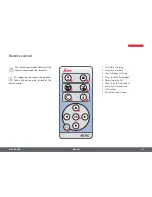
Page 23: ...a the optional footswitch can be used instead of the remote control 1 Start video recording 2 Stop video recording 3 Save still image to SD card 4 Stop continue freeze image 5 Rotate image by 180 6 Show hide information box 7 Arrow keys for navigation 8 OK confirm 9 Call up the camera menu Remote control 1 3 5 2 4 6 7 8 9 ...

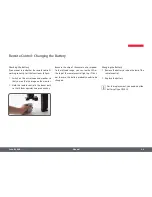
Page 24: ...in the beam path so that it faces upwards and press any key Because the chip of the camera also responds to the infrared range you can see the LED at the top of the remote control light up If this is not the case the battery probably needs to be changed Changing the Battery 1 Remove the battery insert on the rear of the remote control 2 Replace the battery For the replacement you need a button bat...

Page 25: ...IC80 HD and the other end into a suitable power socket 2 Plug the video cable into the Video port on the rear side of the Leica IC80 HD and the other end into the analog port of the device projector monitor recorder etc Changing the video standard If you see a distorted image or no image at all on your analog device you may have to change the video standard 1 To change between the PAL and NTSC vid...

Page 26: ...Leica IC80 HD Manual 26 The Camera Menu ...

Page 27: ...button on the camera for about 5 seconds until the message Standalone mode appears on the attached analog or HD screen Opening and closing the camera menu 1 Point the remote control towards the camera 2 Press the key on the remote control to show the camera menus on the monitor 3 Press the and buttons to select a menu item 4 Press the OK button to confirm a menu item 5 Press the button again to hi...

Page 28: ...mera chip to the ambient light so that color neutral images can be acquired Tip Whenever possible always use a neutral gray chart to attain optimum results Enabling automatic white balance 1 Press the button on the remote control 2 Call up the COLOR entry 3 Set the value for WB MODE to AUTO 4 Press the button to exit the menu The values for RED and BLUE cannot be adjusted if the WB MODE setting is...

Page 29: ...ired Tip Whenever possible always use a neutral gray chart to attain optimum results Adjusting the white balance manually recommended 1 Place the gray chart under the microscope so that the entire field of view is filled in 2 Press the button on the remote control 3 Call up the COLOR entry 4 Select the SET WHITE BAL menu item and press the OK button 4 If necessary correct the values for RED and BL...

Page 30: ...ote control 2 Call up the command for manual exposure see diagram at the left 3 Set the value for EXP MODE to MANUAL 4 Correct the values for EXPOSURE GAIN and GAMMA until you obtain the desired results for the image Automatic exposure 1 Press the button on the remote control 2 Call up the command for automatic exposure see diagram at the left 3 Set the value for WB MODE to AUTO 4 Correct the valu...

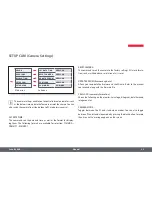
Page 31: ...280 720 or 1920 1080 16 9 aspect ratio Ϙ Ϙ For connection to a computer 640 480 1024 768 and 1440 1080 4 3 aspect ratio IMG RES resolution of the captured image Defines the resolution of the captured image if the Leica IC80 HD is not connected to a computer The following resolutions are available 640 480 1024 768 1600 1200 and 2048 1536 MOVIE RES resolution of videos Indicates the resolution of th...

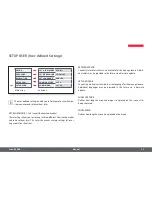
Page 32: ...format for display ing them The following formats are available for selection YYMMDD DDMMYY MMDDYY RESET CAMERA This command resets the camera to the factory settings All user informa tion such as white balance resolution etc is reset UPDATE EPROM firmware update Allows you to update the firmware via the SD card Refer to the manual you received along with the firmware file CAM LOGO camera informat...

Page 33: ... up to three different illumination modes and retrieve them later This saves the current camera settings for recur ring acquisition situations SET MENUCOLOR Currently two color schemes are available for the menu guidance Additi onal colors may be provided in the future via a firmware update SET LANGUAGE Currently only English is available as the language for the menu guidance Additional languages ...

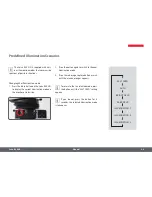
Page 34: ...e monitor or television 2 Press the button again to switch to the next illumination mode 3 Press the red image capture button or wait until the menu no longer appears To return to the last selected mode press the button until the LAST USED setting appears If you do not press the button for 5 seconds the selected illumination mode is taken over Predefined Illumination Scenarios Last used Auto Brigh...

Page 35: ...Leica IC80 HD Manual 35 Care and Maintenance ...

Page 36: ... should be cleaned using a lint free cloth lens cloth or cotton swab soaked in methanol or a commercially available glass cleaner Do not use alcohol Ϙ Ϙ Avoid excessive use of solvents The lint free cloth lens cloth or cotton swab should be soaked with solvent but not so wet that solvent runs over the lens Danger of electric shock Risk of electric shock Removing the cover of the Leica IC80 HD came...

Page 37: ...Leica IC80 HD Manual 37 Specifications ...

Page 38: ... between tube and stand via standard Leica dovetail Ϙ Ϙ Midpoint offset between top and bottom of dovetail 0 4 mm Ϙ Ϙ Light distribution optical 50 camera 50 Ϙ Ϙ No visible reflections dust or dirt on the prism Ϙ Ϙ Internal video magnification 0 5 Ϙ Ϙ Sensor centered on optical axis 0 1 mm Ϙ Ϙ Sensor aligned horizontally vertically 1 degree Electronic interfaces Ϙ Ϙ Compatibility USB 2 0 mini sock...

Page 39: ...tallation category II overvoltage category Ϙ Ϙ Pollution degree 2 Ϙ Ϙ Maximum humidity 80 for temperatures up to 31 C linear decre ase to 50 relative humidity at 40 C Other Ϙ Ϙ Power supply via USB 2 0 Ϙ Ϙ External power supply optional Ϙ Ϙ Operating temperature range 5 C 50 C humidity 10 90 Ϙ Ϙ Minimum computer configuration Ϙ Ϙ Intel Pentium 4 or DuoCore 2 GHz 1 GB RAM Ϙ Ϙ 24 bit graphics 1024 7...

Page 40: ...k Material No Sub ID Ver Doc Type Name Change No Copyright by Leica Microsystems CMS GmbH Germany 2006 Sheet Designer Intermediate Product MICROSYSTEMS TIF Date 40 133 4 34 101 2 95 80 8 mechanik2002 N i c h t f r e i g e g e b e n IC HD Tolerierung DIN 7167 1 1 ISO 2768 mH CLIM 13 02 09 TBD Z1 0000 00 1 1 SCALE 7 10 ...

Page 41: ...Remark Material No Sub ID Ver Doc Type Name Change No Copyright by Leica Microsystems CMS GmbH Germany 2006 Sheet Designer Intermediate Product MICROSYSTEMS TIF Date 40 133 4 34 101 2 95 80 8 mechanik2002 N i c h t f r e i g e g e b e n IC HD Tolerierung DIN 7167 1 1 ISO 2768 mH CLIM 13 02 09 TBD Z1 0000 00 1 1 SCALE 7 10 ...

Reviews: