165
Summarized manual for FLIM experiments
detector module.
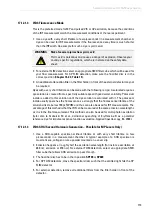
4. Check whether the fluorifier disc is in the correct position (
).
17.7
Setting Suitable Scan Parameters
Determine the correct scan template in LAS AF in the FLIM Wizard's
Setup FLIM
step. The
following settings should be made on the
Acquisition
tab:
•
monodirectional scan
(bidirectional scan is only supported for zoom >8)
• maximum
512 x 512
pixels
Using a low number of pixels (e.g.
256 x 256
) is recommended. With a low number of
pixels, more photons can be collected in the individual pixels. In this way, a better
allocation of the lifetime data is possible.
Even the summary of pixels (binning) is possible later in the analysis range in order to
calculate and analyze an image with low number of pixels. This will result in no loss of
the acquired fluorescence.
• The averaging mode (as
Average
or
Accumulation
) of LAS AF is not accessible within
the SMD-FLIM Wizard, because it is not to be used for scanning operations.
• moderate scan speed (100 to 200 Hz)
With increasing numbers of acquired individual images, the calculation time increases
for all steps of the FLIM analysis. Avoid the use of the resonant scanner for FLIM data
acquisition.
17.8
Optimizing the Photon Count Rate
1. In the FLIM Wizard in LAS AF, go to the
Setup FLIM
step.
2. Start the scanning operation in the test mode by clicking on the image acquisition button
Run FLIM Test
. Normally, the SymPhoTime software will start the data acquisition and
display automatically. You can also start the FLIM data acquisition by selecting the
Acquire LSM Measurements
button in SymPhoTime.
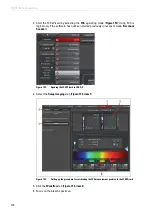
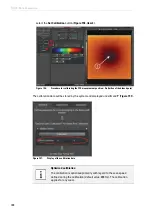
The
Measurement Preview
dialog in SymPhoTime software opens on the
Image
tab
(
right
).
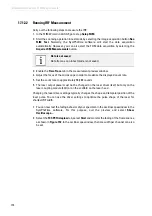
FLIM data is not saved with Run FLIM Test
The
Run FLIM Test
option is only intended for the optimization of the
instrument parameter settings. The corresponding FLIM data is not
saved.
Summary of Contents for TCS SP8 SMD
Page 1: ...10 Living up to Life User Manual Leica TCS SP8 SMD for FCS FLIM and FLCS ...
Page 4: ...4 Copyright ...
Page 14: ...14 Contents ...
Page 18: ...18 Intended Use ...
Page 20: ...20 Liability and Warranty ...
Page 28: ...28 General Safety Notes ...
Page 32: ...32 Additional Notes on Handling the System ...
Page 44: ...44 System Overview and Properties ...
Page 60: ...60 SMD Components Figure 31 DSN 102 Dual SPAD Power Supply ...
Page 80: ...80 Safety Features ...
Page 102: ...102 Switching On the System ...
Page 116: ...116 LAS AF ...
Page 214: ...214 Changing the Specimen ...
Page 216: ...216 Changing the Objective ...
Page 238: ...238 Switching Off the System ...
Page 242: ...242 Repairs and Service Work ...
Page 244: ...244 Maintenance ...
Page 246: ...246 Disassembly and Transport ...
Page 248: ...248 Disposal ...
Page 254: ...254 Contact ...
Page 256: ...256 Recommended Literature ...
Page 266: ...266 Appendix Figure 225 Declaration of conformity ...
Page 268: ...268 Appendix ...
Page 269: ......


