background image


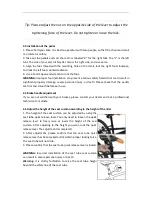
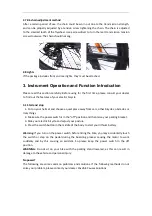
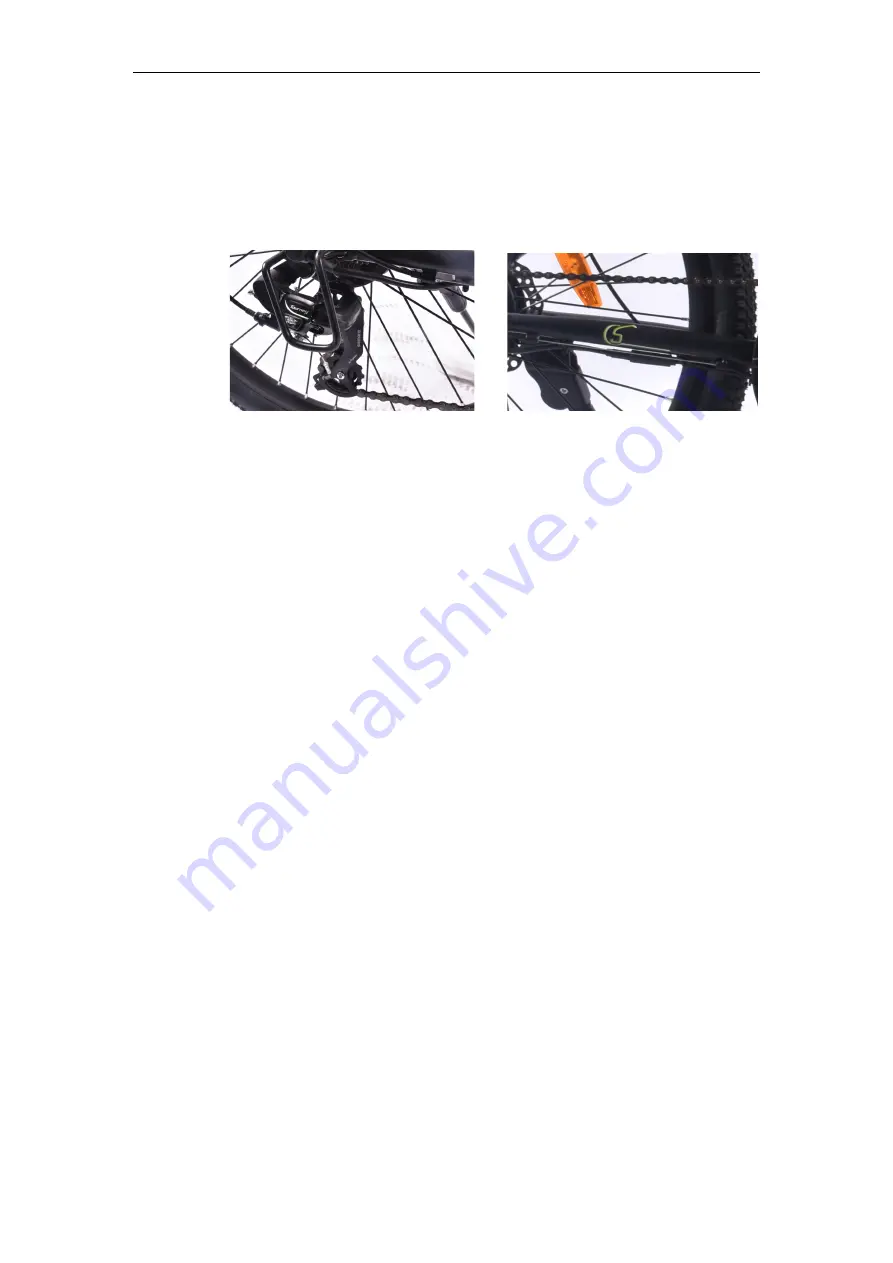
2.7 R6 chain adjustment method 


After a certain period of use, the chain could be worn out due to the transmission strength, 
and can be properly adjusted by a tension screw tightening the chain. The chain is adjusted 
to the smallest tooth of the flywheel. Use a screwdriver to turn the rear transmission tension 
screw clockwise. The chain should not sag. 


2.8 Lights


If the package includes front and rear lights, they must be attached. 


3. Instrument Operation and Function Introduction


Please read this section carefully. Before using for the first time, please consult your dealer 
to find out the features of your electric bicycle. 
 

3.1 Start and stop


   1. Put on your helmet and choose a quiet place away from cars, other bicycles, obstacles or 
risky things. 
   2. Make sure the power switch is in the “off” position and then raise your parking bracket. 
   3. Ride your electric bicycle and adjust your posture. 
   4. Press the switch button in the middle of the body to start your lithium battery. 
 

Warning:

 If you turn on the power switch before riding the bike, you may accidentally touch 

the  switch  or  step  on  the  pedal  during  the  boarding  process  causing  the  motor  to  work 
suddenly  and  by  this  causing  an  accident.  So  please  keep  the  power  switch  in  the  off 
position.


WARNING:

  Do  not  sit  on  your  bike  with  the  parking  stand  lowered,  as  this  can  result  in 

damage to the vehicle and personal injury. 
 

No power?


The following are some common problems and solutions. If the following methods do not 
solve your problem, please contact your dealer. Possible Causes Solutions


Summary of Contents for BB12062

Page 1: ...Manual SachsenRad E Racing Bike R6 Product number BB12062 BB12083 ...

Page 2: ...tery use storage and handling 10 6 Before riding the bike 12 7 Maintenance 13 8 Safety advice and technical parameters 15 Technical data 15 Appendix I Safety instructions for riding 16 Appendix II Notes on the use of bicycles 18 Appendix III Preparation before riding 19 Appendix IV Adjustment and precautions for the brake 20 Declaration of conformity 21 Disposal 21 ...

Page 3: ...on This manual contains important safety performance and service information Please confirm that you have read and understood the following warnings and precautions before using the product for the first time If you lend your e bike to another person please let the user read this manual to minimize the probability of accidents WARNING Wear a suitable and qualified helmet while riding and wear a fl...

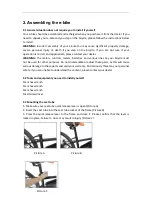
Page 4: ...together 3 Place the bike on a blanket to prevent scratching the floor 4 Remove the accessory tray and all parts from the large carton 5 Use a wire cutter to cut off the various tie wraps Please note that you can only cut those from bundling tie and strap to not accidentally damage the bike or lose accessories 6 Remove all protective paper and foam Tip The battery needs to be charged for at least ...

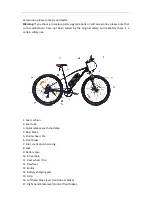
Page 5: ...safety and reliability there is a certain safety risk 1 Seat cushion 2 Seat tube 3 Quick release seat tube clamp 4 Rear brake 5 Front wheel tire 6 Front brake 7 Foot crank and chain ring 8 Fork 9 Battery case 10 Drive chain 11 Rear wheel tire 12 Flywheel 13 Motor 14 Battery charging port 15 Grip 16 Left hand brake lever control rear brake 17 Right hand brake lever control front brake ...

Page 6: ... and various lines on your bicycle must not be used for other purposes Do not disassemble or adjust these parts as this will cause serious damage to these parts and void your warranty And seriously threaten your personal safety If you are unable to understand the content please contact your dealer 2 2 Tools and equipment you need to install yourself 4mm hex wrench 5mm hex wrench 6mm hex wrench Sma...

Page 7: ...hat the pedals are firm and smooth before each use 2 5 Brake handle adjustment If you are not satisfied with your brakes please contact your dealer and ask a professional technician to mediate 2 6 Adjust the height of the seat cushion according to the height of the rider 1 The height of the seat cushion can be adjusted by using the seat tube quick release lever You only need to loosen the quick re...

Page 8: ...d choose a quiet place away from cars other bicycles obstacles or risky things 2 Make sure the power switch is in the off position and then raise your parking bracket 3 Ride your electric bicycle and adjust your posture 4 Press the switch button in the middle of the body to start your lithium battery Warning If you turn on the power switch before riding the bike you may accidentally touch the swit...

Page 9: ...lly stop working when your battery voltage is below a certain level to protect the battery and to prevent the occurrence of loss of power Warning Never use your battery excessively which will seriously damage the battery s capacity and charge When your battery is no longer working please use a dedicated charger to charge your battery It can be fully charged in about 5 6 hours under normal conditio...

Page 10: ...Charge the electricity Check tire pressure 40 50psi recommended Always look for professional technicians to maintain your electric bicycle and adjust the brakes transmissions and other components Reduce the load Don t ride too fast Maintain a steady speed 5 Battery use storage and handling 5 1 Battery use Reading and understanding the following can help you use maintain and store your battery prop...

Page 11: ...harger Check the color of the CHARGE LED on the charger If it is red the battery is charging normally 5 When the CHARGE LED on the charger changes color to green your battery has been fully charged Note Please turn off the charger when the charger s power plug is connected to the power outlet Keep the charger off before plugging it into the battery charging jack Note When you want to unplug any ch...

Page 12: ...est to contact your dealer for the best treatment 5 5 Battery removal Insert the battery box key and unlock Pull out the battery compartment Pull until the battery is completely separated from the base 6 Before riding the bike This section can help you prepare for your use When riding please always wear a safety helmet that is safe and of the right size If you want to lend to others please ensure ...

Page 13: ...Maintenance 7 1 Wheels The front and rear wheels of the vehicle should be located at the center of the fork or frame The tension of each spoke on the wheel rim should be similar and the rim should maintain a regular circle without bounce or yaw If there are missing or broken spokes this will make the rim lose smoothness Please ask your dealer or professional technician for repair and debugging The...

Page 14: ...ube should be perpendicular to the rim Damaged or excessively worn tires need to be replaced immediately Please contact your dealer or professional technician to replace your tires If your tires are accidentally punctured please contact your dealer or technician for repair or replacement WARNING Do not ride while your vehicle is leaking or under inflated Failure to do so may result in serious dama...

Page 15: ...erve as a warning It is recommended that you use your own head and tail lights to alert and illuminate the front road check the position of the reflector and keep it clean ride slowly and ensure that drivers can see you Please concentrate You should pay attention to the traffic Check your vehicle before each ride Please check your entire e bike before each ride including brakes tires rims quick re...

Page 16: ...s certificate To maximize the protection of your e bike from theft purchase a high quality U lock or chain lock Please do not put your e bike in an unattended place Please lock the main components such as the frame motor when you lock the e bike Appendix I Safety instructions for riding 1 Slow down when turning and confirm that passing vehicles are driving again 2 Try to avoid sudden braking in th...

Page 17: ... the vehicle to ensure safety C When it is snowing try to get off the bike especially if the road is frozen and the ground is too slippery Don t ride 15 Traffic rules must be observed while driving 16 If there are parked cars near you when driving slow down to avoid colliding with suddenly opened car doors 17 Regular inspection A Check the tires for damage and if the tire pressure is sufficient In...

Page 18: ... on the hands and handlebars 16 Do not place your pet in a basket to prevent the pet from suddenly jumping out of it and causing an accident 17 Do not use it for purposes other than driving such as standing on the bicycle to take high rise items etc to prevent falls and injuries 18 If the handle of the handlebar is loose it must be replaced in time Otherwise there will be an accidental risk when t...

Page 19: ...the most stressed position in the oblique front the rider s knee center line can vertically penetrate the center of the pedal which is the best state of riding the bike This is used as a reference for saddle position adjustment In addition the saddle should be adjusted to a horizontal state under normal conditions G Warning sign A safety identifier is engraved on the saddle tube The safety sign mu...

Page 20: ...The warning sign on the rim means to change the rim when the rim wears to the safety line Otherwise the rim will burst 7 The lighting system and reflector needs to be installed However the rider needs to understand the standard of use the front of the bicycle is a colorless white reflector the rear is a red reflector the pedal is amber and the rim is colorless or amber Appendix IV Adjustment and P...

Page 21: ...be replaced in time We have made every effort to ensure that the information in this manual is accurate and the product function parameters are subject to change without prior notice Declaration of Conformity The manufacturer declares that the products listed above are conform to all relevant declarations of the Machinery Directive 2006 42 EG Low Voltage Directive 2014 35 EU product safety 2001 95...

Reviews: