ProVision 3 Installation Manual
8100-35521-00
Rev. A0
Leidos Security Detection & Automation, Inc.
–
Proprietary
Page 109 of 119
© 2020 Leidos. All rights reserved
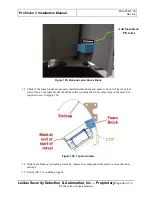
Figure 122: Monitor Mount Disassembly
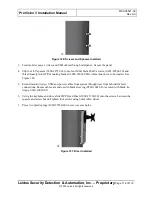
3.
Insert two provided thumb screws and snap into place as shown in Figure 123. These are for locking
monitor height.
4.
Figure 123: Install Thumb Screws
5.
Attach Monitor Mount to pole by sliding into one of four channels in the Monitor Pole. Ensure
manufacturer’s logo is readable and not upside
-down. Refer to Figure 124.
Monitor Mounting Bracket
Monitor Mount


