43
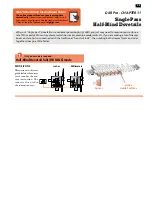
SINGLE PASS HALF-BLIND DOVETAILS
Chapter 11
D4R Pro User Guide
11-15
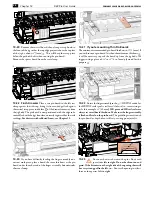
Unclamp the tail board from the front clamp and insert
the dovetail spacer as shown against the side stop
➀
. Re-set the
drawer side in the front clamp so that its top edge touches the
guide fingers and is perfectly flush with the top face of the drawer
front and the left edge is against the Spacer.
!
Board edges must be square.
1
11-16
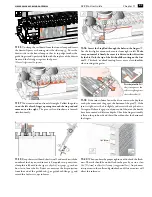
Insert the Stop Rod through the holes in the fingers
➀
.
For the first light cut move the router from right to left.
Make
sure you control it firmly, because it is driven in this direction
by the bit. Only the tip of the bit should be cutting on the first
cut
➁
. This back, or climb routing, leaves a very clean shoulder
when routing side grain.
2
1
11-17
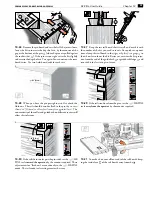
Now rout in and out from left to right. Follow the guides
in on the left of each finger opening to touch the stop rod and
come out on the right
. The pins, tails and sockets are formed
simultaneously.
11-18
If the joint is loose, lower the bit to increase the depth of
cut by the amount of the gap at the bottom of the pins
➀
. If the
joint is tight, raise the bit slightly to decrease the depth of cut.
Test again. If there is a gap at only one end of the joint, the boards
have been routed at different depths. Check the finger assembly
is flat on the pin board and the tail board touches the bottom of
the fingers.
90o
1
2
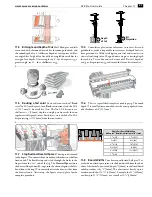
11-19
Keep the test tail board that fits well, and mark it with the
number of the bit you used to rout it. For quick set-up next time,
clamp this tail board in the jig as a depth-of-cut gauge
➀
to show
how far to lower the bit. Better yet, measure the bit projection
from the end of the guidebush
➁
or guidebush flange
➂
and
record this for fast set-ups in future.
1
3
2
11-20
When you have the proper tightness of fit, check the flush-
ness. The tails should be under flush to the pins by no more than
1
/
64
"[0,3mm] to allow for cleanup (exaggerated here). Any concen-
tricity errors in the collet and guidebush on different routers will
affect this tolerance.
1/64"[0,3mm]
Test the joint fit.
Pull
the joint apart so the
tails are tight against
the socket sides (2)
Summary of Contents for D4R Pro
Page 14: ...JIG ASSEMBLY MOUNTING AND USING THE CLAMPS 6 Chapter 1 D4R Pro User Guide ...
Page 24: ...WOOD PREPARATION 16 Chapter 6 D4R Pro User Guide ...
Page 86: ...BIT SELECTION 78 Appendix II D4R Pro User Guide ...
Page 90: ...JIG PARTS 82 Appendix III D4R Pro User Guide ...
Page 92: ...PRINTED IN CANADA Joining Tradition with Today Printed in Canada ...


