


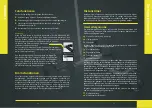

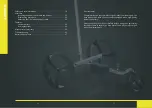

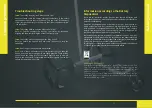


Disassembling procedure
1. Take the supplied socket wrench and press the spring button into
the frame. Turn the rod slightly so that the knob cannot spring back
and pull the linkage apart.
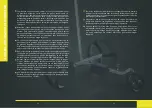
2.
Repeat the same steps you have with the rod that leads to the
front wheel. By pressing and slightly turning the linkage, the lock can
be easily released.
3. Pull the wheels off the axle by
pressing the pin on the rim.
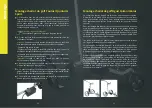
If you have ordered the trolley bag, you
can optimally stow all components in
the bag.
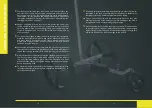
The Spirit/ Quintum
can be folded in
addition to the disassembly, easy and
fast. To do this, release the handle
height adjustment and fold down the
upper bag holder. The vertical rod can
be folded forward, the front rod can be rotated by pressing the locking
pin by 90 ° to obtain an even flatter pack size. The rear wheels should
be removed for storage in the optional trolleybag
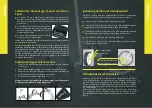
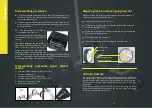
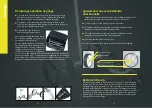
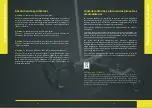
Adjusting the front wheel/going forward
With each trolley, the factory preset is straight travel. Nevertheless, it
may be necessary to readjust the barrel.
1. Loosen the cap nut one or two turns.
2.
If the device is pulling to the left, unscrew the front grub screw and
screw in the rear grub screw.
3. If the device is pulling to the right, unscrew the rear grub screw and
screw in the front grub screw.
4. Then tighten the cap nut again.
5. You may have to readjust the setting with a second pass.
Disassembling procedure Figus/ Falcon/
Ikarus
1. Loose the height adjustment from the handle
2. Turn the handle down
3. Remove the Cartbag from the trolley
4. Turn the upper frame part down to the front
5. Remove rear wheels by option
6. Remove battery by option
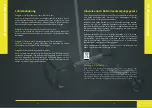
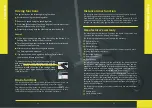
Lithium battery
First, connect the battery to the charger, then plug it into the wall outlet.
The charger has an LED. When you plug the charger into the power outlet,
the LED turns red. When the battery is fully charged, the LED turns green.
If you insert the charger without battery into the socket, the LED also
turns green.
Please always make sure that the LED turns red afer plugging in the
charger with the battery. Depending on the state of charge, recharging
the battery can take up to four hours.
Front grub screw
Rear grub screw
Grub screw
Cap nut
Structure
22
23


